Bench Plane Basics
Words and photos: Vic Tesolin
Bench planes are named such because they were the first planes to get taken out of the tool chest at the beginning of the day and lived on or under the bench all day. In modern times, bench planes are a great place to start if you didn’t begin your woodworking training with hand tools. There are many options available for these tools and sometimes names and terminology can be confusing so allow me to shed some light on these workhorses.
You may be asking yourself, why all the fuss about an antiquated form of woodworking? The truth is that hand planes definitely have a place in the modern shop. Whether it’s flattening a board too wide for the power jointer or polishing up a surface prior to applying finish, these tools can help a modern woodworker out.
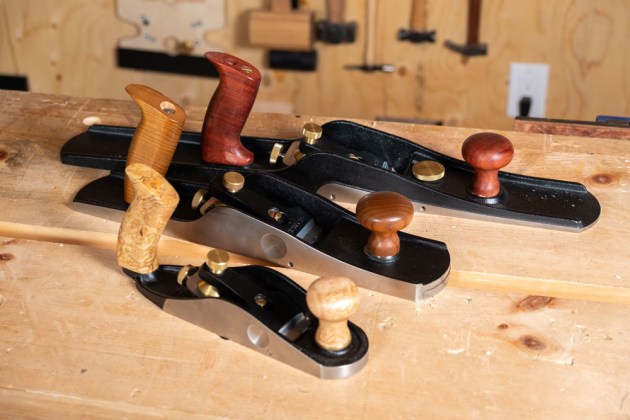
1. In order of size, jointer, jack plane and smoother These three planes will allow you to work with any sized timber. The longer the sole, the flatter the surface you will get.
It would have been common for most woodworkers to have three main bench planes: a jointer, a jack plane and a smoother (photo 1). These three planes would allow the woodworker to take a piece of timber from rough to finish ready. The secret to these tools was their sizes, when it comes to Western style bench planes, size does matter.
The longer the plane body the flatter the surface will become. The reason for this is that the longer sole of the plane will ride on the high areas, allowing the blade to only cut the high spots.
2. Making long, true edges is a task the jointer excels at.
Once the plane is cutting full length shavings across the board’s width then you know the surface is flat. With that said, it stands to reason that having a jointer plane is great for creating flat, true surfaces as well as straight edges for joining boards together to later make panels (photo 2).
In the days of the wooden plane, there was no limit to how long a jointer could be made. I’ve seen them as long as 1200mm, but these were for more specialised uses like making flooring. In modern times it’s more common to see them in the 550mm range which makes them ideal for furniture and cabinetmaking.

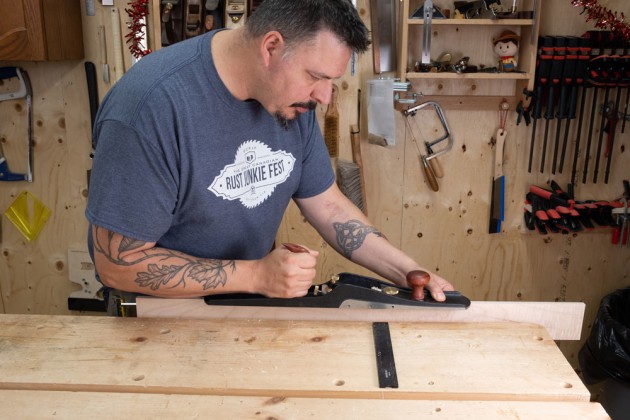
3. Working the surface at 45° to the grain helps to get things flat.
The jack plane is a hard working plane that was traditionally used for many heavy tasks that involved a lot of stock removal. Initial flattening and bringing boards to thickness – the jack was built for grunt work (photo 3).

4. You’re not looking for surface quality here, just flat.
Wispy, gossamer-like shavings are not what this plane creates. This is the plane I use when I have a few millimetres to remove and don’t want to be at it for hours. The surface from this tool is often coarse but it certainly gets things done in a hurry (photo 4).

5. The shooting board and jack are a great combination.
This jack plane is also ideal for other tasks. Used in conjunction with a shooting board and a fine setting, this tool can trim endgrain at 0.02mm per pass making it perfect for sneaking up on a precise fit (photo 5). Using the plane this way allows you to make a rough cut with a handsaw that is close to the line, then finish off with a few trimming cuts to bring the piece to length and square. Not only does this remove the stress of trying to get a fit off a saw, making handplaning the last step means you don’t have to do any surface prep to that area.
The final step to most woodworking projects is applying finish. Many woodworkers know that the key step to getting a great finish, no matter which product you use, is surface preparation. This is the main task for the final bench plane, the smoother. The smoothing plane is too short to use for flattening and it wouldn’t be my first choice for mass stock removal because of its lack of weight but nothing polishes up a board better.
Smoothers are where I really pay attention to blade bevel angles and mouth openings. I typically try to use the lowest cutting angle that I can because the lower the angle of attack the more lustrous the surface will be. That being said, no one knows better than the readers of this magazine that sometimes low angles are just not achievable. This is no problem because your options are so diverse.

6. On this HNT Gordon wooden bodied plane the blade can be easily flipped to get a higher angle of attack.
If you are running a bevel-up plane, you can simply sharpen a higher angle on the blade or even keep a few blades available with varying angles for different timbers. The other option is to do as great planemaker Terry Gordon espouses and simply flip the blade from bevel-down to bevel up to get the higher cutting angle you are looking for (photo 6).

7. Working with tools that you’ve made yourself is a joy.
Lately, I have been really enjoying my wood-bodied planes again. The wood body burnishes the surfaces you are planing which makes them really shine (photo 7).

8. A tight mouth and sharp blade can handle almost anything.
It also gives me the opportunity to make planes and try out different styles and sizes to find just what I’m looking for. As well, wooden planes allow me to dial in a wafer- thin mouth opening that is essential to reducing tear-out (photo 8).
For the uninitiated, the thought of using tools like this may seem daunting but I can assure you, a bit of practise and care will lead to great surfaces and an efficient workflow that will make your woodworking even more enjoyable.
Vic Tesolin is a furniture maker who lives in Canada and has taught workshops all over the world. Learn more at www.victesolin.com