Finishing Small Objects, Part 2

Words and photos: Carol Russell
In part 1 of this series we looked at techniques of burnishing surfaces and using a mix of shellac, wax and pigments to create finishes with depth. In this article we’ll look at creating charred and painted surfaces and how these can be further treated for different effects.
Shou sugi ban
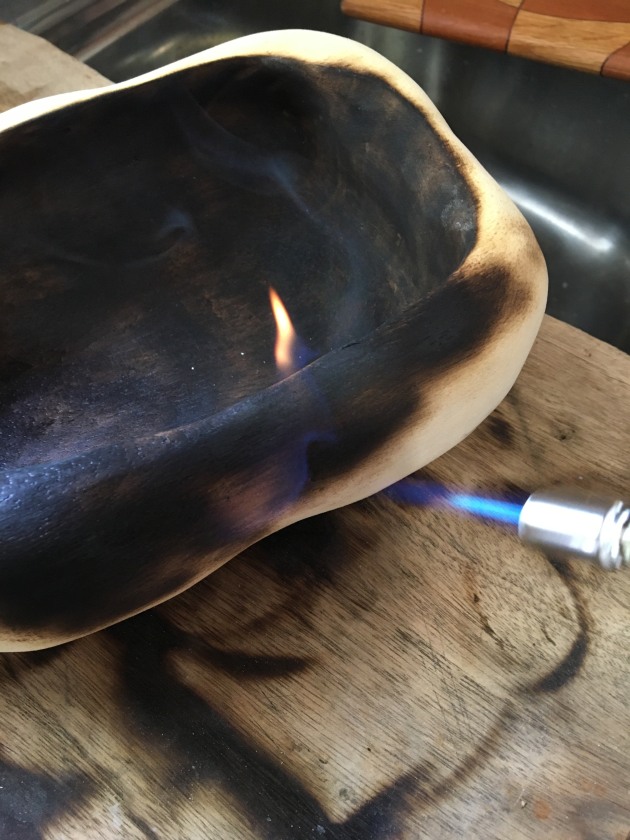
1. A small refillable butane torch lets you control the flame more easily.
This is a Japanese technique of charring the surface of wooden buildings and then oiling it to make it stronger and more resistant to weather and fire. It hardens the surface and creates a very pleasing effect.
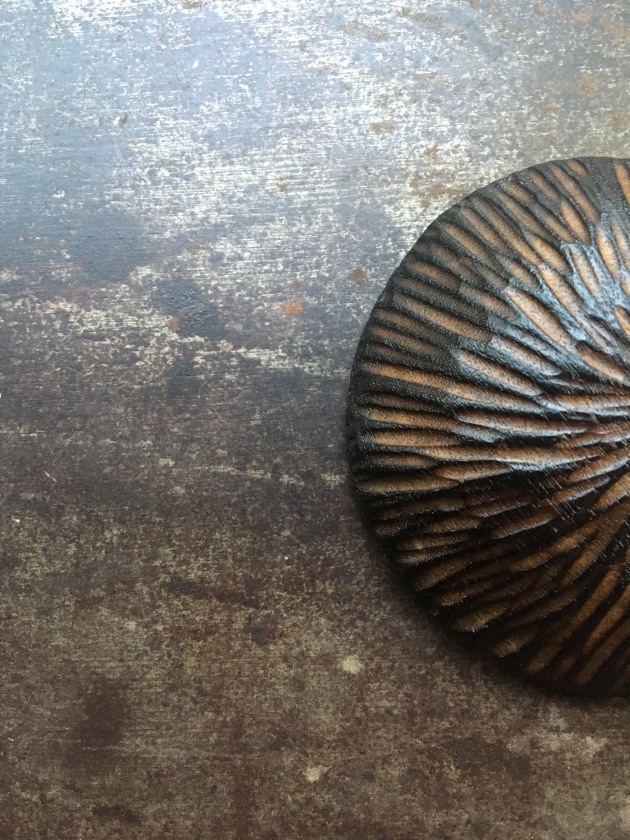
2. The base of a carved through shou sugi ban charred surface.
I have found this process works beautifully on small wooden objects. The feature of the grain comes through strongly after oiling or waxing. It’s a very striking technique, perfect if you want form and texture to dominate.
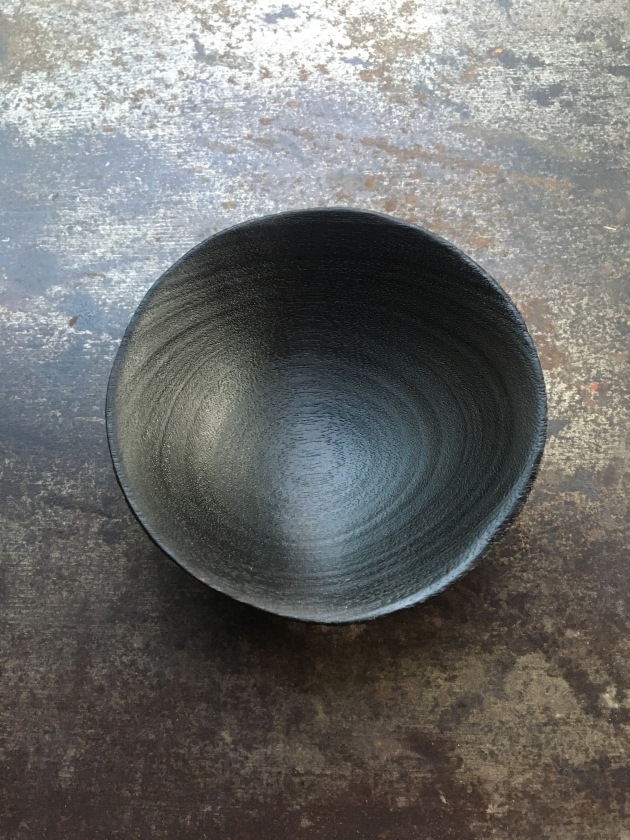
3. Small shou sugi ban charred bowl.
I use a small refillable butane torch that lets me control the flame more easily. Too much fire can distort your edges, although this can be an interesting effect in itself.
Experiment a bit before you attack a piece you’ve been working on for ages. All species burn differently – I’ve had great success with Huon pine, rose mahogany, jarrah, celery top pine and most outback hardwoods such as mulga, gidgee and brigalow.
I sand the piece to about 280 grit paper; because you’re really taking off a layer, there’s no need to go too much finer.

4. After the charring process the grain can still be seen.
I always have a bucket of water and a spray bottle nearby – be vigilant, you don’t need an out of control flame. I set the burner to a fine flame and char the surface evenly, being careful to blow out any areas that stay alight, particularly edges. Try to avoid dunking in water as the charring can become quite patchy. Don’t let the piece overheat, fine bowls and spoons can crack, take it slowly and let it cool a bit.
Once there is an even layer of carbon over the whole piece, take a fine scotchbrite pad and buff off the loose particles. Don’t buff too hard as it can become patchy. If there are lighter sections, burn them again.
Once you’re happy with the surface and it’s cooled down, you can begin to rub wax or oil into it. It will be very thirsty, and the process of waxing is really important. I use my flaxseed oil and beeswax mix, but you can use any of your favourite finishing oils or waxes.
Flaxseed oil is food grade linseed oil, it’s beautiful for bowls and spoons and is a ‘drying’ oil so it will harden. The beeswax allows you to buff it and bring a lustre to the surface. Don’t be too hasty with this process; this is your reward, the more you buff and rub in the wax, the more the texture builds and the surface begins to take on a very special quality.
I take a few days to build up coats, buffing and rubbing in the wax. The harder growth rings will be prominent and the piece becomes a tactile and visual feast – don’t be addicted to smooth, texture adds a whole other dimension.
Milk paint and chalk paint
These paints are often identified as folk or country style finishes, however their potential is much broader. Experimentation is key. You can layer different colours and rub through to create ceramic glaze-like effects and startling contrasts.
5. Layers of chalk paint were painted on and then carved back through.
Milk paint at its simplest form is milk solids mixed with pigments. If you curdle milk and drain off the liquid, and then add earth pigments or paint pigments, you’ll get the most basic form of milk paint – I’ve even used yoghurt and powered milk to good effect.

6. Applying chalk paint to a textured surface.
Milk paints usually contain lime to give them their chalky effect. The milk protein or casein is the key ingredient and was used in commercial paint in the early 20th century. This kind of paint has been identified as being used for centuries by many cultures including that of Ancient Egypt.

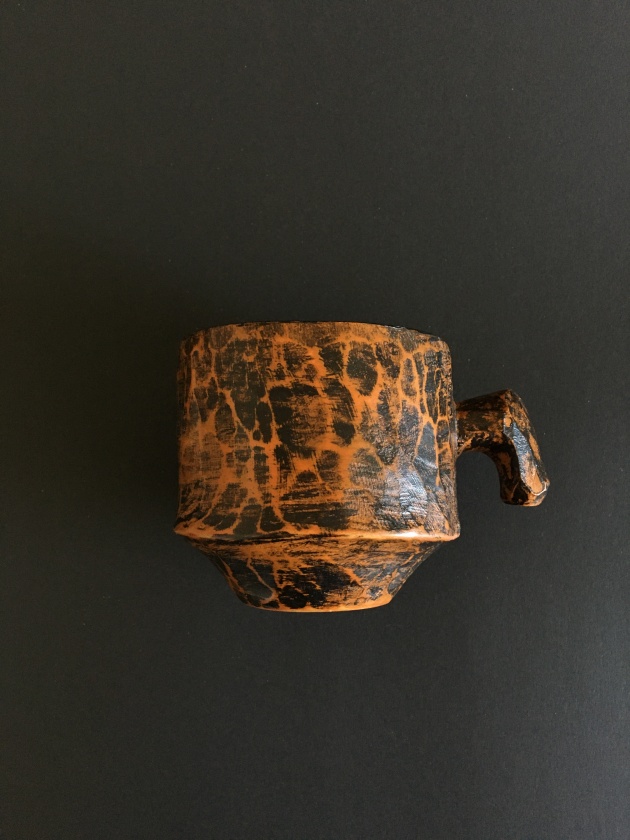
7. Using white shellac as a sealer inside a white beech coffee cup.
The effect of milk paint is a soft, chalky, slightly patchy finish that can be buffed through to reveal a variation in tone. It’s a fairly porous finish and benefits from a topcoat of wax to assist with longevity, and you can also topcoat with shellac if you want a glossier effect. It’s non-toxic, making it perfect for utensils and toys.
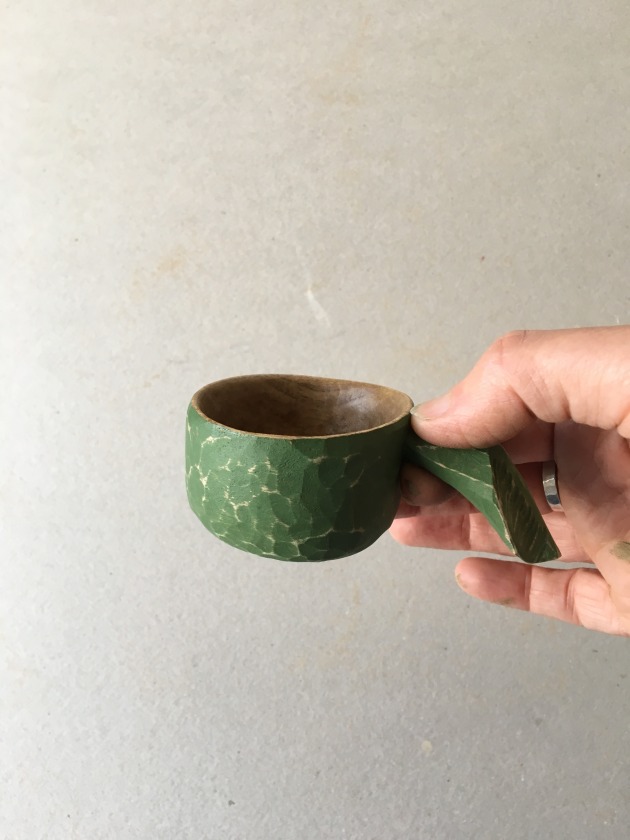
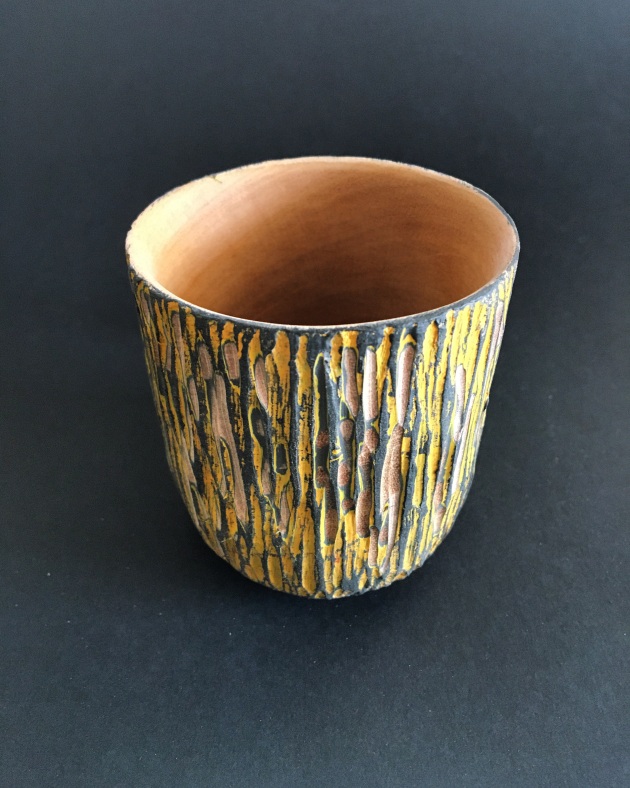
8. White beech espresso cup with milk paint finish.
There are several high quality milk paints on the market that you can buy pre-coloured or as a basic white that you can add your own pigments to.
Chalk paint
Chalk paint is an acrylic based paint with calcium carbonate mixed in. The colour is more even than milk paint and the colours are usually more solid.

9. The handle on this New Guinea rosewood spoon was first charred and then carved back through the surface. It was sealed with shellac and then flaxseed oil and wax were applied as a top coat.
You can buy it commercially or mix your own, using acrylic paint and adding the calcium carbonate. It’s commonly used on furniture but works well on smaller objects that don’t come into contact with food. It will burnish well too, bringing shine to the high points.
10. Multiple layers of chalk paint are rubbed back through to create an almost glaze-like effect.
Ebonising
Ebonising uses the natural tannins in the timber to darken the colour of the wood by chemical reaction, so the ‘stain’ goes beyond the surface, giving depth and warmth.
If you put three cups of white vinegar in a jar with a tennis ball-sized piece of steel wool and leave it for a week, the steel wool will dissolve giving you a fairly smelly brown solution that can be wiped onto the surface of a finished piece. Open the lid occasionally as pressure in the jar can build up. You can strain it if you want to remove any small particles.
11. Steel wool dissolved in white vinegar will ebonise by reacting to tannins in the timber.
Depending on the tannin content of the timber, it will immediately begin to darken once the mix is brushed on, so work quickly for even coverage. Try a sample piece of the timber first before you work on your finished piece. If it doesn’t darken enough you can paint on strong black tea (let it cool first) to add more tannin to the wood; let that dry, then apply the vinegar mix.
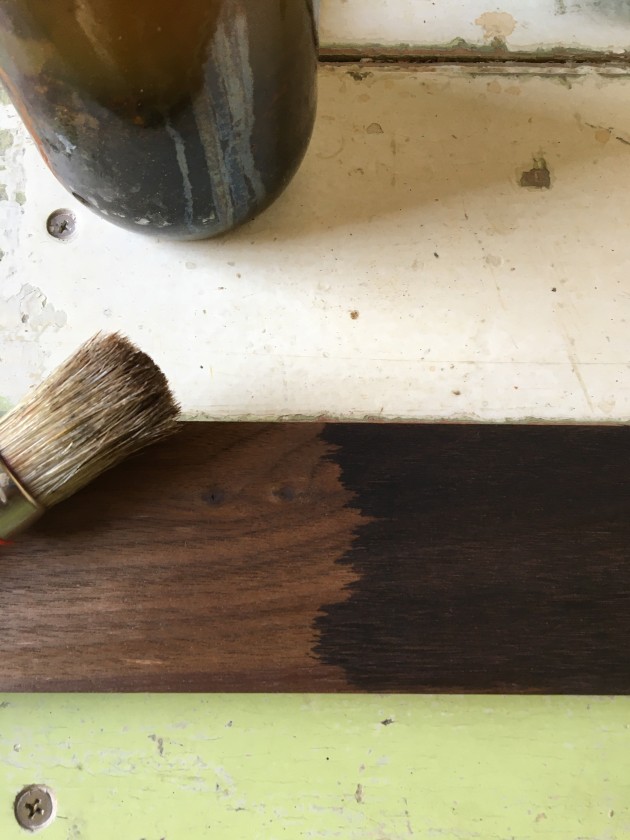
Because the solution is wet the grain will raise, however wetting down before you stain and sanding with 600 grit sandpaper after it’s dry, and then adding the mixture will help reduce this. Once dry, you can burnish the surface and coat with any clear finish. I often seal with blonde shellac and rub back with 600 grit sandpaper; the shellac gives warmth. You can then use whatever wax or oil finish suits you. I love using this method on my spoons and bowls, it makes them look ancient and precious.
There’s so much more to say about finishing but my biggest piece of advice is to always question the conventional methods and look beyond clear, smooth and shiny. Never stop experimenting and playing.
Carol Russell is a Brisbane based woodworker who also teaches woodcarving classes. Learn more at www.carolrussellwoodwork.com.au