Finishing Small Objects, Part 1

Words and photos: Carol Russell
Handling a small, beautifully crafted wooden object can evoke a silent conversation between you and the maker. It can calm your busy mind, causing you to reflect on the process and material, and the inspiration for its creation. I’ve seen it many times; that emotional response to the handmade object fashioned out of wood.
What the wood is coated with, or not, is a big part of the story. Finishing small objects can be so much more complex than simply creating a smooth, shiny, coated surface. The finish can tell its own story. If you obscure the grain, it allows the form and texture to be dominant, however a clear finish allows you to look deep inside the material, bringing the grain and colour into the design as a feature.
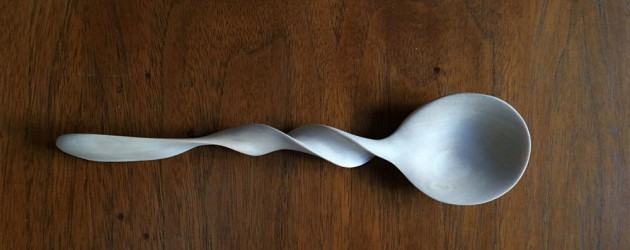
Twirl Spoon, white beech – ‘The simplest finish is no finish at all.’
Finishing begins well before anything is applied to the timber. Each object requires a decision based on timber species, form, usage and what the maker is trying to say by making the piece in the first place. Do you sand through many sandpaper grades and make it silky smooth to the touch? Do you leave a tooled finish that tells the story of the process, creating facets for fingers to follow and trace? How light falls on the piece, points of definition where light and shade are can be a factor as well.
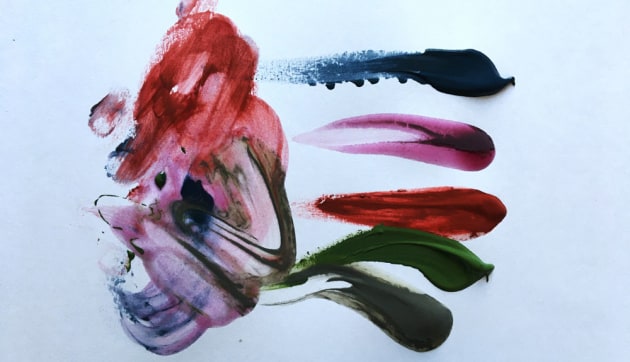
Don't be afraid to use colour in your woodworking.
Whether the object is to be used for cooking, eating, viewing or handling, will have an enormous bearing on which way you go with your finishing. I try to use as many non- toxic materials as possible, preferring shellac, milk paint, chalk paint, earth pigments and my own beeswax and flaxseed oil recipe of one part beeswax and three parts flaxseed oil melted together in a pot.
Keeping it raw
The simplest finish is no finish at all. You can leave a piece uncoated and let it change over time. If it’s a decorative piece, it will darken with exposure to light and handling. With no coating to act as a barrier it may stain a bit too, particularly light timbers. I have often thought I liked a piece better before putting on a finish.
With cooking utensils, untreated timber will change more rapidly. There’s no rule to say you have to apply a finish to utensils, if you can accept the fact that they’ll age and take on the colours of turmeric and paprika and tomato, cinnamon and burnt sugar. The spoons will go furry and dry out and take on their own personality, the prettiness of the freshly worked wood will go but what’s left is really interesting, spoons in particular start to look a bit like driftwood. A waxy timber such as white beech or crow’s ash or the dense western desert timbers such as gidgee, mulga or brigalow age really well under these conditions.
How timber is worked in the final stages has a huge bearing on the look of an unfinished surface. If cut with a sharp blade or scraper, the pores of the timber are sealed and the surface is smooth and shiny. If sanded with ever decreasing grades of sandpaper, the surface is less likely to have a shiny finish. To achieve this after sanding you can burnish the surface for a shiny closed pore effect. Burnishing works beautifully on tooled surfaces too.
Burnishing
After a piece is finished and before any coating is applied, I usually burnish the surface. I started doing this because I had seen potters using smooth river stones to get a finish on clay. The surface is rubbed vigorously with the burnisher and the friction creates heat, bringing the oil in the timber to the surface, compressing and sealing the fibres. If you do this to a piece of gidgee, rose mahogany, red cedar, Tasmanian blackwood, myrtle beech or Huon pine, you’ll be dancing with joy at the beauty of it.
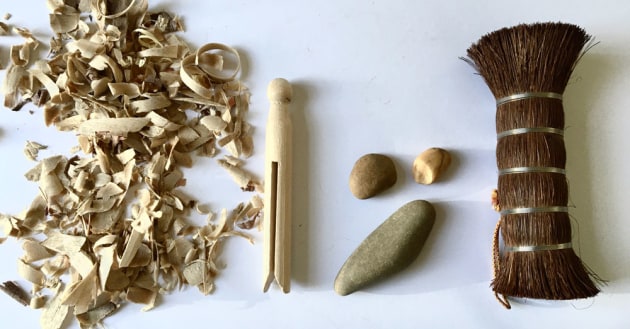
Wood can be burnished by rubbing with shavings, or use hard objects such as the dolly peg and stones shown. The Japanese uzukuri brush of palm fibre is made specifically for burnishing surfaces.
Timber with a more open grain, particularly silky oak, benefits from wetting down after sanding first to raise the grain. When dry, sand with about 400 to 600 grit sandpaper and then burnish. After burnishing, I use my simple homemade wax finish and really buff it in, this supports the burnished look and doesn’t raise the grain.
My favourite burnishing tool is an old fashioned dolly peg with a round head, you can also use wood shavings, smooth river stones or a fine Japanese uzukuri brush of palm fibre.
Finishing using shellac
No two timber species finish the same way, one of the keys to finishing is understanding the properties of the
timber you’re using. A dense, oily timber such as Huon pine or rose mahogany requires a different approach to silky oak or red cedar. In this situation it’s worth using a sealer, shellac is my preference.

Shellac is versatile and can be used as a sealer, or built over many applications to a finish of exquisite depth and sheen. No two timber species finish the same way, however shellac is a beautiful finish on dark timbers such as the rosewood bowl shown here.
Shellac is the key material used in French polishing, a highly skilled and involved technique of applying and working the resin to gain a finish of exquisite depth and sheen. It’s a beautiful natural finishing material. When used as a sanding sealer on open grain timber, it reduces the absorption of waxes and oil finishes.
You can also build layers and pull up a shine, and although this isn’t French polishing, you can use elements of the technique to bring a warm glow to your work. It’s a lot more water resistant than you would expect and is also food safe once the solvent has evaporated. Shellac is still used to glaze some lollies and fruits.
The nature of shellac
Shellac derives from a natural resin secreted by the lac beetle onto trees in India and Thailand. The production of shellac in its various forms is an intriguing process and remains largely unchanged from traditional methods. After harvesting the raw resin, it’s removed from the sticks by grinding and scraping – it then resembles seeds and is referred to as seed lac.
The seed lac is then heavily washed, removing much of the twigs and rubbish and placed in long raw cotton bags that are held at each end over a charcoal fire. The bags are heated and twisted until the lac oozes through and is then scraped off and spread over the surface of a thin porcelain drum to cool. From here, the lac is called shellac.

Shellac on dark rosewood
The drum is then covered, and the shellac removed, softened and then stretched until it becomes a very thin sheet. After any remaining impurities are removed it’s then broken up into the familiar orange flakes.
Some of the original softened lac is melted into small cakes, known as button lac. The poorer grades and by-products from the cleansing process also contain rosin that is marketed as garnet lac. This is a deep ruby colour and can be used to make newer timber looked aged as it can give a muddy look.
From the refined orange flake shellac, the resin can be further bleached and dewaxed, producing white or dewaxed shellac. White shellac is a bright clear finish that when used on light coloured timbers will not yellow or deepen the colour too much, on darker timbers it will keep brown tones truer and still bring warmth to red tones.
Applying shellac
The thing with shellac is it’s less about how many coats you apply, and more about building a body and then working with what’s there using friction and buffing techniques.
You can use a pre-mixed shellac, or if you are buying it in flake form, follow the instructions for mixing. I find blonde shellac often clumps together in the packet – it’s okay to use but can take a bit of time to melt.

Two spoons finished with shellac and indigo pigment.
My rule of thumb for mixing flakes or powder is to cover the shellac with 100% pure methylated spirits in a jar. Once it dissolves, double the quantity of liquid with more metho because you can make the mix stronger or weaker to suit. Apply to a prepared surface, that is one that has been cut with a sharp blade or scraper, or sanded to 400 to 600 grit.
The level of detail and shape of the surfaces will have a bearing on the way you apply the shellac. I use a brush if there’s a lot of detail or tight corners. You can buy a special French polishers mop – my preference is a small hake brush as these are quite light and have goat bristles. On more clear or flat surfaces, I find the best way to apply shellac is with a polishers mouse or rubber made as shown opposite.
Pigments
Shellac can also be mixed with natural earth pigments to create a range of beautiful colours and textures. One of my favourites is indigo powder added straight into the shellac to give an extraordinary blue/black colour. I have also used crushed charcoal, burnt umber, yellow ochre and Venetian red. Always check the toxicity of pigments before using them.
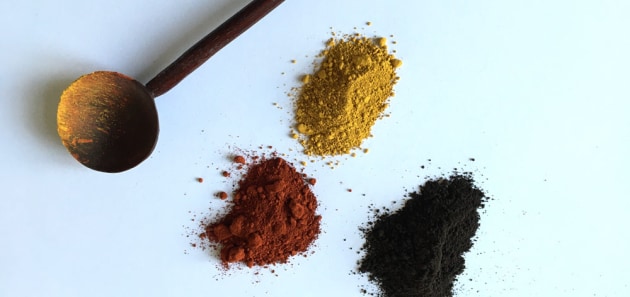
Natural pigments such as cassel earth, yellow ochre and red oxide can be mixed with shellac or milk paint to create beautiful colours.
Experimenting with finishes and textures can be a source of constant delight as you discover the possibilities of combining them with the woods you use and the surfaces you create.
Carol Russell is a Brisbane based woodworker who teaches woodcarving classes. Learn more at www.carolrussellwoodwork.com.au