TESTED: USSA Multifunctional Trim Router Jig

Above: The jig is shown fitted with a Bosch cordless router and the ploycarbonate edge guide. Two large thumbwheels near the handle are loosened to allow the router to slide.
Review and photos: Raf Nathan
‘Ussa’ is a Turkmen language word which translates loosely as ‘the inspiring spirit of a master craftsperson’. The inventor, Babayev Nurlan, is an architect and keen woodworker who now resides in China where the jig is made. The idea for the jig came from Babayev wanting a jig to help with his own furniture making. It took about four years to go from a 3D printed initial version to today’s machined model.
There are a few iterations of the jig, starting with a 3D print file you download and create yourself, however the premium Multifunctional Pioneer 003 is trialed here. The basic versions are polycarbonate or a mix of materials and have either a fixed or sliding base and need drilling to fit your router.

1. Your router fits to the black base which slides over the lower section.
This one has a base and sliding sled that allow quick changes in the router cutter’s position. It is all beautifully CNC routed aviation-grade aluminium with polycarbonate attachments and stainless steel fittings, and arrives in an impressive fitted case that includes an array of parts and attachments.
Your router mounts on a removeable plate which is pre-drilled to fit pretty well all 1/4" routers. A centring pin and guide are included to ensure the router is centred properly on the plate. This plate then screws to the top of the sled. An option is to only use the extra thumbscrews to fix the plate to the sled allowing you to pull the router out for freehand use with quick replacement.

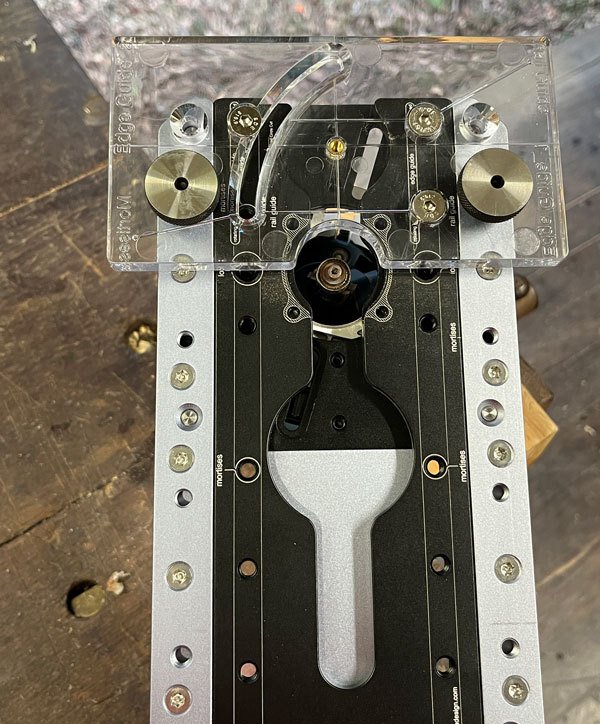
2. The full kit with main sled, base and guides, fences and template accessories.
The sled and base are precision machined and lock in place with two large thumbscrews. This is all good stuff. There are laser markings for positioning all the various components in place. The attention to detail in the build quality is outstanding.
Circle-cutting is easy. Screw the round holder in place and the end of the jig fits firmly over this becoming the pivot point for the circle cutting. The sliding base accommodates circles from 25–760mm and the inbuilt ruler can be used reasonably well to set the cutter position as I found the scale hard to read.
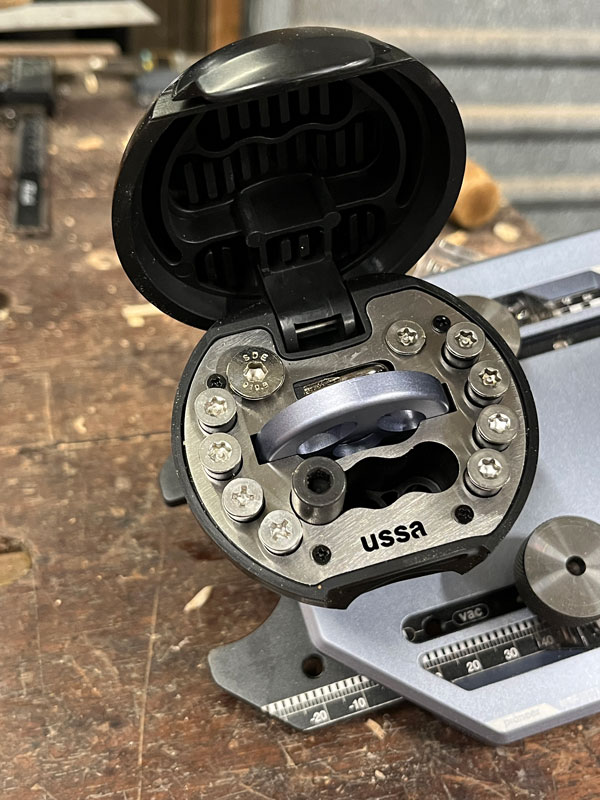
3. The flip-top handle holds a selection of screws and holders.
The included edge guide is a hefty piece of polished and detailed polycarbonate, although given the high quality of the other parts I thought using this material out of sync. It attaches to the jig with large screws.
The edge guide is good in use but for me it is a little too short. An extra 25mm each end in length would give a better bearing edge for starting and ending a cut, however it works well.
4. Here the clear edge guide is fitted – detailed engraved markings show the needed positions.
Although it’s not a process I use, by quickly screwing in the large thumbwheels onto the base and fitting the edge guide you can flush trim protruding dowels or similar quite easily. The thumbwheels and edge guide are exactly the same thickness so the router can ride above the surface needing to be flush trimmed. For template cutting everything is included, even a small bearing guided cutter.

5. Screw the round holder to the workpiece and let the jig pivot for circle making. Changing cutter position is easy using the two large thumbscrews to release the sled action.
The handle is a key part of the jig as this gives you relatively safe and secure two-handed control when routing. The handle is too large but off-setting this to an extent is the James Bond style flip-top compartment at the top. It reveals screw storage, allen key and circle holder.
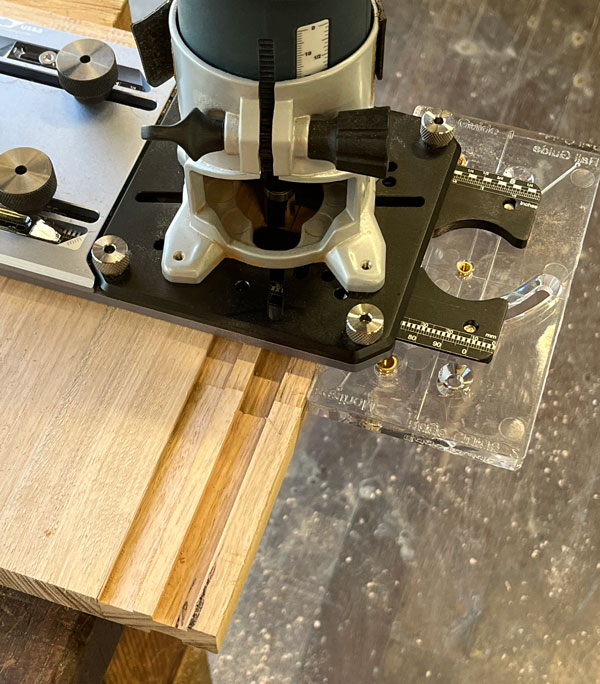
6. Making trenches or grooves is easy with the polycarb edge guide fitted.
Mortise cutting or groove making can be achieved by flipping the edge guide and securing it near the middle of the base. The extra polycarb 90° guide is then screwed to this. Two locating pins screw into the jig base and they straddle the wood piece automatically centring the wood to the router cutter. There are numerous markings on the base showing where the pins and fence attaches. Everything has been thought through.
The edge guide acts as a fence to give good bearing surface and keep the router vertical. Running a groove or mortise in edges is actually not a process I like, however the Ussa achieved a good result. The 90° extra fence slides up neatly to the workpiece and helps immensely to offer support when running along an edge to make a cut. For mortises a plunge router is preferred.

7. Two locating pins fit to the base and act to centre the cutter to the workpiece. The edge guide with the extra 90° guide attached acts to support the unit on narrower pieces of wood to make grooves or mortises.
To extend its use the router and its mounting plate can be removed for freehand use and can be mounted in a router table. The templates for making the cut-outs in a router tabletop are included in the kit. A dust extraction shroud is included for edge work.
Given its somewhat high price, this system’s appeal to a broader market may be limited. If you use a trim router a lot and appreciate artistic engineering then this jig is a winner. All its many functions have been thought through in detail, everything fits together perfectly and works well. If you can afford a Ussa jig you will never regret the purchase.
Review tool supplied by and available from www.ussadesign.com/
Raf Nathan @treeman777 is a Brisbane based woodworker and regular contributor to Australian Wood Review.