

PROJECT: Handmade for hand tools

Above: Practise your hand tool cut joinery skills to make this bench-top chisel tray.
Words and photos: Charles Mak
Diagram: Graham Sands
I have used my combination plane – another version of a plough plane – to cut various decorative features in my projects, like, for example, on the sides of a tea tray I made for my daughter (photo 1). But, the combination plane, in a skilled hand, can efficiently make joints.

1. Another tray variation by the author. Hand-cut decorative beads add elegance to the design.
In this article, I will detail step-by-step how to cut by hand four different corner joints for a tool tray, mostly with a combination plane. The four corner joints are the double rebated joint, dado and rebate joint, loose tongue and glue joint, and the dado and tenon joint (fig.1). You can of course use other joinery planes such as a rebate plane or shoulder plane to make the joinery.

Laying out
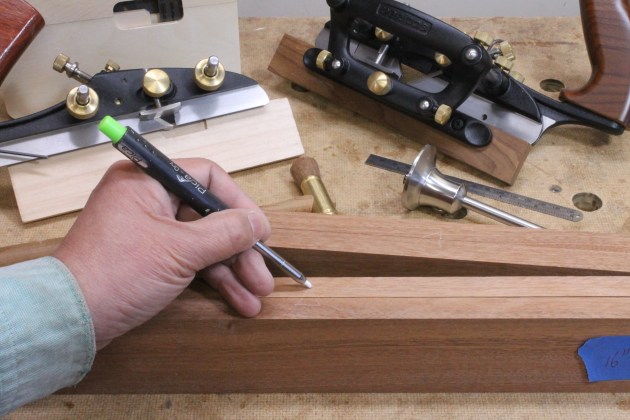
2. Cabinetmaker’s triangles keep track of all the parts in their proper order.
As in any carcase build, begin by organising the parts in their proper orientation and marking them using the cabinetmaker’s triangles or any marking system of your choice (photo 2).
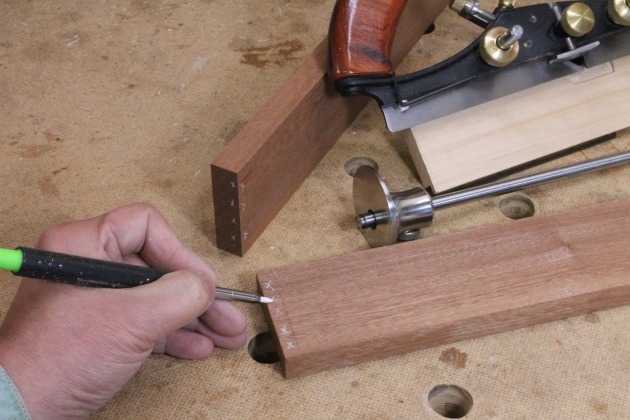
3. Marking the waste side of the cut prevents unnecessary cutting errors.
Complete the marking by laying out the four different joints on the corners based on fig.1, photo 3.
Double rebated joint
Let’s start with the double rebated or lapped joint, frequently used with small boxes. For this joint, as all the rebates are the same, the plane uses only one plane setting.
Referring to the instruction manual for the combo plane, I set up the plane as below:
- Choose a cutter that is the same as the rebate width (7.5mm in this case) and set the depth of cut to 0.5mm
- Set the spurs to the same as the depth of cut at 0.5mm
- Set the fence so the blade cuts to the width of the cheek
- Set the depth stop to the difference between the depth of the rebate (7.5mm) and depth of cut (0.5mm) (for this tray, the depth stop is, therefore, set at 7.5mm from the bottom of the skate).
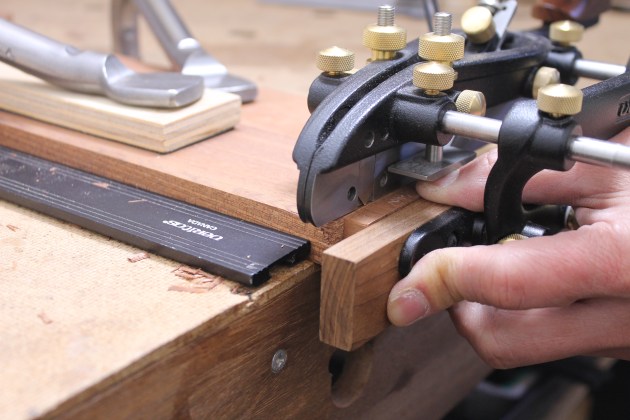
4. Start from the front end and pull the plane to scribe the lines with the spurs.
To begin, place the plane near the far end of the stock to make a few scoring cuts with the spurs, which will avoid tear-out (photo 4).
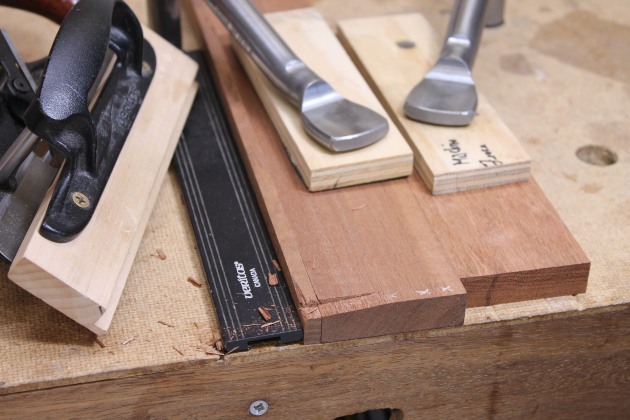
5. Move the plane back and make progressively longer cuts to full strokes.
After scoring, make planing passes with the plane and continue shaving until the plane stops cutting wood (photo 5).
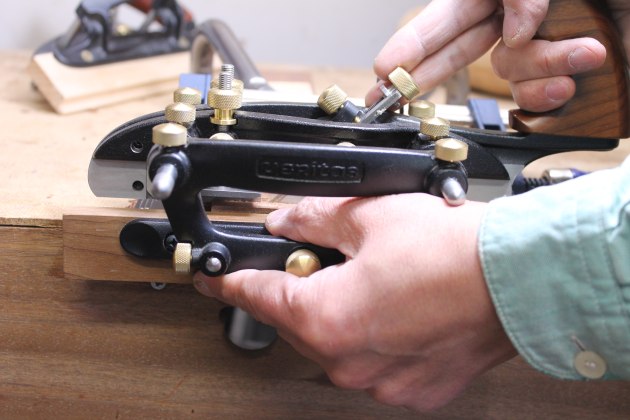
6. To avoid tilting the plane, hold the handle with a soft grip and push it with the palm.
To prevent slanted cuts, press the fence against the stock while planing and hold the handle with a light grip to avoid tilting the plane (photo 6).

7. Check the rebate with a square for squareness.

8. Dry-assemble the mating pieces and check the fit.
When done, dry fit and check the rebates for square (photos 7, 8).
Dado and rebate joint
Also known as a tongue and groove joint, the rack-resistant dado and rebate joint is suitable for light work. To mill a dado, install the blade (a 1/4" cutter in this project), and set the depth of cut and depth stop in the same manner as described in the last section for the double rebated joint. Set the fence to the thickness of the mating piece, or 5/8" here.
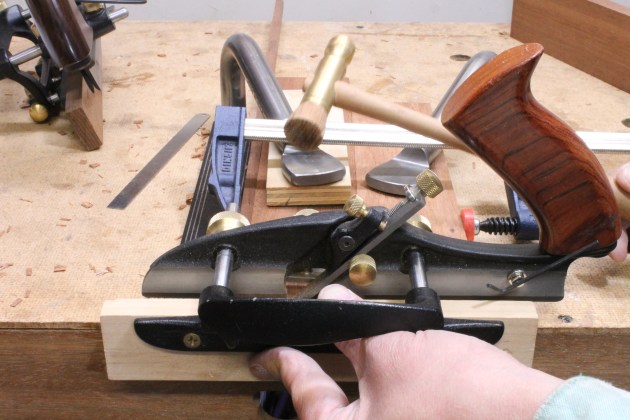
9. Clamp a sacrificial strip to the work to prevent blow-out on the exit edge.
To start, set the plane and plough the dado across the grain (photo 9).

10. Scribe the cut lines for a rebate on the mating piece that matches the dado.
To make the rebate, reset the plough plane’s fence to cut a matching rebate for the dado (photo 10).
Loose tongue and groove joint
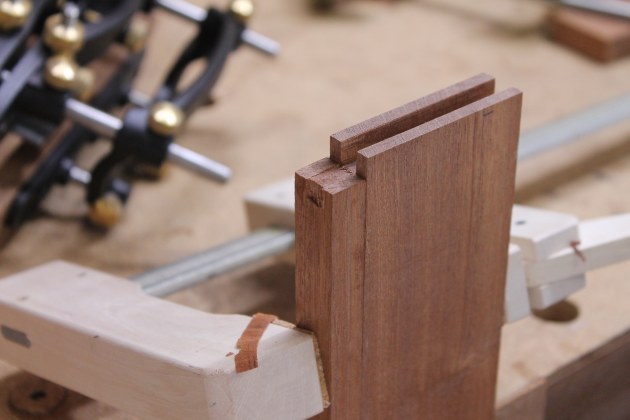
11. Plough a slot on the endgrain as deep as half the thickness of the mating piece.
The third joint to cut, the loose tongue corner joint, is composed of a dado and a groove, held together with a tongue. First, set the fence at or close to the centre of the stock and plough a groove in the endgrain of one piece (photo 11).
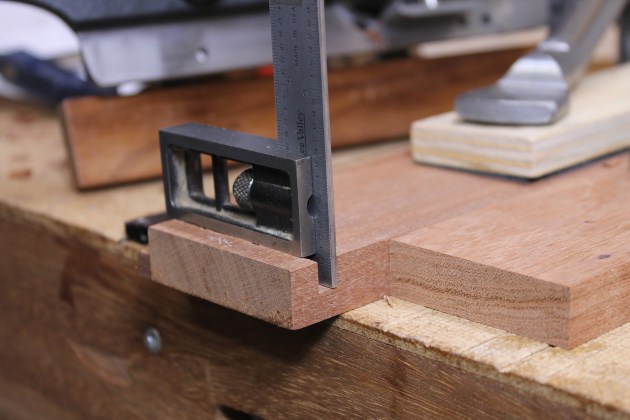
12. Cut the dado and check for consistent depth.
Next, cut the dado on the mating piece using the same plane setting (photo 12).

13. Note the grain direction of the tongue, running along with the grain on the mating pieces.
Lastly, make a tongue out of a strip that fits snugly into the groove and dado (photo 13).
Dado and tenon joint

14. Lay out the tenon on the endgrain with a marking gauge and set the combination plane accordingly.

15. Remove the waste on one side and flip the work to cut the tenon on the other side.
This last joint is like a mortise and tenon joint, but with a dado instead of a mortise. To make this joint, start by cutting the dado on one piece with the combo plane. Then, scribe the tenon cut lines on the end grain of the mating piece and use the combo plane or a plough plane to make the tenon (photos 14, 15).
Bottom rebates

16. After the glue-up, cut a panel for the tray base.
To house the bottom panel, make through rebates on the inside bottom edges of the side pieces and stopped rebates on the front and back pieces. Then, glue up the case and cut a ply board to the size of the rebated opening (photo 16).
The tool rest
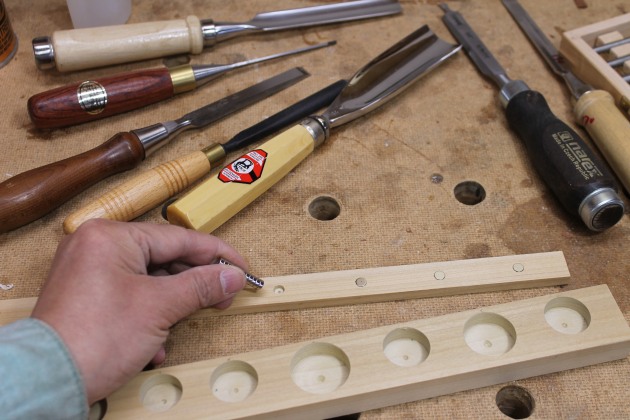
17. Glue magnets on the upper strip and drill blind holes on the bottom strip.
For tool holding, make a strip with blind holes and a strip with magnets glued into recessed holes (photo 17).
Assembly and finishing
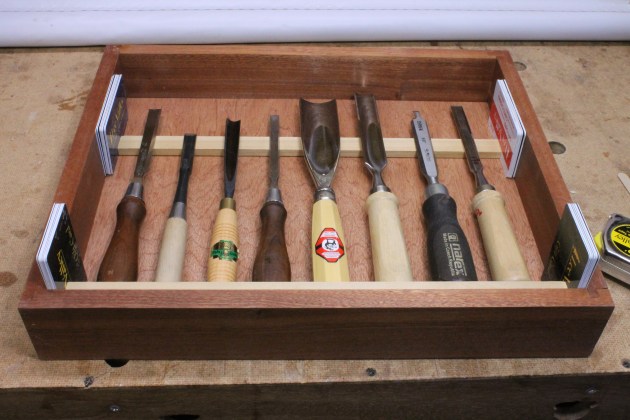
18. Centre the strips and screw them in place on the base board.
To finish off, break the edges, nail the ply bottom in place, and screw the strips to the bottom panel (from the back), and apply a finish (photo 18).
With its hand-cut joinery, this tool tray provides a good home for your tools while also being a testament to your unquestionable joinery plane skills!
 Charles Mak lives in Alberta, Canada and enjoys writing articles and woodworking in his shop.