Trent Palelei: Building an acoustic bass guitar

Trent Palelei is a Brisbane-based luthier who is passionate about building bespoke, one-off custom-made instruments. He combines modern techniques and materials with traditional processes to tailor the sound and performance of his instruments to customer needs and tastes. Sound and tone are his first priority, however he also believes that a beautiful instrument entices its owner to play it. A great amount of attention is paid to the selection of tonewood, and how to best highlight its beauty, sonority and the musicality of the wood.
As a featured entrant for Maker of the Year presented by Carbatec we asked Trent to give us some insights into the complex build of his entry, an acoustic bass guitar with a Florentine cutaway. Note: the images below are not presented in build order.
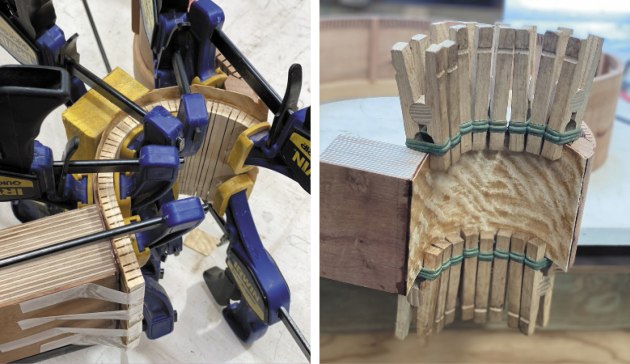
Curves always present challenges. Here a kerfed caul is used to veneer the Florentine cutaway. The photo on the right shows the veneer in place and the linings being glued in to allow a larging gluing surface for the back and soundboard plates to the rims.

The rosette has been made from myrtle offcuts from the back panel, rejoined to maintain the bookmatch, and then cut out using offset centres to produce a non-concentric rosette. The rosette is then string inlaid to create a radiating pattern. On the right, the inlaid rosette is shown prior to the soundhole being cut out. The transposed offset centres are used to ensure a tight gapless fit.

A router on a circle cutting jig is used to evacuate a pocket to inlay the rosette.
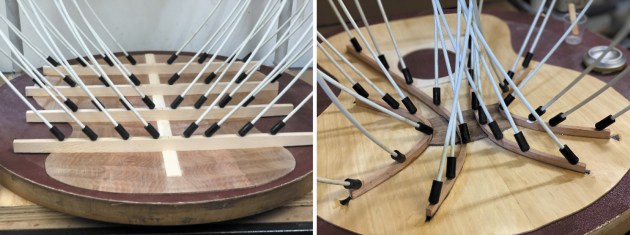
Above left: The oversized back braces are glued on to the backplate on a go-bar deck. The brace's bottom edge is radiused to a 5m radius and the fiberglass rods apply reasonably gentle pressure against the 5m radius dish shown below.
Above right: Here you can see bent and laminated braces being glued in, again on the go-bar deck with a 8m radius dish supporting the desired curvature of the soundboard. The King Billy pine braces are called falcate braces and they are pre-bent on a hot pipe and then laminated to achieve a curved brace. You can also see the carbon fibre tows underneath each brace, which provide added stiffness and prevent cold creep for the longevity of the instrument.
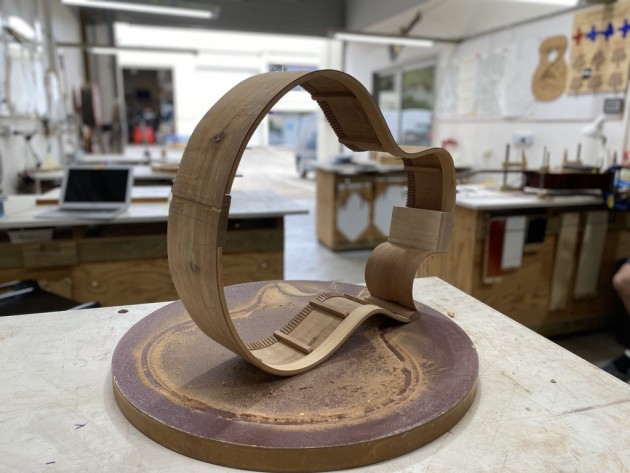
Here you can see a 8m radius dish being used to radius the top rim so they will marry with the soundboard dome/radius.

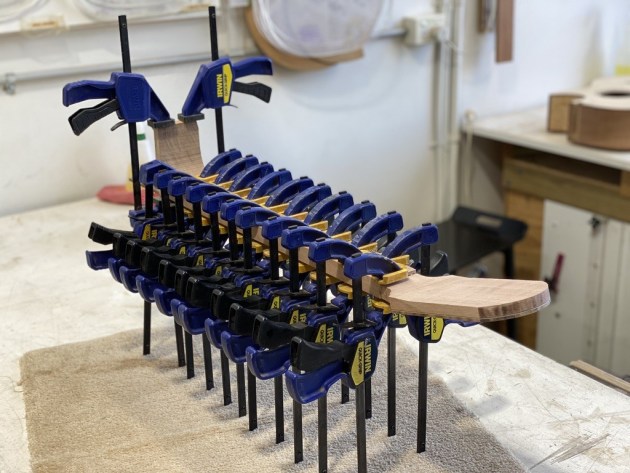
Above left: This is just prior to closing the box and you can see the different linings used for the top and back rims; kerfed lining for the back and solid laminated linings for additional siffness on the top. You can also see the internal surfaces seal coated in shellac to retard the moisture exchange cycles. On the right you can see the clamping process for gluing on the bindings and purfling to the perimeter of the instrument. Binding provides a aesthetic purpose in helping to frame the body but also gives structural reinforcement to help with impacts and to seal and protect the endgrain of the soundboard and back plates.

The balloon is used to ensure the sprayed finish does not get inside the instrument.

I buff my instruments with four grits on a buffing wheel. You can also see the shadow of the masked area for the bridge and fretboard extension. The next step is to cut around the footprint of the bridge and fretboard to expose unfinished wood for gluing on the bridge.

Left: I learnt this trick off a spanish guitar maker use to align the bridge to ensure not only a centred bridge but also correct string fall of the strings on the neck. Right: I vacuum clamp the bridge because the speed of this clamping process allows the use of my preferred glue for this joint, hot hide glue. It also avoids using long jaw, heavy clamps (perfect denting tools!) in and outside of the instrument after all the time spent on the finish.


Heel cap glue up looks more complicated than it is, however the extra size of an acoustic bass did make use of some old exercise weights to keep things stable.

A luthier's vice is invaluable for neck carving. You can also see the internal workings of the neck joint arrangement with the cross dowel holes taped with green masking tape. You can also see the cross-grain tenon support that allows use of the cross dowels.

There are many more processes in a build like this, however you can see the finished guitar in Trent Palelei's entry here. Learn more about Trent at Instagram @paleleiguitars
Earlybird entry pricing closes May 29.