The spindle moulder, part 3: Using the jig

Words and photos: Neil Erasmus
In part 1 of this series I described the basic function of the spindle moulder and compared its usage with that of a router. In part 2 we looked at how to design and make a spindle jig with safety and efficiency in mind. This is the final instalment and covers how to use a spindle jig.
Using the jig
Before running, check the following:
1. The spindle must now be reset, this time with the bearing down, the cutter up and the shaft locked in position to ensure maximum bearing contact with the jig (see image above). The bottom of the cutterblade just skims the top surface of the jig.
Note: whenever changing the set-up on the spindle shaft, ensure all clamping surfaces are clean. This means no embedded dirt or burrs on the machined faces of the flange at the base of the shaft, cutter, spacers and nut. Failure to do this may cause unnerving, confidence-sapping vibration.
2. Check the cutters are sharp and replace if necessary. Fix the bonnet guard and dust extraction in place, and ensure the bearing follower is prevented from spinning.
3. Ensure a clean work environment—only the jig should rest on the table; no spanners, shaft spacers etc, as these have a habit of moving towards the cutter once the machine is turned on.
First and second cuts
The jig used here was designed to shape legs for a simple wine table (see part 2). Using the jig involves two cuts.
Load the jig with two legs. Place one leg over the 1st cut side so just enough material hangs over the edge—no more than the 2mm or so waste left after bandsawing. The other leg acts as a prop for each clamping bar, and doesn’t get cut at this stage. Clamp the legs in place, aligning the bars so that their ends don’t get cut.
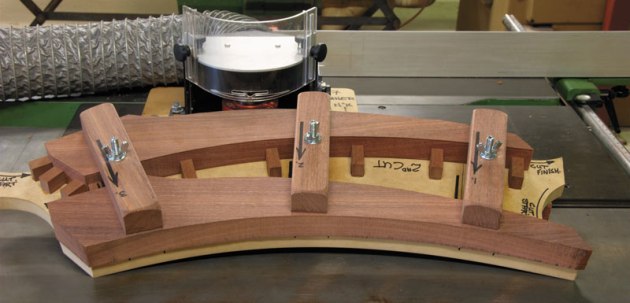
You are now ready to make your first cut, but only on the first cut side. Once done the legs are swapped, this time the partially cut leg fits against the reference blocks on the second cut side, see photo above.

Both sides are now ready for cutting. Before changing the legs in the jig, switch off the machine and wait for the cutter to completely stop. Repeat this process until all the components are done. The photo above shows the three wine table legs after shaping on the spindle moulder.
By now you will know just how helpful the spindle moulder machine is in creating multiples of fully machined, identical components, where any area can be used as a reference for marking and further machining.
First published in Australian Wood Review, issue 67.
Neil Erasmus is a furniture designer/maker in Perth, WA
