Pull-Out Drawer Stops
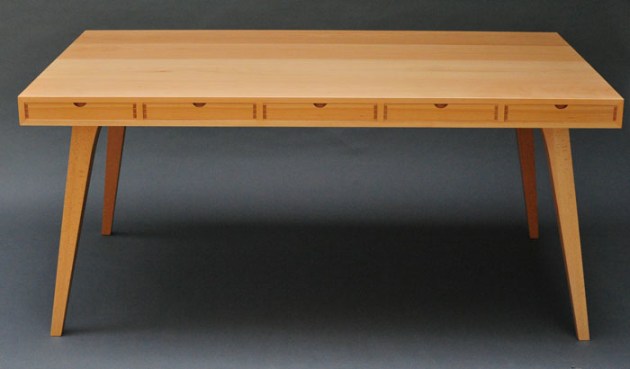
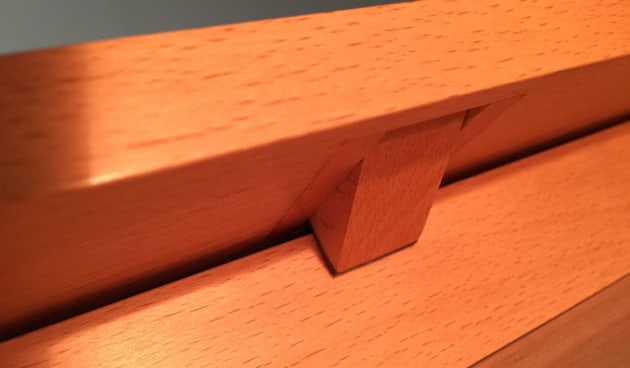
Kathy's Desk by Neil Erasmus is shown above, and below a close-up of the drawer stops which are mounted internally under the top of the carcase.
Words and photos: Neil Erasmus
Diagrams: Graham Sands
The debate amongst fine furniture makers about the best methods to stop drawers is as old as the one about drawer making itself. Often there is a tendency to invest more time in the quality of the drawer, and cut corners in the design and making of the stops. This story deals with a flip-stop mechanism that stops a drawer from being pulled all the way out.
A drawer stop prevents a drawer from being pushed in beyond a certain point, while a pull-out stop prevents the drawer from being pulled right out. In my furniture practice I make two kinds of drawer stops and one pull- out stop. The latter is a relatively complex little device to make, which also allows the drawer to be removed easily when required.
Every drawer must be stopped at some point within its carcase, while there are only certain times where a pull- out stop is a must, such as for big, heavy drawers, and very deep ones such as those I recently built for Kathy’s Desk, shown above. Regardless of any need to have them, they are a nice feature in a fine piece.
Where they fit
Unlike conventional drawer stops that are fitted to the carcase underneath the drawer, the pull-out stop is mounted above the drawer and is designed to ‘catch’ the drawer at the inside of the drawer back.
In the case of Kathy’s Desk, it stopped the drawer at the central drawer divider/back that helped conceal the space behind. It also serves as a safety device to prevent drawers from dropping on your feet.

Gravity keeps the leather-faced, pivoting stop mechanism facing downwards, but it can easily be lifted out of the way with a finger or two. The entire four-part stop (fig.1) fits in a shallow recess.
Make the recess first
The recess is excavated in the carcase before the cabinet is assembled. For small drawers, one centrally mounted device will do; for wider drawers you’ll need two pull-out stops, one at each end.

Photo 1. A plunge-router and an MDF jig are used to create a cavity for the pull-out stop.

A plunge-router is fitted with a 12.7mm upcut straight cutter and a 16mm guide bush, and the cutting depth is set to 13mm. I use an MDF jig that has a 43.3 x 38.3mm window for a 40 x 35mm stop (photo 1, fig.2). For this size, the piece of wood needs to be at least 50mm wide and 17mm thick. Once routed, the corners are neatly squared with a chisel.
Making the stop
The drop-down drawer-stop pivots on a 6.35mm (1/4") brass axle between two narrow blocks which are glued into the recess. The geometry shown in fig.1 allows the stop block to clear the recess housing and catch the drawer back at the correct angle.
Step 1: Machine up sufficient lengths of wood to sections of 13 x 8mm for the axle blocks, and 18 x 13mm for the stop blocks. Add on at least 150mm of ‘holdable’ waste so these lengths are safer to machine.
Step 2: To cut to length, set up the tablesaw with an auxiliary rip fence whose end is clear of the blade, or retract the existing rip fence, and set it to cut 40mm. Also, bring the cross-cut fence within a few millimetres of the blade for maximum support.

Photo 2.Tape the stop and axle block lengths together with the stop block in the middle.

Photo 3.Cross-cut these lengths into 40mm pieces. Leave them taped – each set is a unit.

4.Mark a triangle in pencil on the other side to keep track of their order.
Step 3: Tape the stop and axle block lengths together with the stop block in the middle (photo 2). Cross-cut each assembly to 40mm, leaving them taped together – they must remain a set (photo 3), so a triangle mark in pencil on the other side will help once the tape has been removed (photo 4). Let’s call this our reference face.

Photo 5. Drill through all with a 1/4” brad-point bit.
Step 4: Next, set up the drill press with a 1/4" or 6.35mm brad- point bit to drill through the entire face of each assembly (photo 5). A back fence and end stop block are essential to line the bit up with the hole centre which is in the middle and 10mm from one end. Reference face against the back fence.

Photo 6. Leave the tape on and fold in the axle blocks. Open up the holes in the stop blocks to 6.5 to 7mm, using the same set-up on the drill press.
Step 5: Now, leaving the tape on, fold the outer axle blocks out of the way, and open up the stop block holes only to 6.5 or even 7.0mm using the same drill press set-up (photo 6). Again, reference face against the back fence. A tiny countersink on all holes cleans them up nicely.
Step 6: By rotating the stop block through 24°, and cutting the stop end at the same angle, together with a relief cut above it to clear the bottom of the recess, it can drop down into the drawer space by around 10mm. This is more than enough to ‘catch’ the drawer back, provided it is positioned around 2 or 3mm down from the drawer side.

Photo 7. Tilt the sawblade to 24°, and set the cross-cut fence to cut the stops to 37mm long on the long axis.

Photo 8. Be sure to use a hold-down stick like the one shown for small pieces such as these.

Photo 9. Leather is attached to the angled ends.
Step 7: Now, tilt the sawblade to 24°, and set the cross-cut fence to cut the stops to 37mm long on the long axis (photo 7). Sandpaper on the cross-cut table gives added grip. I use a special safety hold-down stick fitted with a sharpened nail to hold these small pieces firmly down, never use your fingers! (photo 8). A piece of leather may now be attached to this angled end (photo 9).

Photo 10. An angled stick is used to rest the block against for the third and final cut, also at 24°.
Step 8: Next stage is to mark out for the two cuts at the other, hole end. Check the dimensions on fig.1. As before, these small cuts are safely executed with hold-downs that keep fingers at a safe distance. In photo 10 an angled stick is used to rest the block against for the third and final cut. Cuts 1 and 2 are done with the blade tilted to 24°, while cut 3 is done with the cross-cut fence set at the same angle.

Photo 11. For the axle, brass bar is cut to just under 35mm lengths.
Step 9: The last components to make are the axles. Brass bar is simply cut to a length of just under 35mm, and the ends deburred for easy assembly (photo 11).
Now, it’s time to test the assembly in the recess to ensure that it all swivels easily with nothing more than gravity. The areas that can obstruct are the bevelled ends of the stop. A little fettling here and there with a small block and sandpaper may be required.

Photo 12. To create a small gap between the blocks 0.4mm plastic is used.
Once right, arris all corners slightly, and seal and wax. The axle blocks must also be treated this way, but mask off the face and edge that come in contact with the bottom and walls of the recess. A small gap must be allowed for between the blocks, so I use two pieces of 0.4mm plastic (photo 12).
Last, apply a small bead of glue along the bottom, outer corner of the recess, just enough to contact the bottom edges of the axle blocks, without creeping onto the stop block itself. Push the whole thing home and try to push the axle blocks to the outer edges to prevent them from pinching the stop block.

Photo 13. The pull-out stops fitted. Flush sand after the glue has dried.
Once the glue has dried flush sand (photo 13). Job done. You can see them fitted in the carcase in the image below.
It often comes down to the little, neat details such as those described here that differentiates the highly valued, beautifully crafted piece from the ordinary one. They are a reminder of quality just like the reassuring sound made when a prestigious motor car door is closed. Quality lasts long after the effort to realise it has been forgotten.
Neil Erasmus is a furniture designer/maker in Perth, WA and also teaches woodwork. Learn more at www.erasmusdesigns.com
