Making a woven wood bench

Words and photos: Henrik Tjaerby
Four years ago I made a shelf from a woven lattice of wood as I wanted a light and transparent look. It only had to carry a couple of jumpers so after a few trials I realised 3mm maple slats were more than strong enough. Very quickly my one year old realised this shelf was his favourite place to jump as it had a nice bouncy action – and to my surprise he didn’t break it like most other things in the house!
Extending this idea to other furniture items seemed obvious, so I came up with a concept using a very simple frame for the weaving supported by vertical legs. The Danish cord benches from the 50s used stretchers for stability, but for a cleaner look I decided to use just the one deep 90mm rail. This could withstand a lot of downwards force, and as it didn’t need much sideways stability, I slimmed its thickness down to the bare minimum. The height also gave enormous strength to the leg joint – win-win. The result? A bench measuring 110mm long x 40mm deep x 450mm high, and weighing just over 3kg! The following photos show how I made it.

Photo 1. Ideas for the leg profile. I made this particular bench with the three-radius profile which I thought was new, as well as offering a solid joint to the legs due to its two flat/ perpendicular surfaces.
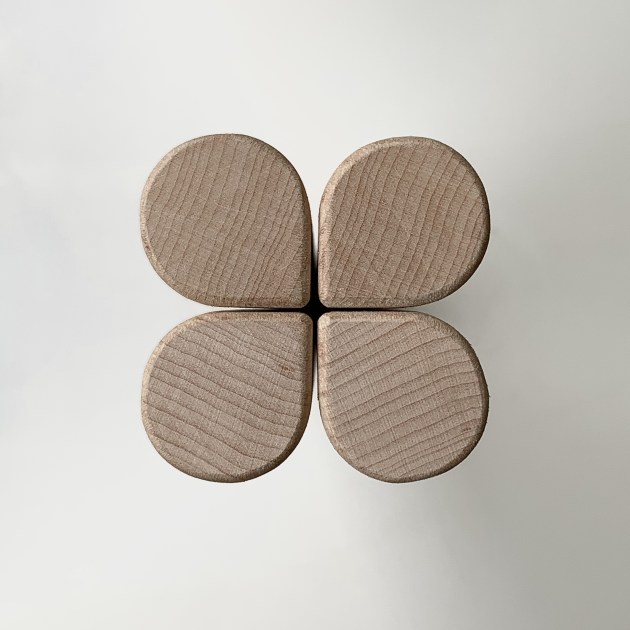
Photo 2. Leg profiles. Simply plane your square stock to exactly double the thickness of your radius cutter (in this case 25.4mm as I had a half inch cutter at hand). Rather than routing all four edges to leave you with a full round, instead leave one edge and this is the result. Remember to pass this through the router at least twice. The first pass will remove 90% of the radius, while the second will shape the rest for a nice smooth cut. Removing the whole lot in one go will create tear- out – especially in the rock hard Canadian maple I used.

Photo 3. I used Festool dominos to join the legs and crossbraces, but you could use any kind of strong joinery here. Dowels, traditional mortise and tenon joins or even a mechanical joint for a flatpack construction.

Photo 4. ‘Its all about the detail.’ It’s easy to imagine a whole family of furniture using this principle. Chair, lounge chair, shelving unit and more. I’m even thinking of making a bed as I’d like to see the weaving in monster size. If you, like me, suffer from a dust allergy, this kind of furniture is great, as it doesn’t gather dust as easily as paper cord or fabric.

Photo 5. The woven wood can be of any proportion or pattern. I wanted a plain over/under chequered look and liked the proportions of a 50mm wide slat with a 50mm gap to go with the look of the bench. I thought 4mm thickness was on the weak side, but wanted a challenge and went with 4mm. If you have a planer thicknesser I’d suggest bandsawing the slats, as the thinner blade will produce less waste. If not, you can use a tablesaw and sand off the saw marks. You will be surprised how many slats you can make from offcuts which otherwise would have been thrown out, or used for heating in my case.

Photo 6. Most planer thicknessers don’t go down to 3–4mm and neither does mine, so I built a custom machining bed to thickness to 3.8mm (4mm is my rough dimension but you need 3.8mm for joining). A leftover melamine kitchen benchtop did the job with little friction and with its constant thickness and resistance to pressure. Look carefully at the wood grain and run the slats through in the right direction as with this thickness you can get some nasty blowouts. Think of it as stroking a dog from the tail towards the head...not pleasant for either the dog or you. I don’t have a drum sander, but if I had this would have been the perfect machine for the job (for the slats, not the dog).

Photo 7. I made a few cuts at each end of the slats so the glue really could ‘get in there like swimwear’. Rather than clamping down a piece of wood as a stop, I used the Vogel magnetic blocks shown. I bought them a while back and use them for all kinds of stuff. They even come with a threaded hole on top – great for holding cameras as well if you are documenting your work.
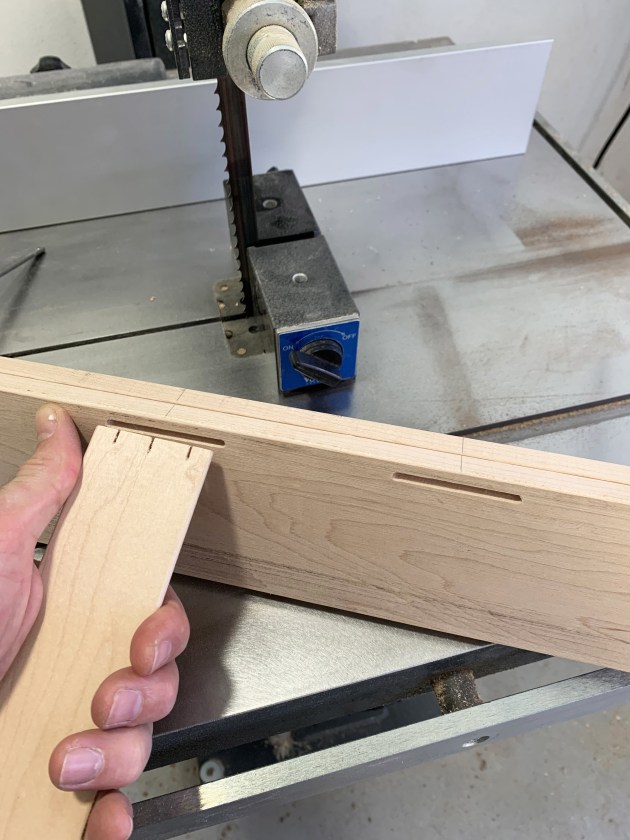
Photo 8. The rails are pretty straightforward. As mentioned before I wanted to avoid using stretchers as well, so to give stability made them 90mm high but only 12mm thick; just enough to capture the woven slats. I cut the slots with a domino machine, but I could also have made a simple router jig, or if in a hurry cut a dado in the full length of the rail, although the fit wouldn’t have been as neat...
The slat and rail edges have a small 2mm radius applied. You want the radius to be half the thickness of the slat so it fits perfectly in the slot with fully rounded ends no matter whether made with a domino or a router.
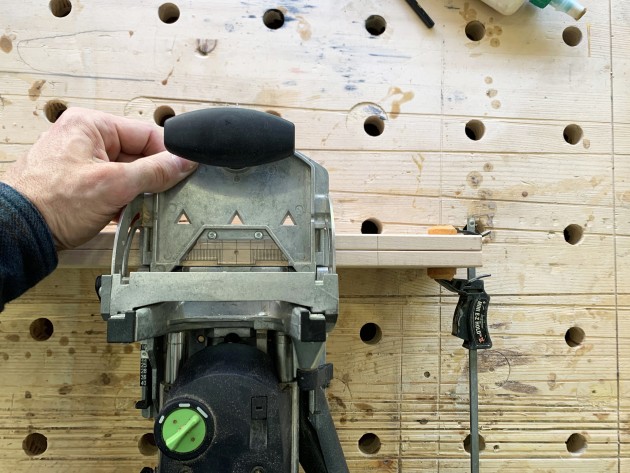
Photo 9. Another photo of cutting the slots with the domino. I simply mark the centre of each slot as the domino has a centre mark on the fence. To ensure each slot is in line with the opposite side I clamped the two rails together, and this created a larger bearing surface on top, ensuring the cut was perpendicular.

Photo 10.

Photo 11.
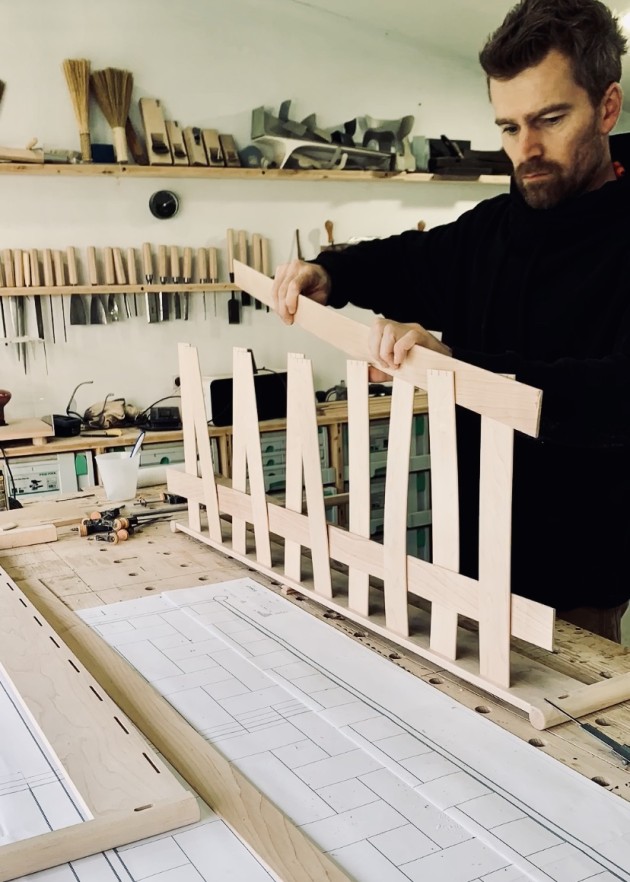
Photo 12.
Photos 10, 11 and 12 show the dry fitting of the weaving. There is a lot of tension in those slats, and you will be surprised how strong it gets as soon as you put the second slat in and they start to interlock.
Again, it’s all down to the weaving pattern, and it takes a lot of trial and error to get it right. Say, for example, if I wanted the gap to be only 30mm wide, I would probably have to shave off at least 0.5mm of the thickness to be able to bend it (unless you steam bend or wet the slats which would also be interesting to try).
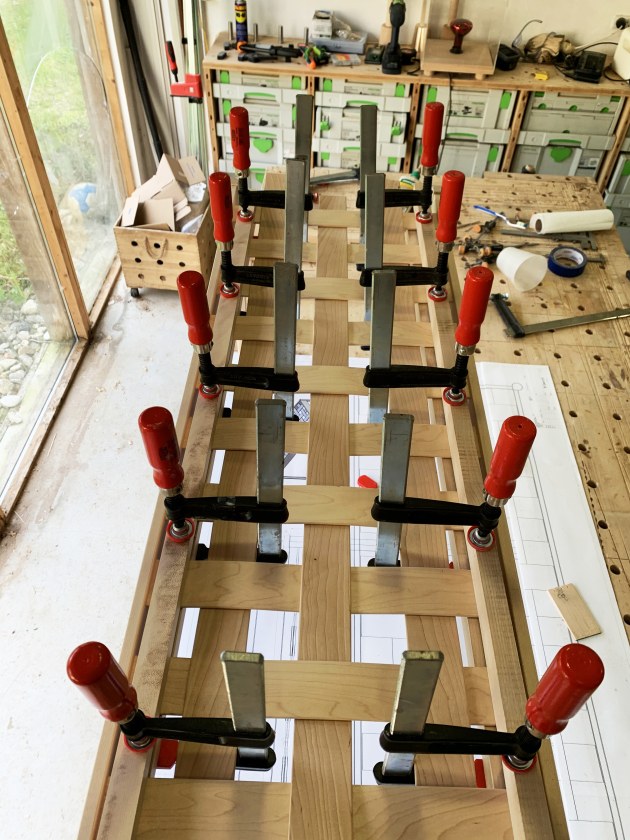
Photo 13. Right, glue-up! Nobody likes gluing up as it can get pretty stressful with the glue setting fast and so on. This glue-up is stressful at a whole different level. Trying to fit the ends into each rail at the same time as the dominos connecting the legs is very difficult. Trying to fit the woven ends which stick out in two different angles is impossible. My solution was to clamp down the woven top between a few bars forcing the ends to stick out in a straight angle.
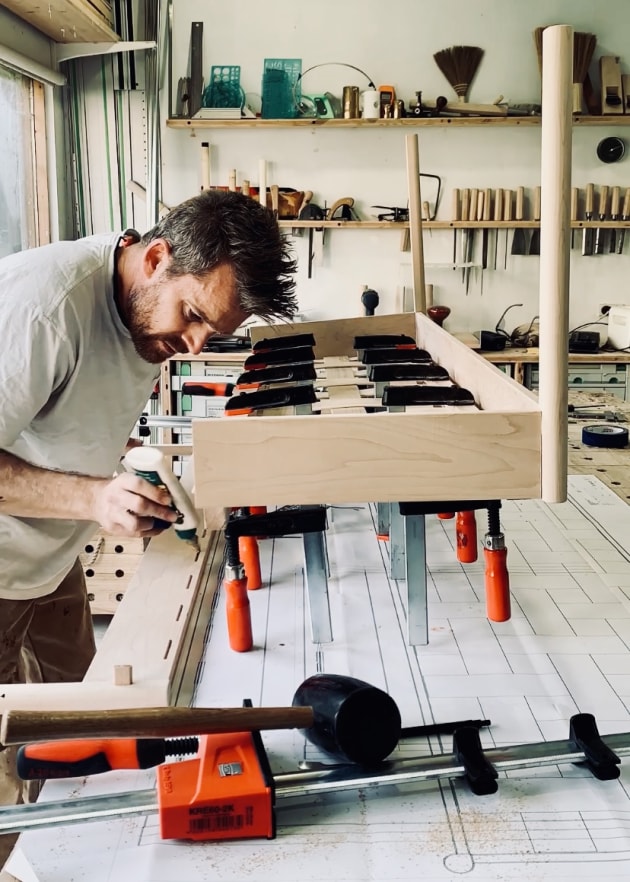
Photo 14. Even so it is not easy as the tension forces the legs out of line and you need to get those glued up at the same go. In other words: make sure to go to the bathroom, turn off your phone, put the kids to bed and have a coffee beforehand so nothing can distract you!

Photo 15. I use a toothbrush and water to clean up each joint for any excess glue. For a complicated glue up like this I always use too much glue to be sure of getting a good contact.
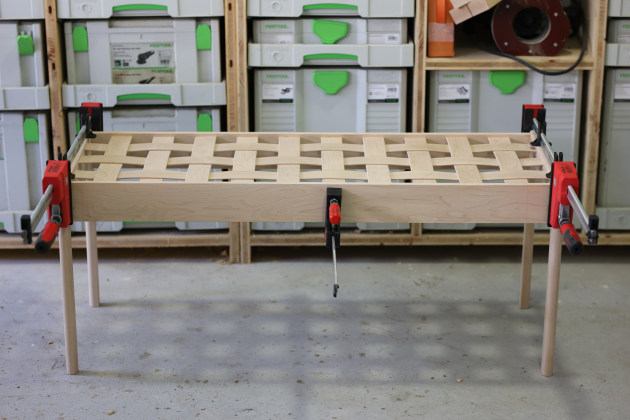
Photo 16. So here is the fun part. It’s probably the first time you’re ever going to remove the clamps before the glue sets. Well, most of them – the ones clamping the weaving flat have to be removed, as you need the slats to return to their natural position. They will always enter the slots slightly on an angle, and it’s better the glue sets at this angle otherwise you’ll put too much stress on the joint. You leave on the clamps holding the legs together as well as one in the middle to prevent the slats pushing the rails apart.

Photos 17, 18. I haven’t put this through any official testing and it probably wouldn’t pass today’s standards. It did however pass my daughter launching off it several times, as well as my two kids and me sitting on it at the same time. Anyhow this project wasn’t meant as a commercial product or in any way meant for mass production. Instead it was a challenge to see how thin I could go, as well as how far I could simplify the structure. After all, there are only three components: slat, leg and rail cut to length. Job done.
Danish born, Henrik Tjærby completed his MA in furniture and industrial design in 2002. During his education Henrik focused heavily on making processes and developed a particular passion for wood and both traditional and modern woodworking techniques. He has worked as a designer for a number of internationally renowned studios in Denmark, the UK, China, and Japan with projects for George Jensen, Tom Dixon, Fritz Hansen, Artek, Zara Home and Virgin Atlantic amongst others. Currently living in Northern Spain, Henrik has his own workshop in his back garden on the edge of a eucalyptus forest where he carries on working in local woods. At his request, Henrik’s authors fee was donated towards Australian bushfire relief. Design copyright Henrik Tjærby Contact via Instagram: @henriktjaerby and www.tjaerby.com