Making a square burl box

Words and process photos: David Barron
Diagram: Graham Sands
Studio photo: Jon Banfield
The starting point for this box was a nice chunk of red mallee burl which leant itself to a square lidded box which would make best use of the wood. The lack of grain direction found in burrs was also helpful in keeping the lid looking square in the finished box.


The burr panel was cut on the bandsaw using a carbide toothed blade which gave a very clean finish and cut this very hard wood with ease (photo 1).
The wood I chose to harmonise with the red mallee was a small piece of Cuban mahogany which I’d had for years. It wasn’t thick enough to re-saw and get all four corners matching, but the grain was straight and even so the fourth corner wasn’t a problem.

All the sides were cut on the tablesaw using my newly upgraded crosscut sled, fitted with the excellent Flipstop system (photo 2). Coloured dots were added to identify the matching parts, as well as showing which was the outside and which was the top. I’ve seen many methods of identifying parts but for me this remains the easiest and most foolproof.

Marking out for the dovetails needed to be done with care, remembering to add 2mm to the section where the lid was to be separated on the bandsaw. The dovetails were cut using a Japanese dovetail saw and my magnetic dovetail guide (photo 3) with a 1:6 angle (my favourite).

The resulting cuts were straight, at the same angle, but above all, dead square (photo 4).

With the waste cleaned out (photo 5) it was time to mark the pins. This is made a lot easier and more accurate with the use of a dovetail alignment board which clamps the pin board securely in the vice and allows the tail board to be moved until its position is just right for marking.

By lining up both parts against the fence it not only keeps things square, but ensure that grooves for the lid and base also line up (photo 6).

The grooves for the lid and base were cut on the shaper with a 4mm router bit; this was done in three passes
to a depth of 5mm (photo 7). For the stopped cuts on the tailboard, I again used the Flipstop system on my shaper fence to limit the travel of the cutter.

The fence is attached to the cast iron surface with a pair of large Magswitch featherboards. The rebates on the lid and base panel were cut with an angled cutter, designed by Christian Becksvoort (photo 8) and available from Lee Valley in Canada. If used accurately this gives a tight fitting panel whilst maintaining a nice even reveal and I’ve been using this on my lid panels for years.
The thickness of the top was cut so it was flush with the box sides giving a clean look. The base was made 3mm thicker than the top and therefore protruded beyond the box sides to give a subtle floating appearance. This extra thickness also added welcome weight to the base which helps with the stability of the box. The pins were cut using the other side of my magnetic dovetail guide and the whole thing was ready for glue up.

I like to get all the dovetails engaged before adding any glue, this checks the fit as well as speeding up the assembly before the glue starts to dry (photo 9).

I used the bandsaw to cut the lid off (photo 10), but this could just as easily be done on the tablesaw or router table.
It could also be done with a handsaw if your skills are up to it! Whichever method is used just allow the appropriate amount of waste when laying out your dovetails. Cleaning up the sawn surfaces dead flat is easily done on a planing board by working through the grits (photo 11).

The hinges I used were Neat Hinges made by Ian Hawthorne, they have a built-in stop at 95° and are easy to fit as long as they are done very accurately (Brusso also make these hinges). Stops need to be set in both directions to exactly 31.5 mm from the cutter tip and I set this with a spacer. I used an 8mm up spiral bit for a super clean finish and took great care as there wasn’t much waste left either side of the groove (photo 12).

It best to clean up and finish the back of the box before the hinges are finally fitted (photo 13), otherwise this could be awkward. The same applies to the inside surfaces where the lid was cut off. The other outside surfaces are best cleaned up after the hinges are fitted so they are perfectly flush. The top panel being flush with the sides is also easier to finish off, using a random orbital sander, after the box is assembled.

The next stage is to line the interior, which was done with padded pig suede and mitred inserts to give a soft close to the lid. First some 0.3mm card was cut to 1mm less than the interior base, to allow 0.5mm clearance on each edge for the suede to fold over. Some 3mm thick foam was cut on the bandsaw using a sharp blade (photo 14), this sounds as if it won’t work but it cuts surprisingly easily.
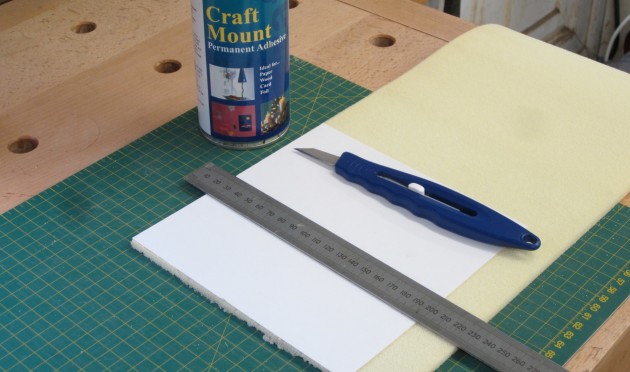
The foam was then glued to the card using permanent spray adhesive and trimmed flush (photo 15). A piece of nice pig suede was cut 20mm wider than the card all round and then good quality double-sided tape was applied to the back.

Each corner of the suede was cut (photo 16) to allow a neat fold over and the foam side of the card was carefully positioned onto the suede after removing the tape backing.

This gave a nice tight fit without buckling and could be left like that (photo 17), although I like to add a mitred wooden lining which gives the box a soft close to the lid.

These were cut to 3mm thick and the mitres carefully cut on the shooting board (photo 18).

The outside edges of the inserts need rounding over until the lid just closes without obstruction. If you’ve got it right the lid can be dropped closed without banging, giving a quality feel (photo 19).
The discrete fingerhold doesn’t clash with the square lines of the box and is made with a rasp and followed by sandpaper wrapped round a small cylinder. I kept the finger pull as small as possible to match the small proportions of the box. I find that burrs are best finished with a surface coating such as shellac — oils can leave a blotchy result and have a habit of seeping back out causing shiny spots, even days later.
My chosen finish was Melamine Lacquer which I rubbed on with a cloth and immediately wiped off with a clean
rag as it dries very quickly. Two coats of this followed by a gentle rub with a soft 600 grit pad, gave a soft and durable sheen.
Republished from Australian Wood Review, issue 88.
David Barron is a UK fine furniture and boxmaker, see www.davidbarronfurniture.co.uk