How to make a (stable) guitar stand

Words and photos: Liam Park
Like a lot of my workshop projects, this one didn’t start with a complete idea. It came about slowly, trying to find the right tool for the job.
I’d been playing guitar most of my life, and like most people I had one of those standard lightweight black metal stands sitting in the corner of the room. It did the job – however not that well. I found myself constantly stepping on the narrow legs which came up quite high, never being able to properly place it nicely in the corner of a room, or even just sitting the guitar down a bit off-centre and the whole thing felt like it was so lightly constructed that it might just tip.
It always struck me as odd. Guitars aren’t exactly cheap (for the most part) or indestructible, yet the thing holding them upright often feels like an afterthought. As a woodworker who loves designing things, that honestly drove me insane.
So a simple idea – “surely I can make something better than this” – quickly turned into a much more interesting design problem. Stability, it turns out, comes down to virtually one thing: understanding where most of the weight actually is.

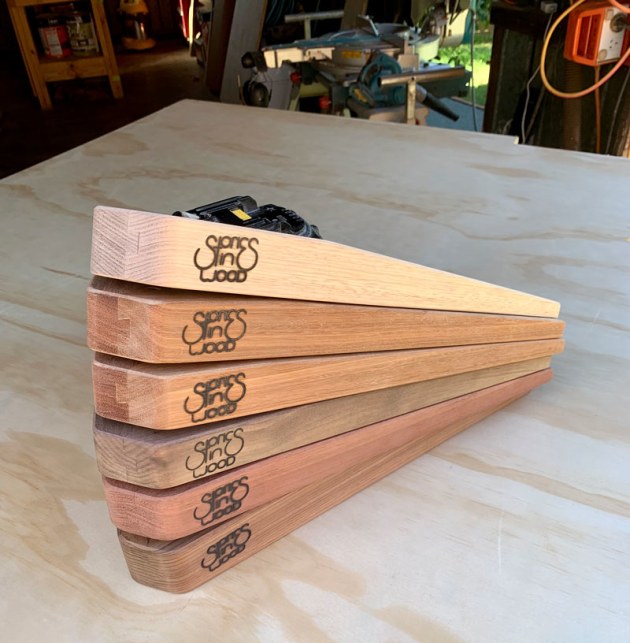
Amongst others, woods suitable for stands include (left to right): Blackbutt, American cherry, jarrah, Vic ash and spotted gum.
Understanding the centre of gravity
The first mistake I made was assuming a guitar behaves like a symmetrical object. It doesn’t. On most guitars, the bulk of the weight sits in the body, not the neck. That means the centre of gravity is relatively low, but also forward of where you might expect. If the support point doesn’t account for that, the instrument naturally wants to rotate or tip.
Early prototypes made this obvious pretty quickly. I built a simple upright stand with a narrow base and a rear support, thinking the guitar would sit neatly in place. It looked good, but it didn’t take much to upset it. A light bump from the side and the whole thing would rock. Not ideal when you’ve got your beloved guitar on board!
What I eventually realised was simple: if the centre of gravity moves outside the footprint of the base, the stand will tip. Everything else flows from that.
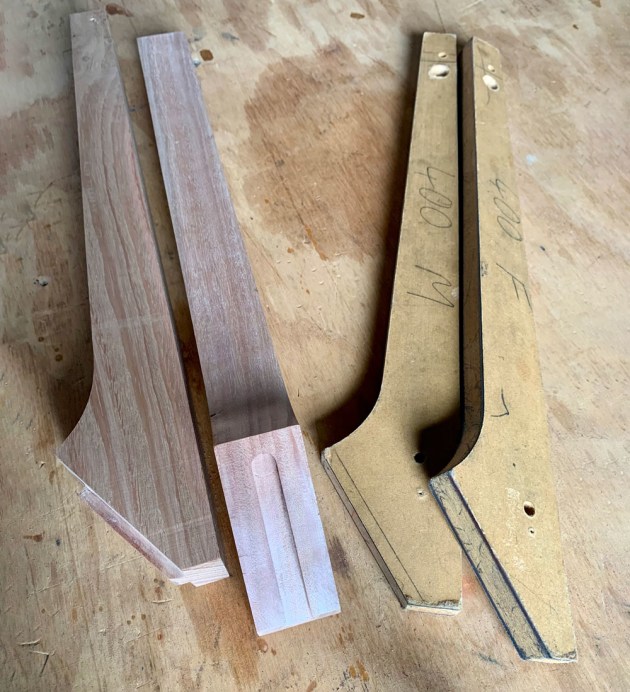
Templates used for cutting stand components
Widening the footprint
The most direct way, and the easiest to improve stability is to increase the base footprint. That doesn’t just mean making it bigger (which yet again, I figured out by about prototype #3) – it means making it bigger in the right direction. A guitar is far more likely to be knocked from the side than from directly front-on, so lateral stability matters most.
In practice, that meant widening the base across the front while keeping the overall form fairly compact. As simple as that may be, one of the main function/design criteria I had set myself was for the stand to sit nicely in the corner of a room and out of the way. This made it obvious that too wide of a base and things become awkward in a living space; and too narrow and you’re back where you started.
I went through a few variations adjusting the width and angle of the sliding dovetail by small increments, testing each one by deliberately bumping the stand from different angles with one of my less-loved guitars. It’s not particularly scientific, but it tells you what you need to know very quickly. Another less obvious consideration affecting stability are the floor coverings and/or condition of the floor in the room. If the floor is uneven or bumpy, then ultimately three points of contact are necessary for any form of stability, which is achieved by adding non-marring bumpers underneath the base.
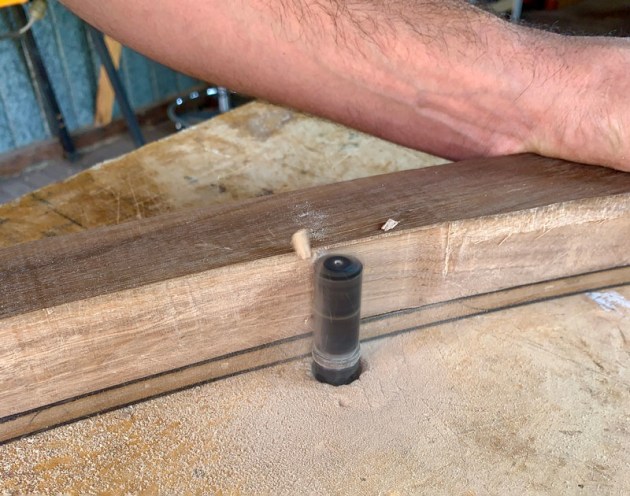
Flush trimming to achieve consistent and final dimensions
Lowering the centre of gravity
The next improvement came from lowering the stand’s own centre of gravity. A heavier base makes a noticeable difference. By concentrating mass down low – rather than in the upper supports – you create a more stable structure that resists tipping forces.
This is where material choice started to become necessary not just for form, but also function. Using a dense hardwood like spotted gum added weight without needing to make the stand bulky. It also allowed for slimmer sections up top, which I found helps keep the visual balance of the piece without looking out of proportion with a standard guitar.
This is a good example of how important material choices are when designing something which cannot afford to fail.
Base components pre-finished
Supporting the guitar properly
One thing I was conscious of from the beginning was avoiding unnecessary contact points. A lot of stands clamp or cradle the neck quite tightly, but that introduces its own issues – especially with different guitar shapes and finishes. I wanted something that would support the instrument securely without being restrictive.
The best solution I came up with was to let the body and neck-to-headstock transition do most of the work on its own. By designing a shaped lower support that the guitar naturally settles into, the instrument effectively locates itself. The upper section then acts more as a guide than a clamp, keeping the guitar upright without forcing it into position.
This approach also helps with stability. When the guitar sits naturally in the stand, there’s less chance of it being placed off-centre, which is often what leads to tipping in the first place.
Stability is about finding the centre of gravity as well as an optimum footprint.
Prototyping (and what went wrong)
There were plenty of small lessons (Who am I fooling? Mistakes!) along the way. Some early versions had bases that were technically wide enough but visually felt too heavy. Others looked great but didn’t quite hold up under a sideways bump. A few had contact points that seemed fine until you actually used them on a floor which was not flat, and quickly became too unstable to use.
One of the more useful habits I got into was just using each prototype for a while. Put it in the corner, use it properly, and see what annoys you after a few days. The issues that show up aren’t always the ones you notice in the workshop.
It’s also where you start to refine the small details – edge profiles, transitions, proportions – that don’t affect function directly but make a big difference to how the piece feels.
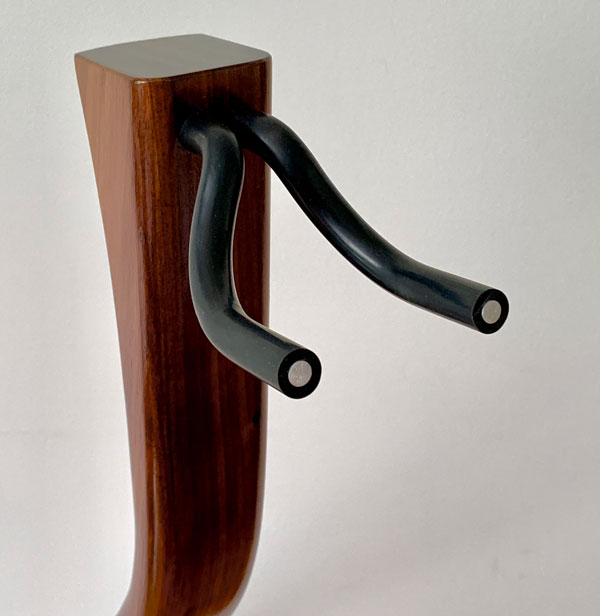
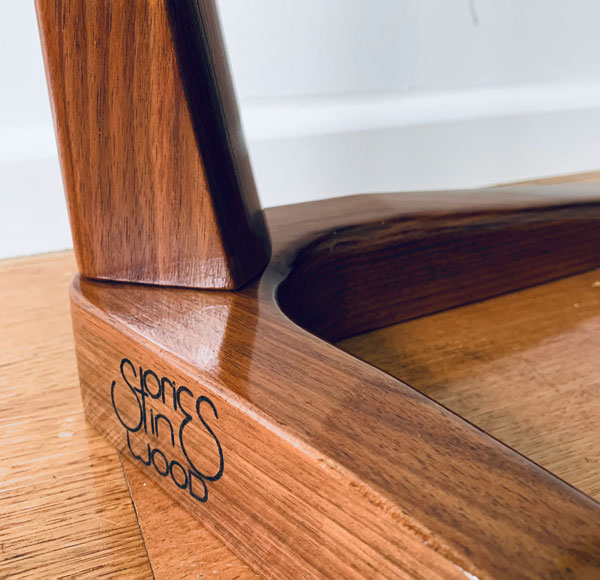
Detail of the hanger on a finished blackwood stand
Shaping and balance
Once I had the stand working the way it needed to, the focus shifted to refining the form. This is where woodworking becomes more than problem-solving. The stand needs to feel balanced visually as well as physically. Too much bulk in the base and it looks clumsy; too little and it feels fragile.
Subtle curves and tapering helped reduce visual weight without removing actual mass where it mattered. Softening edges also made the piece feel more considered, especially in a domestic setting where it’s as much a piece of furniture as it is a functional object. Sometimes sharp corners look great, but in reality end up dented if a piece is in high traffic or daily use.
Protecting the instrument
The final piece of the puzzle is protecting the guitar itself. Any contact point needs to be non-abrasive and soft. Hard timber against a finished instrument isn’t ideal, so adding a protective layer is essential. The key is to do it in a way that doesn’t look like an afterthought.
It’s a small detail, but it’s one of the first things people notice when they use the stand. Going back to the metal tube stand, the padding provided is always a cheap form of foam or even leather, which can be okay, but in cases where the guitars finish is a nitrocellulose lacquer these materials are notorious for slow damage over sustained contact.
The best material choice here was a high quality non-reactive silicone, which plays well with any finish from a 2k poly to a 1k lacquer.
A simple problem, finally solved
What started as a slightly frustrating piece of hardware (in fact, I had a few different brands of the black metal stands over the years) turned into a surprisingly rewarding design experience.
There’s nothing overly complex about a guitar stand, but getting it right means paying attention to weight distribution, balance, and how people actually use it in the real world. The centre-of-gravity problem sits at the heart of it, and once you understand that, the rest becomes a matter of refinement and personal touch.
It’s a good reminder that even simple objects can benefit from a bit of careful thinking – and that sometimes the best projects come from the things that quietly annoy you every day.
Liam Park makes and sells guitar stands in Melbourne from Stories in Wood, see storiesinwood.com.au