Gifted and given: a simple desk

Words and photos: Raf Nathan
Illustration: Graham Sands
For many years I have worked weekly at a clinic near Brisbane city. In the front meeting room there is a desk, a chain store special that holds a media box and some odds and ends. Over the past few years I have watched its decline. It grew wonky, the corner of the top was peeling, and some months earlier a drawer front fell out.
One day, as a furniture maker, I couldn’t take it anymore and decided to make a replacement – anything would be better. There is never money available so their budget was $100 as that would be the commercial replacement cost. That meant I was in effect shouting them, so it had to be made from wood already in stock.
Gifted wood
The wood used is Wau beech from New Guinea, Elmerrillia tsiampacca (L.) Dandy. It was given by the late Peter Eddowes, a forester and timber expert of international standing. According to Peter this particular wood came from the Wau river region in New Guinea, hence its name, although the beech part of the name he and colleagues decided on.
Wau beech is a softish hardwood that machines and carves well and has a gentle lustre and stripe. The wood was given to my wife and I as part of a trade and was also the only stock I had which fitted the budget.

The design
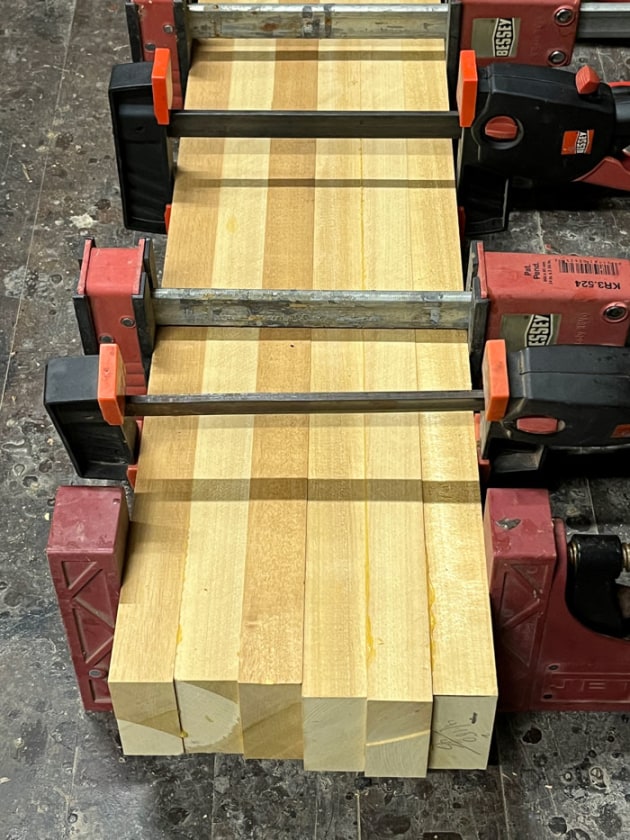
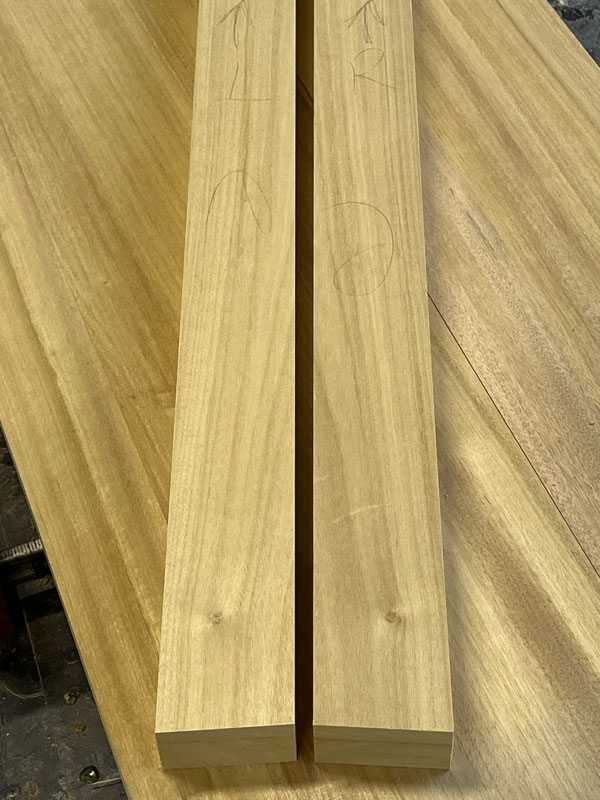
The feature is the angled legs. The wood I had was 38mm rough-sawn thickness which was laminated up to achieve the desired dimension needed for the legs. The beauty of this meant I could have a bookmatched outer face on the legs. Glue three pieces of wood together and rip this in the middle to achieve the bookmatched faces (photos 1, 2).
Whilst most people would never see this detail it gives a far better look to the piece. Given the rather plain grain of the wood, I was looking for any details to make it look more appealing.
Arranging the grain
I once saw a YouTube video by a Japanese maker in New York who said to always orient the wood the way it grew. For a table leg that means keeping the top of the tree uppermost for wood to be used vertically. Apparently this helps keep the wood joinery straight and true.
How to determine this though, unless you followed your wood from sawmill to workshop with it all labelled? What I do in this case is hold the legs lightly with two fingers and then flip the board and repeat, feeling for the heavier end. I figure the end that goes to the floor is the heaviest part of a tree trunk towards the base. You would have to do a controlled study to absolutely verify this, however it does make for a good story.
Square dress and prepare all wood to final dimensions, then saw to length. The main angle is 3° and was easily sawn on a mitre saw. Formerly 5° was my favourite angle for this sort of table but I now think 3° is better.
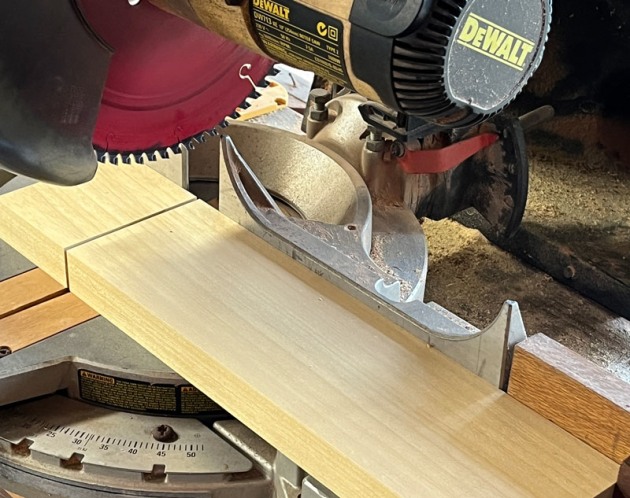
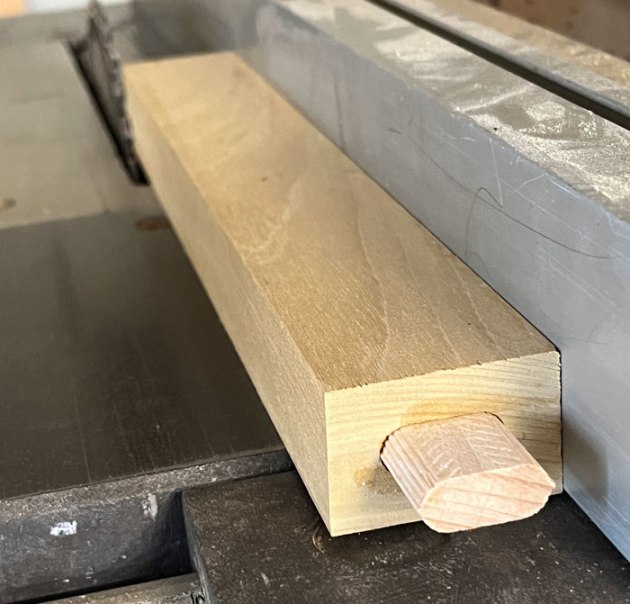
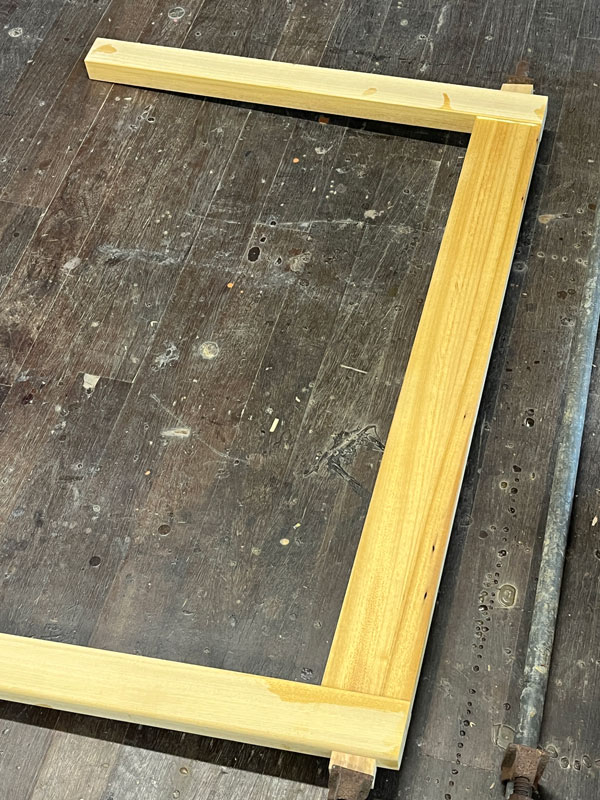
Keeping in mind to have the bookmatched faces of the legs facing the front, you can saw the angle at each end. The long rails are also sawn at 3° whilst the four side rails are 90° at the ends (photo 3).
The joinery
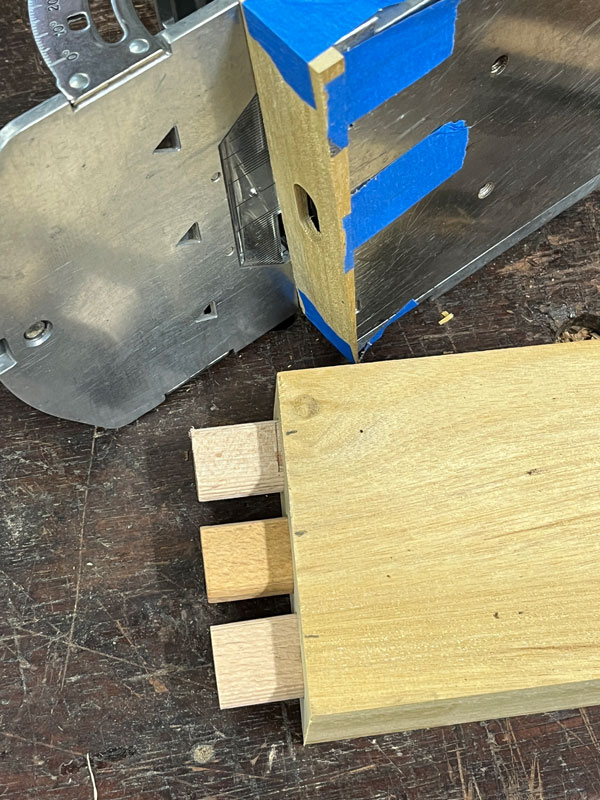
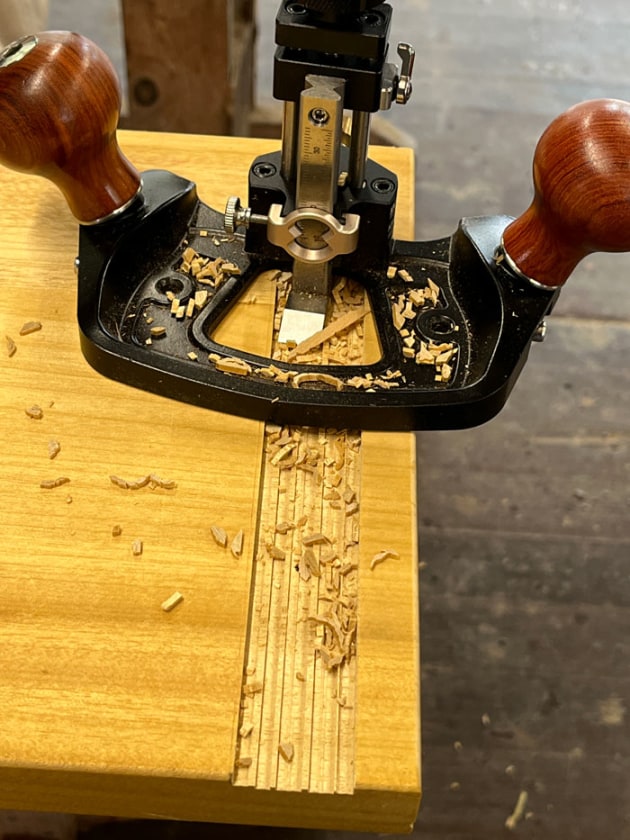
Floating mortise and tenons made with a domino tool are used here. You could make your mortises directly on the edges of the wood, but given the 3° angle, that would mean the tenons would be angled down. I don’t like that, so I am using a 3° angled shim on the domino face resulting in a horizontal mortise and tenon (photo 4).
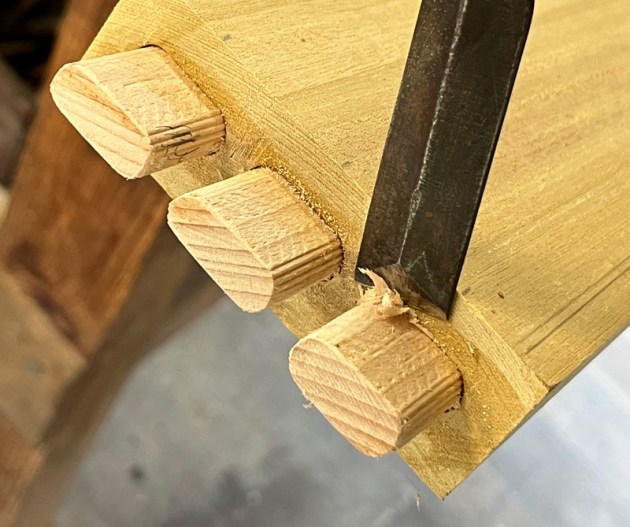
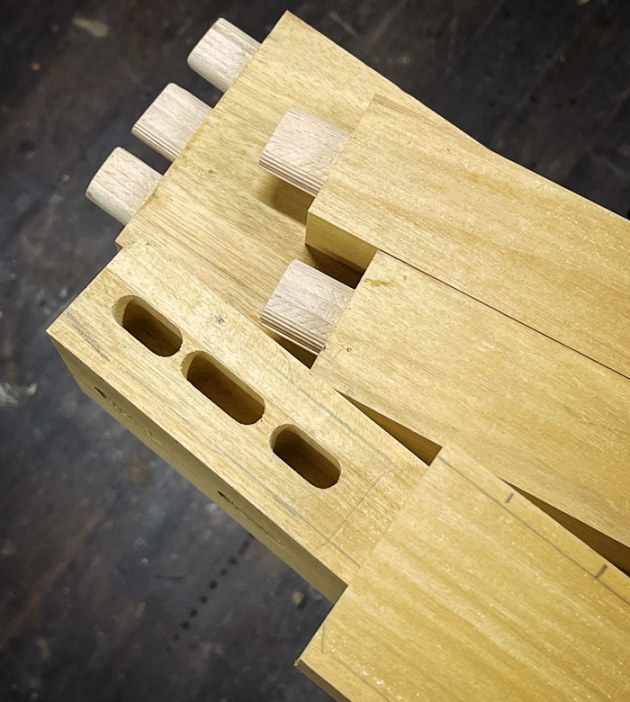
There are three tenons at each leg to rail joint on the front and back. The middle mortise was cut wider but the outer ones were left at the standard width so I needed to hand-fit each of these joints. The side rails use two tenons for the upper and one for the lower rails (photo 5).
The lower rails will support the shelf, so it is important to saw and plane the upper edge of these at 3°. This is so any shelf will sit flat on it (photo 6).
A dry test-fit is important. I hammer the tenon faces a bit to compress the wood so they will slide into the mortises. Applying glue at the later assembly will swell the hammered wood back up to original size. Getting the rails and leg ends lining up perfectly is one of the goals, as planing mismatched endgrain later is a pain.
Detailing and finishing the base

Sanding and detailing can be done now. All edges were given a small round-over whilst the outer edges of the legs were given a large round-over on the router table (photo 7).
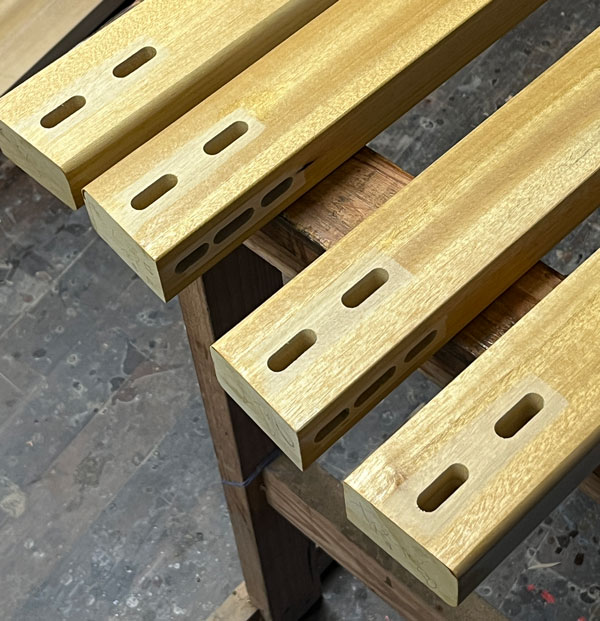
At this stage all the jointing is complete (photo 8).
Pre-finishing a piece prior to gluing up was previously only a dream goal to me in the past. By the time all the jointing and sanding was complete I would be itching to get it glued up. Cleaning up subsequent glue runs at the joints is however also a pain. Pre-finishing means excess glue can be peeled off later.
With the rails sanded and chamfered they were given one coat of hardwax oil, taking care not to let any oil get on the endgrain. The legs were sanded and pre-polished only on the joint faces as applying clamps and moving parts in assembly often leaves small dents. Final sanding and polishing of these areas is left till later (photo 9).
The legs and long rails are glued together first. Sight along the legs and make sure they are parallel when in the clamps (photo 10).
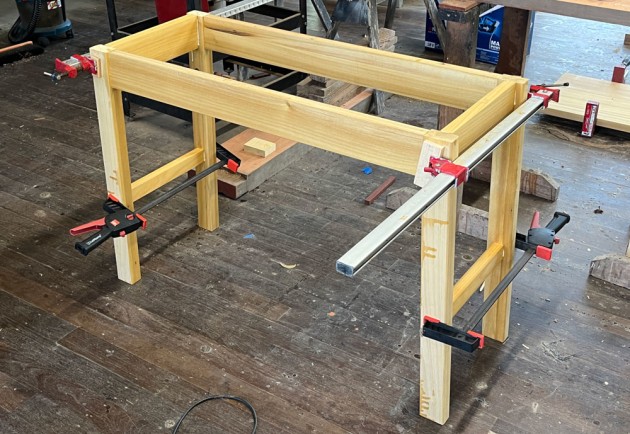
Glue all the side rails in place. The upper side rails will project a little on one long edge due to the angle of the legs. I plane this high point down later. Ensure the frame is square by measuring the diagonals, they need to be the same measurement (photo 11).
With the glue dry, plane the upper edges of the side rails level with the leg tops. Level any leg ends that are proud of the long rails.
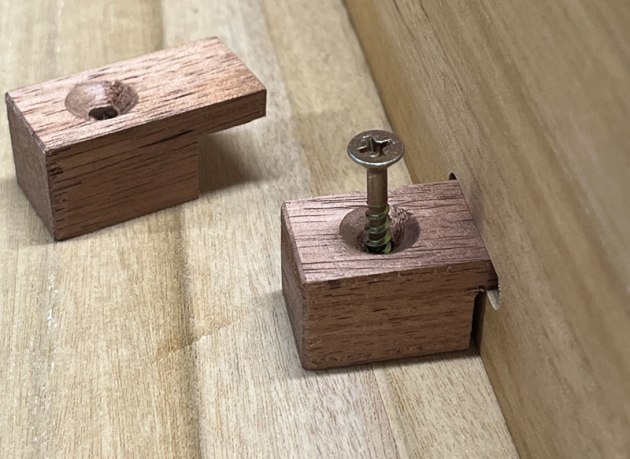
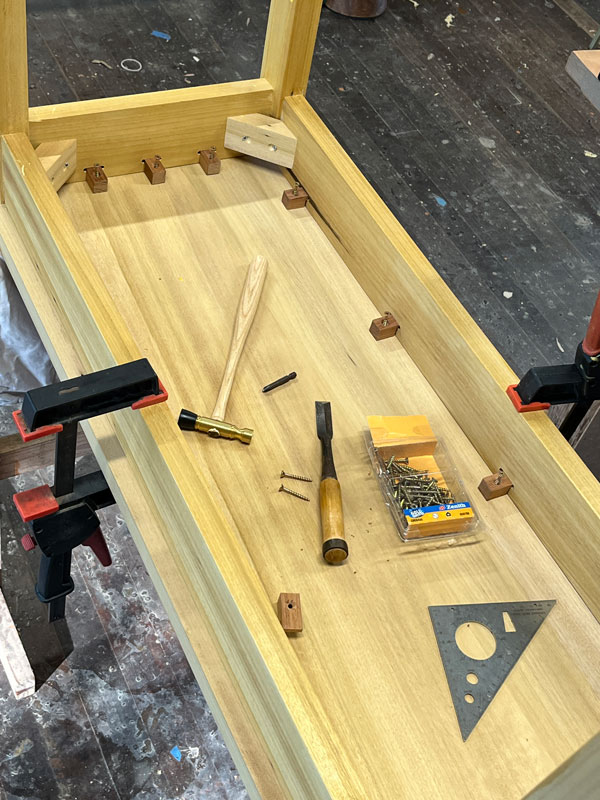
Cut the slots for the table buttons now. A domino tool was used for this. You can also now make and fit corner blocks. These help strengthen the corner joints and are glued and screwed in place.
Now is a good time to sand and detail the unpolished leg faces and detail all areas. The whole frame can then be given a coat of polish.
The top attaches with wood buttons to the frame. These need to be made and fitted (photo 12).
Making the top and shelf
The top is glued from three boards to make up the desired width. With the glue dry, the top is sanded flat to 120 grit then sawn to length with a 10° undercut. The underneath of the top is fine sanded and given a thick coat of polish and left to dry, then fitted to the frame. The top is then fine sanded in preparation for later polishing (photo 13).

The shelf is 240mm wide and 28mm thick. It is secured to the lower rails with three screws at each end. The screws are spread over 110mm so that the outer sides can move with humidity changes. The shelf sits on the rails in a 5mm deep housing made with the tablesaw followed up with a router plane to clean it up (photos 14, 15).
Polishing time sees two coats of hardwax oil given to the legs and four to the top. After a few days, the whole piece was given a soft wax and buff.
Raf Nathan @treeman777 is Brisbane based furniture designer maker and long-time contributor to Australian Wood Review.