Designing With Mock-ups

Words and photos: Martin Jones
The artistry of furniture making is the ability to conceive an idea, nurture it and develop it over time in order to ultimately produce the most resolved and aesthetically pleasing piece that you can possibly make.
A simple way of achieving this goal is through the use of scale models otherwise known as mock-ups. Investing the time in creating a mock-up to explore and refine a design will save you time and money, improve your making efficiency and help you to create a beautifully resolved piece of furniture.
Transforming ideas into reality
So you have an idea for a piece of furniture that you would like to make. The idea could be in the form of a memory, a sketch or a computer assisted design. You have a general sense of the size and materials that you would like to use for your final piece however it is very difficult to imagine the final piece and how individual components relate to one another. Essentially you’re estimating measurements, angles and proportions and ‘hoping’ that they will all combine well to form a beautiful piece.
Begin the mock-up exercise by coming up with all sorts of ideas as you would a brainstorming session. This means that there is nothing bad or too crazy to consider. The aim is to create several mock-ups that can be built quickly and cheaply. Create multiple small scale versions, pushing the design each time even to the point where it might seem ridiculous. This allows you to explore, resolve and refine all the elements of the design in a relatively short period of time.
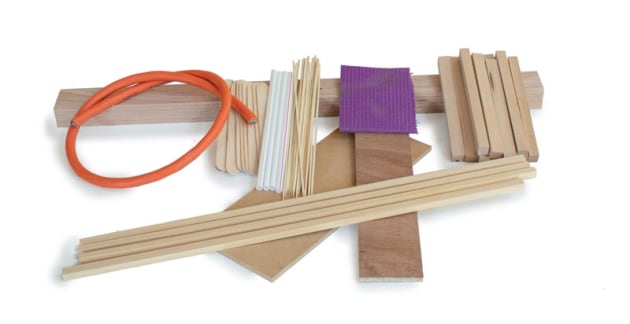
Materials like these can be used to build small scale mock-ups.
Start small by using a scale of 1:4 or 1:10 depending on the size of the piece. For instance, a hall table measuring 1400 x 400 x 800mm high easily translates to 1:4, 350 x 100 x 200mm high. To obtain the correct perspective it is important to accurately replicate the dimensions of the various components and their position in relation to one another.
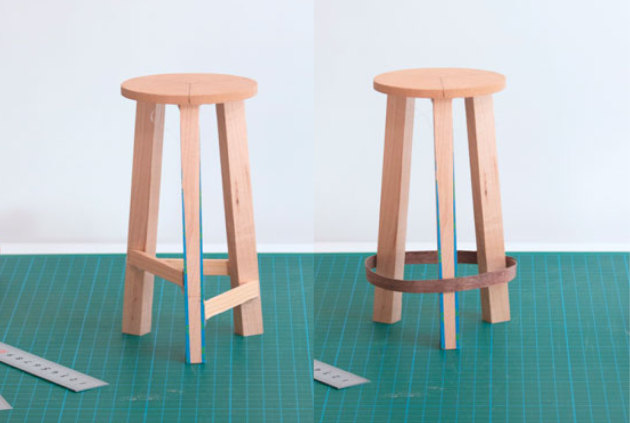
Experimenting with the rail positions in 1:4 scale.
Viewing your design in mock-up can help you answer questions which are essential to refine and resolve the design. Questions such as: are the components too heavy, light, big, small, long, short, square or round? Are the proportions okay? Are the angles pleasing to the eye?
Once you’re content with a small scale mock-up it is time to make an accurate full scale 1:1 mock-up using cheap and available materials and spend some time experimenting and shaping the various components. Ask yourself the same questions again and adjust your design as you see fit.
Model material
Be creative and use various materials, such as sheet polystyrene, MDF or ply to mock up cabinet doors and drawers. Paddle pop sticks or cardboard can be used for door handles. Foam and cardboard can easily replicate curves, whilst construction grade pine can be used for just about everything else. Be resourceful, scour your home and workshop and grab whatever is handy.
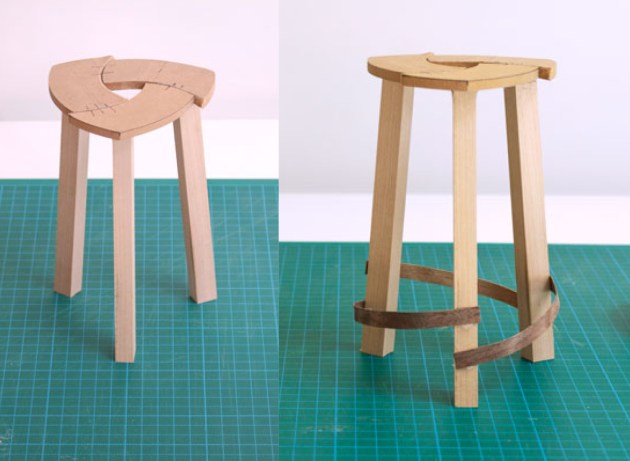
Experimenting with alternative seat and rail designs.
Grab a gun
Don’t worry about cutting any joinery, by far the most convenient tool for constructing your mock-up is a hot glue gun; they are inexpensive, readily available and easy to use. The glue drying time takes only a few seconds so you can construct a mock-up within minutes.
Remelting the glue using a heat gun or even cutting through parts with a knife will allow you to simply remove or
reposition a component for your evolving design. Once you’re constructing full scale mock-ups you might need a battery drill and a few screws.
Shaping components adds a huge amount of character to a piece of furniture. You might like to taper
a leg, curve an armrest, round an edge or reduce the visual weight of a component. While you’re still mocking up and exploring the design it’s best not to remove actual material from the model as this is irreversible. Instead use tape or black marker to simulate the removal of material and only once satisfied should you actually remove the material. I suggest using tape to begin as it is easy to play with.

5. Full scale mock-up using tape to shape the legs.
Assess and review
Take lots of photos as you develop your mock-ups – they are great reference points to the evolution of your design and become a precious resource for potential new ideas. Every now and then you can push a design too far, take it to a place it didn’t need to go and by referring to the photos you can address where you went wrong.
Once you’ve designed a piece and you’re satisfied with the full scale mock-up reflect on it for a few days, a few weeks or even a few months. Once you have a full size 3D model to consider you’ll be surprised how much a design can evolve given some time, revisiting things like size, shape, visual weight or the position of a component.

From sketch to 1:4 scale to 1:1 scale mock-up.
Presenting small scale mock-ups to a customer is a great way to communicate and can avoid potential misunderstandings on a design; it also helps the customer understand the dimensions and feel of a piece.
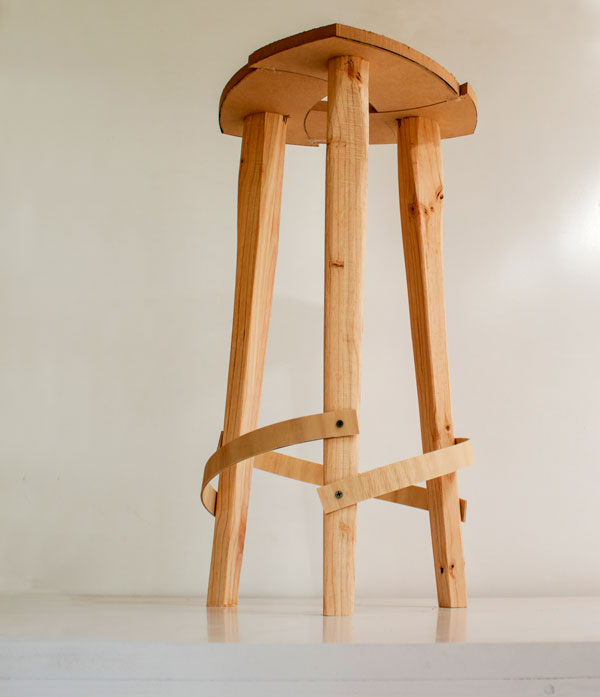
The full scale model which can be used for further design development.
When it comes to actually making the piece you can collect so much data from a mock-up, angles, dimensions, proposed joinery methods, references for potential jigs and other factors that will assist you to make a beautiful piece of furniture.
Martin Jones is a bespoke furniture maker based in the Southern Highlands of NSW. Learn more at www.joneswoodstudio.com.au