Boxmaking: Close-up and critical

Main: Making small boxes can use less material, but take more time than larger scale work.
Words and photos: Raf Nathan
Illustration: Graham Sands
‘Respect, that’s what I have for boxmakers.’ Those words were how I started an article for this magazine many years ago after completing three lidded boxes. After recently making a batch of 17 small boxes that original statement still holds today!
So much work and detailing goes into a small object, in some ways as much work as we would put into a dining table in fact. If you observe people viewing small boxes you will note they always tend to look for any faults, finding things that are not perfect. It’s almost like a game, where people will hold an object up and say, ‘Ah-ha! There’s a tiny gap there’. But the twist is that dining tables sell for a lot more money…
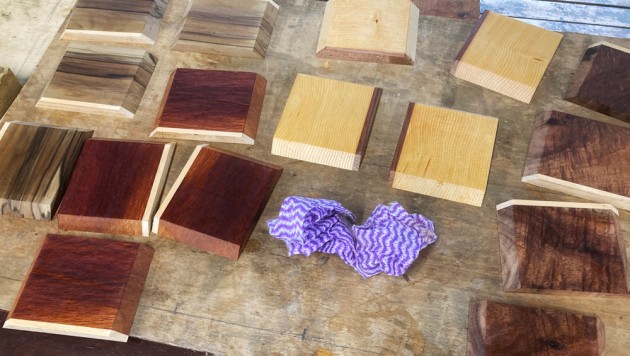
These boxes are a very efficient way to use up short pieces of wood. Anything at least 450mm long can be used, although figured wood is preferable. There are a few basic design themes that can be used for the boxes. Here I’ve used differing combinations of contrasting woods for the edgings, mitre keys, bases and lids.
I saw making these boxes as a good exercise in small batch production. In fact I split the making into two batches, the first to set the style and work out processes to speed up the making. As a professional maker trying to build something to fit a pre-determined retail price, working fast is critical. My father ran a smash repair shop for 50 years and always said that in his field there was nothing worse than a slow tradesperson. On the other hand though, my uncle, who worked in the same panel shop, used to say, ‘sometimes the slower you go, the faster you go’.
So after the first batch I felt that I could get a good pace happening for the second batch. Alas, these are a time-consuming pieces, mostly because there are so many individual processes, and the small scale of work dictates precision at each step with wood selection very important. And as said, the smaller the object the more critical the buying public are.

Bookmatching box sides
Using one piece of wood for the sides will allow for reasonable grain matching at the mitre corners. However for a superior grain match you would need to use bookmatched sides.
To do this, rip a single piece of wood, say 80mm wide and 30mm thick. Ripping this in half will give you two bookmatched faces. Use these faces on the outside of the box and simply mitre and join the matching faces, this way the grain will flow seamlessly around the mitre.
Construction processes
These boxes are around 92mm wide and 80mm high. I make the box then cut grooves for the mitre keys and fit them. The base goes on next, followed by the fitting of the lid, and lastly polishing.

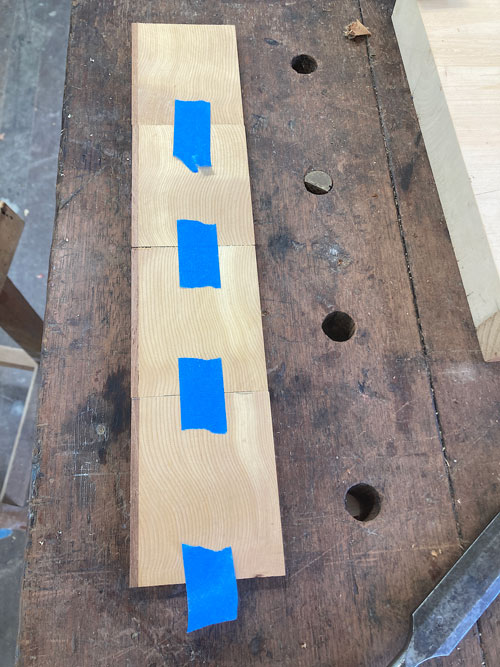
The four sides have a contrasting strip of 5mm thick wood glued to the top edge. Usually I plane one face and edge of the sides flat and then glue the strip on using small clamps or often tape (photo 1). It’s pretty wasteful to be using so much tape and throwing it away so I’m experimenting with using rubber bands instead. After the glue is properly dry, the sides are re-machined to final dimensions, 10mm in thickness and 79mm wide.
Mitring small sections
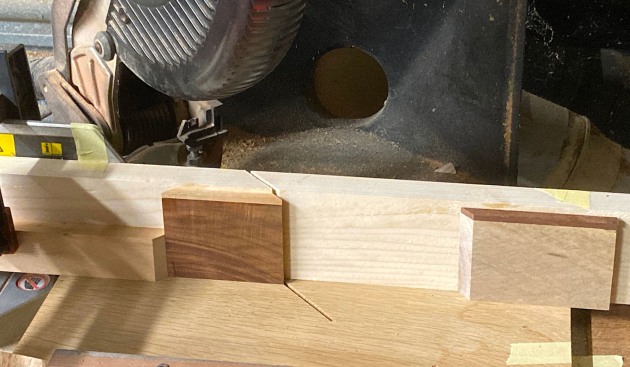
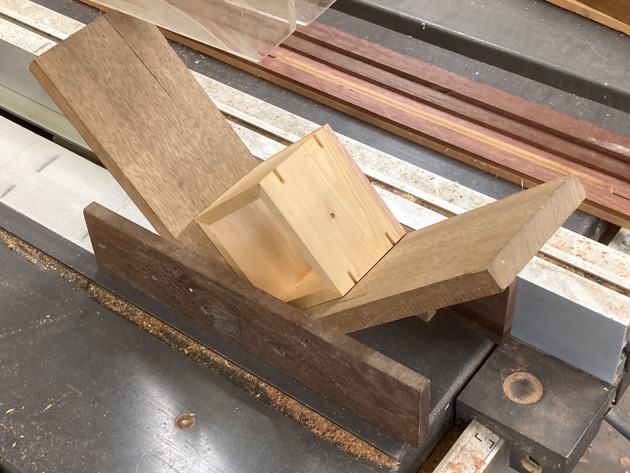
The mitres can be sawn now. Given the pieces of wood are so small and fiddly I made a sub-fence for extra support on the mitre saw (photo 2).
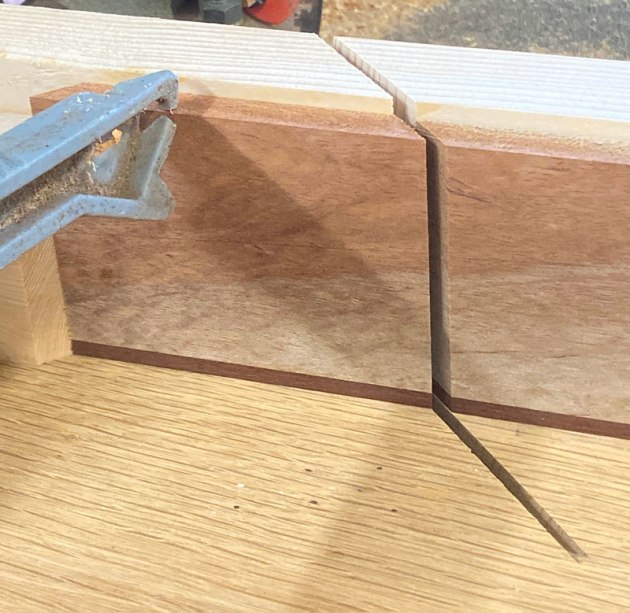
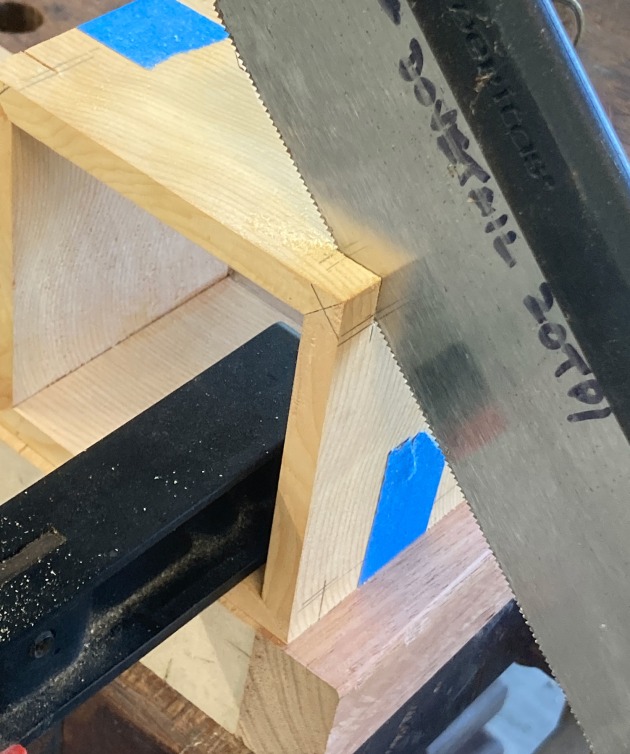
The first saw cut is straightforward, but the second cut on a 90mm long piece of wood is tricky. If the wood grabs, which it wants to, it is dangerous. So for securing the piece of wood whilst sawing I first tried clamping it to the fence, but settled on holding it down with a long push-stick with good results (photo 3).
Pre-finishing
Sand and polish the inside faces now (photo 4). Later on it is too hard to do that, as there is not much space to get your fingers inside, let alone try to sand. Plus this way, glue squeeze-out inside the box will peel off after assembly.
Assembly
Lay the four sides out, matching the grain as best you can on the outer faces (photo 5). Stand the pieces on edge and check the mitres, using a block plane to tune the joint as needed.
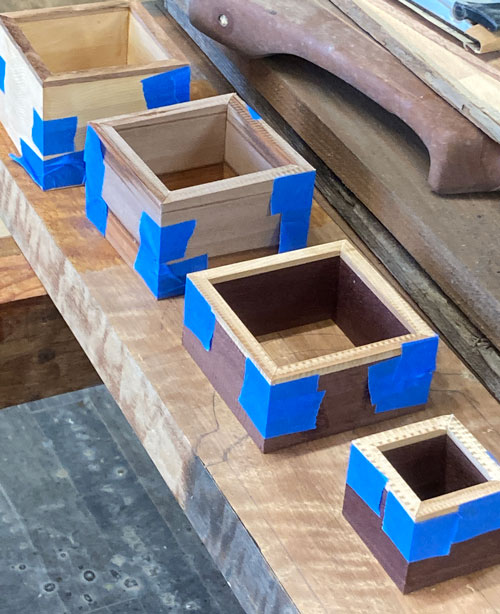
Stick blue tape at the meeting edges then flip the assembly over. Apply glue to the mitre faces – not too much, or too little. Fold the assembly over and bring the mitres together. Stretching the tape will bring the joins together for hopefully a seamless corner (photo 6).
Leave the glue to dry and cure overnight. The tape can be removed next and the box next prepared for the mitre keys. These reinforce the joint and add a decorative touch. The glue bond on the mitre is fairly strong but not reliable. Treat it carefully when sawing the key slots.
Adding the mitre keys
The box sits in a jig or cradle that is pushed along the tablesaw fence (photo 7). The tablesaw blade protrudes enough to make a slot about 10mm deep.

The keys give strength to the corner by adding more edge-to-edge glue surface. The keys are sized to fit the slot sawn on the tablesaw (3mm wide in this case), and they need to be a correct fit. Too loose is useless, whilst a little too tight can be fixed by hammering the keys to compress the grain. Apply glue and slide in the key, a bit of rubbing will help the glue grab (photo 8).
Another way to fit keys if you don’t have a tablesaw is to use a handsaw and saw a slot (photo 9).

I used thick blackwood veneer for the keys in the Huon pine box sides in photo 10.
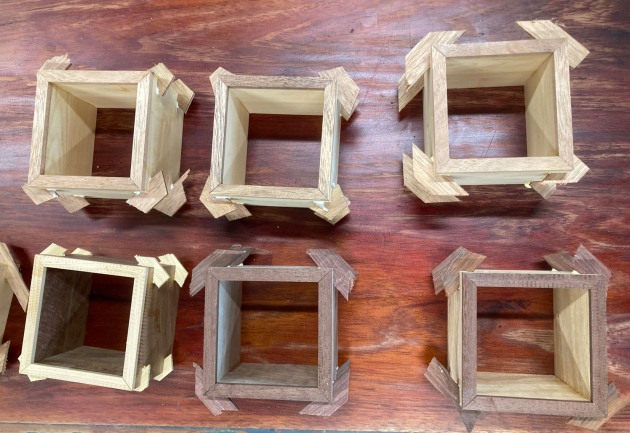
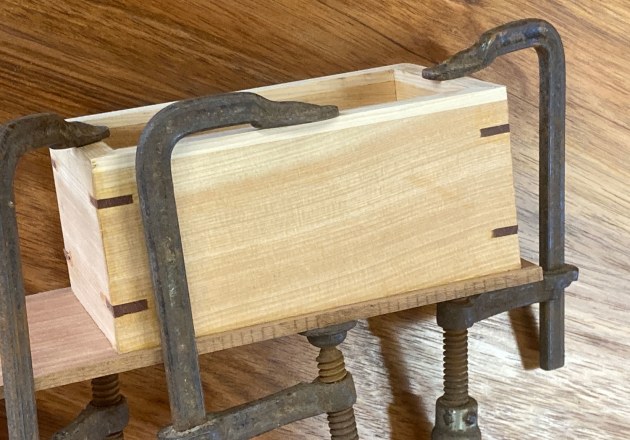
After gluing in the mitre keys, put the boxes aside to dry (photo 11).
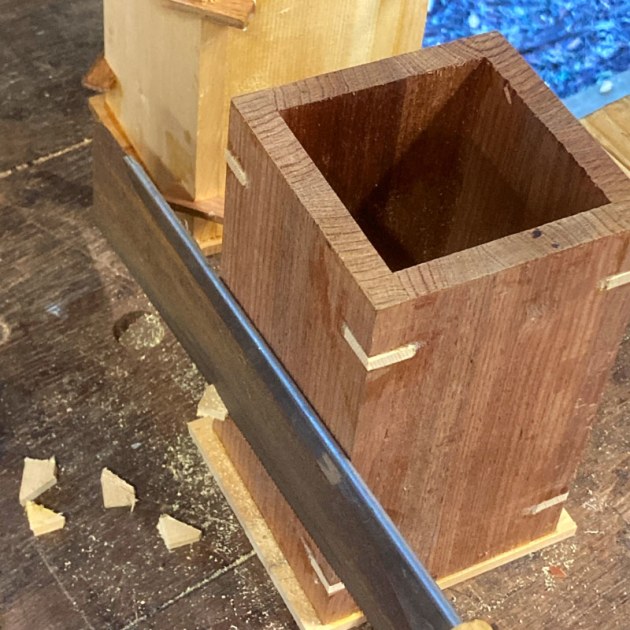
The protruding parts of the keys need to be sawn flush now. It’s important to saw towards the centre of the box to avoid tearing out the short grain at the corner. There are flush cut saws available, but I used a Japanese saw with good results (photo 12). I also tried sawing the protruding keys with the mitre saw, but found it was safer and almost as quick to just use a handsaw for this.
Fitting the base
The base was glued on next (photo 13). This is solid wood, 5mm thick. Given the small sizes of the components used there is not really an issue with wood movement. When the glue is dry the base needs to be flushed off to the sides. A handsaw is a good choice for this.
The sides of the boxes are sanded smooth now, as is the top edge and base.
Lids and pulls
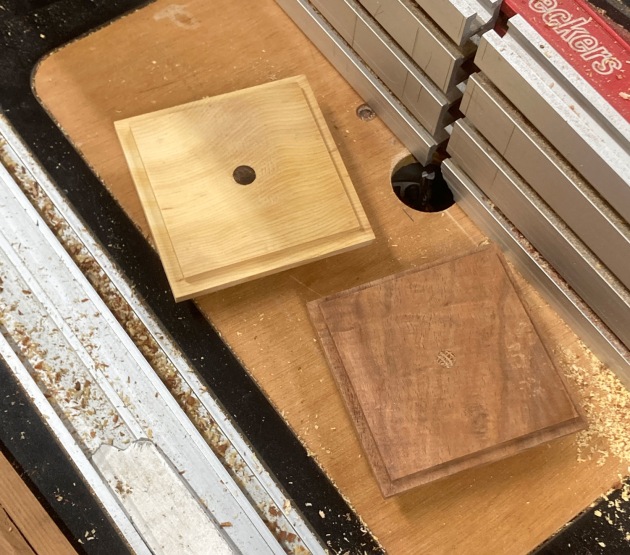
The lids here are solid wood with a small rebate to enable them to seal the box (photo 14). The rebate was made on the router table, taking small passes until the desired size is reached. Each lid was hand fitted with a shoulder plane to its box.
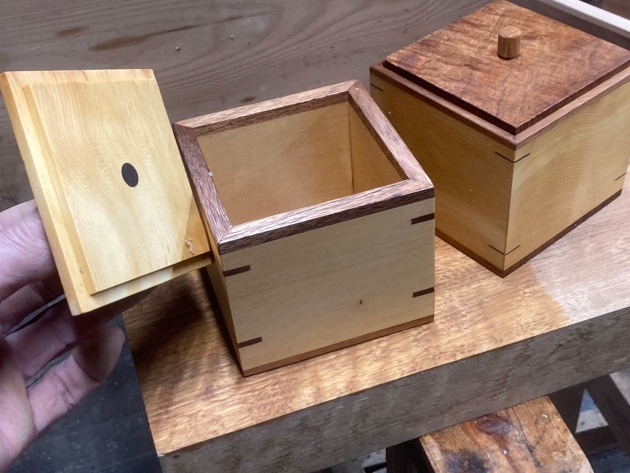
The pulls are small pieces of dowel glued into the lid (photo 15). I used Miller dowels for these as they are a stepped dowel. You can make your own handles of course with dowel, twigs, a custom carving, or even a small brass knob.
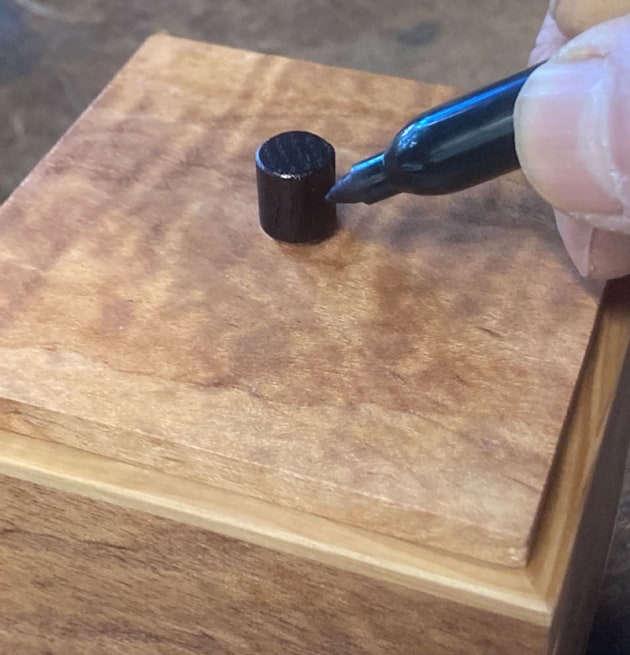
I tried to have my pulls in a contrasting colour to match the keys, and also chose to blacken some. There are many ways to colour wood black with store bought stains, or your own custom brewed ebonising mix made from black tea, vinegar and steel wool. I just used a black felt pen with very good results (photo 16).
The lid and box can now be final polished. In this case a hardwax oil with a final buff of carnauba based wax gave a smooth surface that wasn’t too shiny.
Raf Nathan @treeman777 is a wood designer and maker who lives near Brisbane. He also offers woodworking classes from his studio email rafinathan@hotmail.com for information.