6 Tips for Better Glue-Ups
Words and photos: Charles Mak
For some furniture projects, how well the final assembly or glue-up goes according to plan could determine their fate of success or ruin. Some glue-ups are more challenging than others, but seasoned woodworkers always approach each assembly with a great deal of care because they know from experience that some glue-up blunders are too costly to fix.

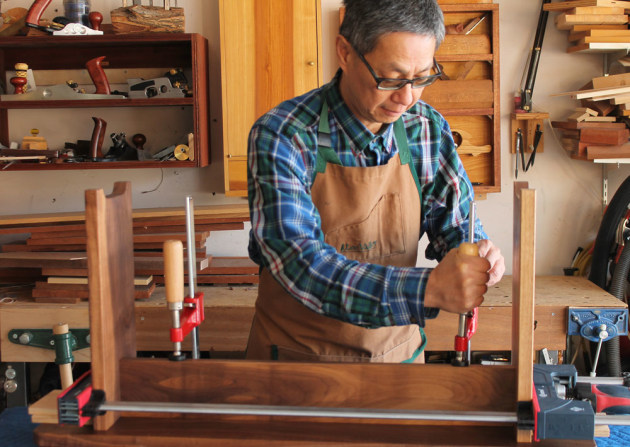
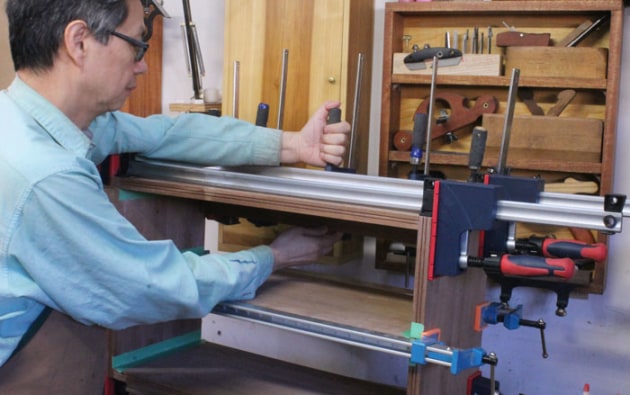
1. Angled cauls are the answer to clamping oddly-shaped joints or parts.

2. The final shelf is glued up from two sub-assemblies.
Dry-fitting, as we all know, is indispensable in each assembly job. In a complex glue-up like the speech bubble shelves shown in photos 1 and 2 that included dovetails and angled joinery, I would go as far as drawing up and testing the order of dry-fitting before the final glue-up. If you tend to overstress with your glue-up tasks, I have some favourite glue-up tricks to share with you.
1. Laminating boards
To make a thicker stock, we often glue two or more pieces together. However, when two boards are applied with glue and clamped together, they tend to shift, bringing the pieces out of alignment.

3. The sand bites into the wood, preventing the mating pieces from slipping during clamping.
One simple solution is to place a few grains of coarse sand or salt on one of the mating surfaces and press them together in alignment before clamping. The sand or salt particles will bite in and prevent the boards from moving when clamping pressure is applied (photo 3).
2. Gluing up panels
My foolproof approach to panel glue-ups is multi-pronged. First, ensure the surface you’re gluing your assembly on is flat, as a warped surface can transfer that warp onto your glue-up. Second, try to use similar types of clamps, thus keeping any unequal clamping pressure to a minimum. Lastly, break down a wide panel into sub-panels, gluing up two or three boards at a time. Once the sub-panels are cured, glue them up to form the final panel.

4. Notched blocks clamped over the gluelines along the ends help keep the boards flush and flat.
To edge glue two boards together, I use regular clamps with notched glue blocks like the ones shown in photo 4 to ensure flatness. The notched glue blocks of varying lengths can be easily drilled in batches on the drill press and then ripped in half.

5. This wide panel for a tabletop is made of two sub-panels, each of which, in turn, is two boards joined together.
When joining, alternate the clamps over and under the workpiece to balance the clamping pressure (photo 5). Check for flatness and for any wind while the glue-up can still be adjusted. Finally, make sure you do not move the assembly right away, or lean it against a wall which could lead to warping. I prefer to let a clamped glue-up sit on a flat surface for no less than half an hour before removing the glue squeeze-out.
3. Gluing up dovetail joints
Many traditional woodworkers are taught to hand cut their through dovetails with the pins slightly proud. Custom clamping cauls are then needed to press the tail boards tight to the pin boards. I layout and cut dovetails using the method advocated by Ian Kirby, a British-trained furniture designer and teacher. His method dispenses with the use of clamping cauls for the dovetail glue-up.

6. The tail boards sit proud of the ends and therefore can be clamped directly to the pin boards.
Kirby’s approach is to cut the joint such that the tail board sits slightly above the ends of the pin board. With no protruding ends, you can clamp the joints with just regular clamps (photo 6).

7. Stop planing or sanding the tail board as soon as its surface is flush with the endgrain.
Once cured, simply remove the clamps and sand or plane all the surfaces flush (photo 7).
4. Squaring up a carcase assembly

8. The rectangular panel back pulls the cabinet square and also keeps it from racking.
To help assemble a carcase such as a cabinet dead square, I use what I call ‘the back-panel trick’. The technique starts with carefully dry-fitting a carcase square, a task that is usually more stressful to do once glue is applied. Then take the time to size and cut a panel to fit exactly the back of the dry-fitted carcase (photo 8).
This method ensures that during the final glue-up, the carcase is clamped tight and pulled square with the back panel in place. You can use this squaring trick even if you have floating panels as the back: you square up the carcase with a sacrificial plywood panel back and once cured, replace the plywood back with the floating panels.
5. Handling glue squeeze-out

9. I turned a broken-down block plane into a chisel plane for glue clean-up.
Another common gluing trouble is the removal of glue squeeze-out. Glue residue can ruin a meticulously applied finish. My usual way is to apply the glue and wait until the squeeze-out turns rubbery. I then peel off the squeeze-out with a sharp edge (photo 9).

10. To avoid smearing, never use the part of a rag that already has glue on it.
I also use the wipe-with-a-wet-rag method. As always, don’t apply too much glue, leaving only a thin bead of squeeze- out along the length of the joint. Wipe off a glue spot with the part of the rag that does not already have any glue on it (photo 10). Expose a fresh part of the rag to wipe off the next glue squeeze-out and keep the same procedure until the glueline is cleaned.
11. During the dry run, apply the tape to the joint and slit it with a sharp knife. Then disassemble the piece and apply the glue as usual.
In some cases, I apply tape at the edge of the joint so the excess glue will go on the tape. I can then peel off the tape after wiping off the glue squeeze-out on the tape with a rag (photo 11).
6. Using a forgiving glue
Did you ever wish that you could recover effortlessly from a glue-up blunder with the push of an ‘undo’ button? Well, reversible glues – such as hide glue or liquid hide glue – do exist and are the closest version of an ‘undo’ button for woodworkers. For tricky or ‘one-shot’ glue-up deals, the slow-setting liquid hide glue is usually my adhesive of choice.

12. One corner was not properly clamped, leaving a visible gap in the joint.

13. Using water and heat, I loosened the joint and applied new glue before re-clamping the joint.
Not only does it offer a long open time of 30 minutes, it is also reversible with heat and moisture (photos 12, 13). Its squeeze-out can also be easily removed with a damp rag.
On occasion, the best assembly tip is to get someone to help you in a glue-up. At other times, these proven tips are the next best thing to having an extra pair of hands – to help keep your blood pressure from spiking!
Charles Mak enjoys writing articles, authoring tricks of the trade, teaching workshops, and woodworking in his shop. In issue 102 of Australian Wood Review he describes techniques for jointing, resawing and relicating on the tablesaw.