The measure of things

Above: A selection of tape measures illustrates some of the variations in measurement display.
Words: Raf Nathan
Photos: Raf Nathan, Rebecca Nathan
If I can’t find my tape measure and pencil then in an instant everything in the workshop comes to a grinding halt. We underestimate how important these humble tools are. More so the pencil; pause to think – without the pencil in most ways you can’t even begin to work. Combine a pencil with a tape measure and you can draw, write, measure and ultimately be accurate.
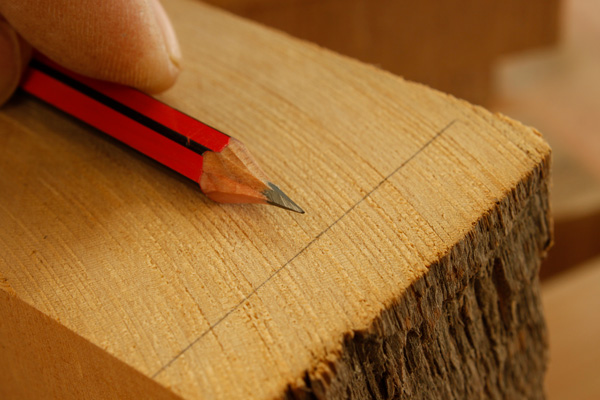
1. Keep your pencil sharp if you want to layout accurately.
Everyone will have preferences on what sort of pencil to use and how to sharpen it. Personally I use an HB pencil and sharpen it with a chisel. I never use those broad tip carpenters pencils. You may prefer a pencil sharpener or rub the tip on
sandpaper to form the point.
Mostly, the finer the point the better, and of course remember that when we work we always leave the pencil line. If you saw the pencil line away then you have lost your reference mark. A knife line is even better to work to for greater accuracy.
Class distinctions
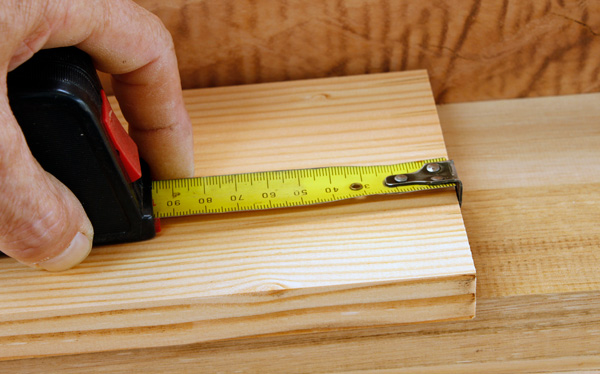
Tape measures come in a variety of styles. Note that different tape manufacturers will have different ways of displaying the measurements. In the end though all are pretty much the same in their use, you may just prefer one style over the others. And of course buying really cheap can be a complete waste of money.

2. Two different manufacturers show how ruler markings can considerably vary.
Fortunately there is a Euro standard for tape measures. There are three grades rated by allowable deviation over 10 metres. The tape will be marked near the start with an encircled ‘CE’, meaning it has been classified. A Roman numeral ‘I’ denotes first class for the most accurate.
Class I allows for a deviance of 0.4mm over three metres, while Class II (most commonly used) has a deviance of 0.9mm. Grade III with 1.8mm deviance is for less critical work. Tapes without class markings are unclassified but may still be very accurate. Deviation over ten metres is a critical thing for someone building a yacht or wall but for most of us using measurements under two metres any deviation is relatively minimal.
For most workshop use a five metre tape will suffice, for building work I use an eight metre version – and my preference is never one that displays inches. Left handed users will decide on markings that work best for them, or opt to purchase tapes specifically designed for them.
What’s the tab for?
3. Showing how the tab compensates for its thickness in an outside reading.
At the end of the tape measure is a metal tab that can move back and forth a bit. This allows the tape to measure inside or outside a structure. The movement of the tab should be equivalent to the thickness of the tab, so the same reading will result.
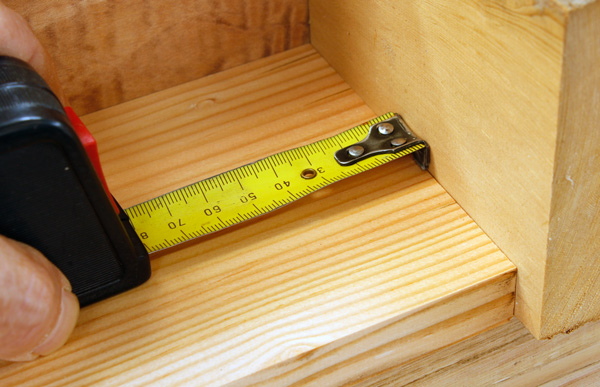
4. For an inside reading the tab is pushed in.
Tape measures have an auto retract to recoil the metal tape. On some, particularly the eight metre version, this recoil can be very quick and sharp. I had one tape with a large tab that could catch my finger with a whack. You will need to train yourself to keep fingers clear of your tape measure on retraction.
Most tapes are bright colours which makes them easy to find on site, which makes sense given its importance. However for years now I have used my all black Lufkins, as to me, flouro coloured tapes are visually offensive. To be honest I have two Lufkin tape measures that were bought at least 15 years ago.
Lastly, as with any ruler, you should use the same tape for a whole job to maintain consistency in measuring.
Raf Nathan is a woodworker and tool designer who lives near Brisbane. Email: raf@interwoodshop.com.au