Making up the Hock Paring Knife Kit

Words and photos: Linda Nathan
Making and fitting your own knife handle is a great use for those figured but too small for anything else pieces of wood some of us hoard. And if you’re going to the trouble, you might as well use a superior blade, and that’s where the kitchen knife kits made and supplied by Hock Tools come in (photo 1).
The blades are made from O1 steel, which is what esteemed US toolmaker Ron Hock uses for his top quality plane blades, so you know already you’re on to something good. These are not dishwasher type blades however, and require hand washing and drying as soon as you can after use, not a big deal because you wouldn’t want to abuse those special bits of wood either.
I was sent the 90mm paring knife kit for a test assemble. There’s a blade with a naked tang and three steel pins which are fitted into holes that you drill into the ‘scales’ you make.
First step is to cover the blade all over with tape because it’s sharp. Next, choose the wood you want to use and dimension it down. Obviously you need two pieces, in this case around 130 x 19 x 6mm. Select and mark the outer sides, then scuff the inner faces with 120 grit – that’s to help the metal to wood bond using the two-part epoxy you’ll soon need.
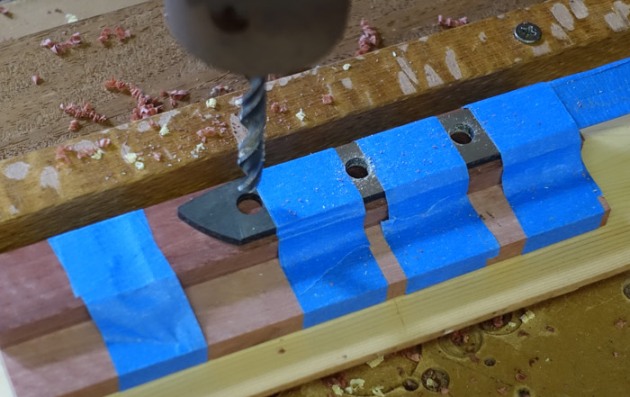
The instructions supplied are good however I deviated to use tape instead of clamps to attach the tang to the scale blanks with inner sides facing in. Holes for the pins were drilled with a 1/4" bit on the drill press with sacrificial
wood underneath to prevent tear-out (photo 2).

Next I removed the tape and the tang, placing the inner faces inwards, aligning them with the pins before marking the shape of the tang on the outside (photo 3).
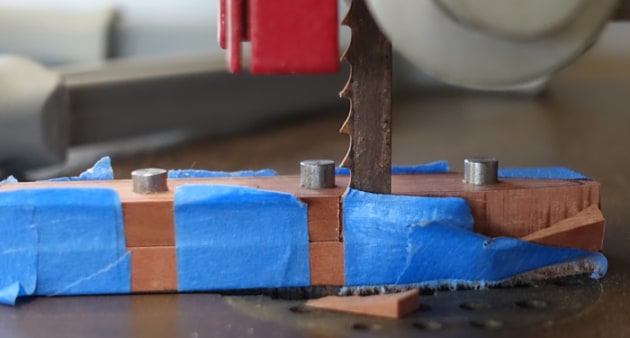
The waste was bandsawn off, leaving the line of course (photo 4). Another test fit showed things were still on track.
Before glue-up the tang was also scuffed with 120 grit, once again to help the epoxy bond. Then it was a matter of getting everything ready – paper towel to protect the bench, scraps of wood to mix the two-part epoxy on and use as a mixer-cum-spreader.

Then it was battle stations with eye protection and gloves on before each scale, hole and pin was covered in epoxy and pins tapped home until the whole slithery mess was a unit (photo 5).
Bound up with tape, the whole package was left in a clamp to cure overnight, well actually for a few nights. With the tape off the handle-to-be, shaping could commence. An inverted belt sander was the means of cleaning up the faces, end and sides. Slight curves on the sides required some care to shape. Sparks showed when the wood and metal were flush. A bench chisel and then a Mora carving knife were used to create a curved facet that took the top of the handle down to the blade.

Hand sanding was next. Taking it to 400 grit wasn’t really necessary but it felt good. The final shape was not precise, but has rounded curves and softened edges because this was a hand tool that I wanted to enjoy holding as well as using.
The finished handle was dipped in Whittles hardwax oil which was wiped off after a minute or so. Another coat would finish that job and highlight the figured jarrah used.
Kit supplied by Professional Woodworkers Supplies or phone 03 9776 1521.