


Designing is difficult to do because it is not primarily a logical, mechanical process. To a large extent it is emotional—a right brain activity that depends on artistic judgement.
Most of us approach it very uncertainly because it is hard to know what is right or wrong, good or bad. It is very tempting to look around for rules to use for guidance. Unfortunately there are not many to be found, and the common ones, such as the golden section, can only help sometimes. In the end, there’s only the hard way: we have to learn to make the necessary judgements. The good news is that we do get better with practice.
To begin a design, you need a starting point, an idea, even if that’s just a particular style. The trick is to make that idea work by changing aspects of the design until it is what is called fully resolved.
That means it will all blend together into a unified, coherent whole, with no clashes of line or form, or details or elements that are not tied in some way.
To me the design process consists of asking yourself over and over again one simple question: do I like it? As you consider each detail you have to decide if it satisfies you, not just as a part, but as a part of the whole. Notice here that the question is whether or not you like it, not whether you think you should like it. If you worry that what you like might not be good enough, console yourself with the knowledge that it is only by doing it you’ll get better, and know that every other designer out there has had to go through the same process.
Over time you will find that you like some details so much that you use them often. You might like a particular way of finishing the edge of a top, or a way of finishing the foot of a leg, or a drawer detail— any of thousands of design possibilities.
These details will come to be seen as your design language and identify a piece of work as yours. Think, for example, of the differences between the work of Sam Maloof, say, and James Krenov, and how quickly and easily you can decide that a piece of furniture is ‘in the style of ’ one or the other.
Another thing about the design process, at least how I practise it, is that it is very messy. It is not some neat progression from idea to working drawing, to construction to finish. Rather, I thrash around with half baked ideas, rough models, inspirations, failures, going three steps forward and two steps backwards, until slowly, agonizingly, I inch towards a final solution. There is no single way to do it, and no easy way for me.
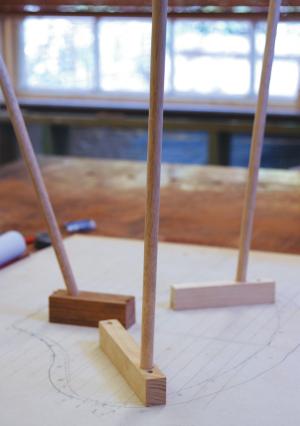
Using long dowels to experiment with different angles between the legs and the bottom plane of the seat block.
The idea
For a number of years I have had a vague idea for a stool that would assist me to assume a correct posture when using it.
The familiar kneeling chair, as well as the Bambach Saddle Seat, and the Galen Cranz book, The Chair, all seem to say something very important about seating solutions. The idea is that conventional seating causes our spines to slump into a ‘C’ shape, when they should, for health reasons, adopt an ‘S’ shape.
Because I am a carver, the idea of a saddle seat has always appealed to me because it is a lovely, sculptural form. I have also needed some workshop stools for a few years, and I thought it would be nice to have some wooden ones built to my own design.
The initial design
I decided on a three legged design because it would be stable. Two back legs and one front would help remove the footrest, and prevent the stool tipping over backwards. I didn’t want a footrest because I wanted the seating position to open up the angle between the thigh and the body beyond 90°. This would cause the pelvis to tilt forward, which in turn would cause the spine to take on the required ‘S’ shape.
A three legged design also lent itself to the idea of a saddle type seat. I had a vivid mental image of a form like an old fashioned girl’s bicycle seat, or an old style Harley Davidson motorcycle seat.
For the legs, I liked Tage Frid’s solution (see Volume 3 of his book on furniture making) of oval cross-sections with tapers.
I rounded the design out with a vague notion for three lower rails joined into a flattened ball located centrally among the legs.
Prototype 1
Prototype 1
I didn’t expect to get lucky with my first prototype, so I was happy for it to be a quick and rough mock-up. However, I did want to be able to judge its comfort, so it needed to be sturdy enough for me to sit on it. I made first guesses at all the parameters: seat size, shape, height and tilt angle; legs sizes and angles to the underside of the seat; and lower rail sizes, shapes, joints and positions.
In passing, I noted that the rails would have a tenon on each end, but the tenons would need to be in planes at right angles to each other to ensure that the major glue surfaces were oriented long grain to long grain at each end.
The only way to test all this was to make the stool up so I could sit on it as I worked on the seat shape. At this point I wasn’t overly concerned about the leg or rail details, although I did need two attempts to get the leg angles right (a bit of epoxy in the joints fixed the odd shaped, double drilled holes).
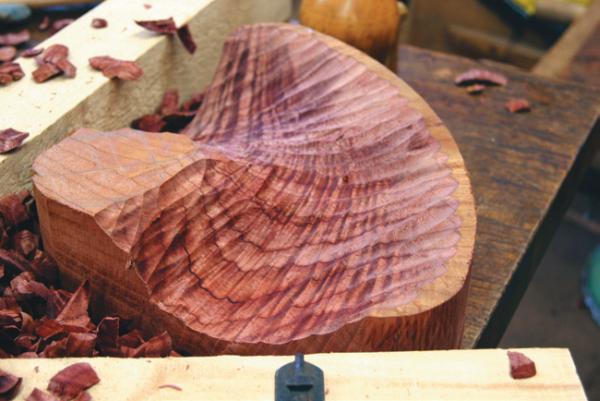
I nudged the seat carving along, all the time aware that I did not want to take too much wood off anywhere on the block.
So for a while it was carve a bit, sit a bit, carve a bit, sit a bit. It became apparent that my seat block was too small to get the shape I wanted. I had cut the legs down somewhat from where I started, and was basically happy with the angles they made with the seat block. It was time to start again.
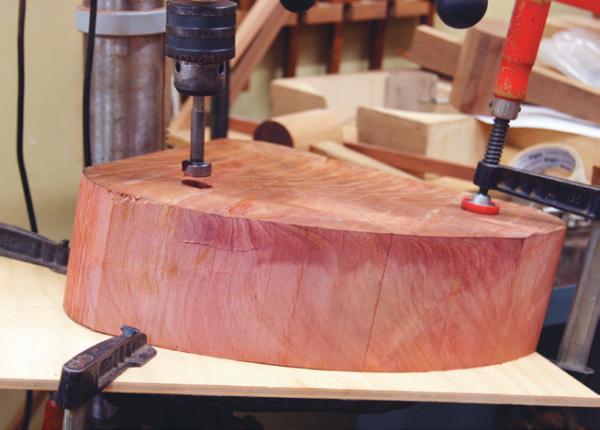
Drilling the leg holes into the seat block. Note that the drill table is tilted.
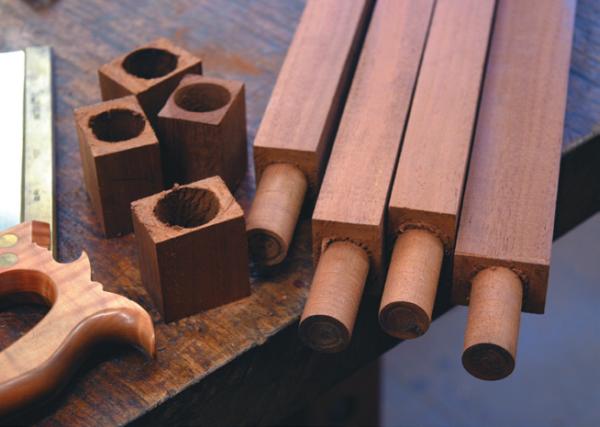
Dowels on the top end the legs were cut using a 25mm dowel cutter mounted in the drill press.
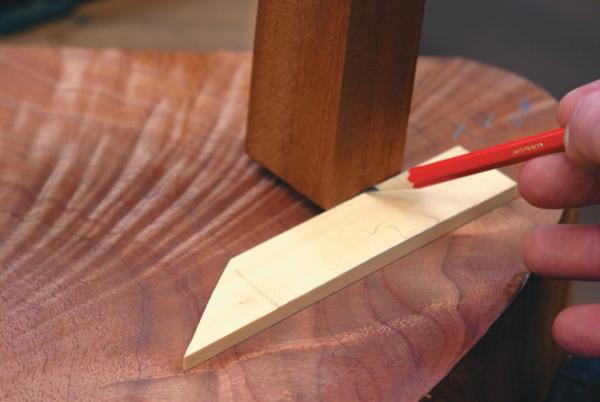
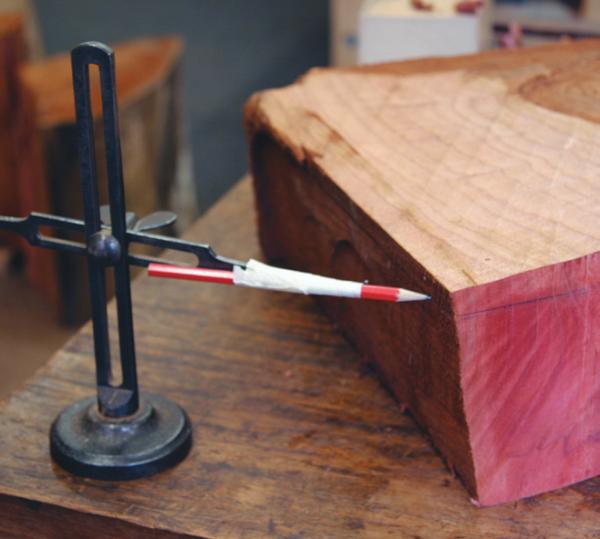
Using a scrap of wood to scribe the shoulders of the legs to the bottom of the seat block.
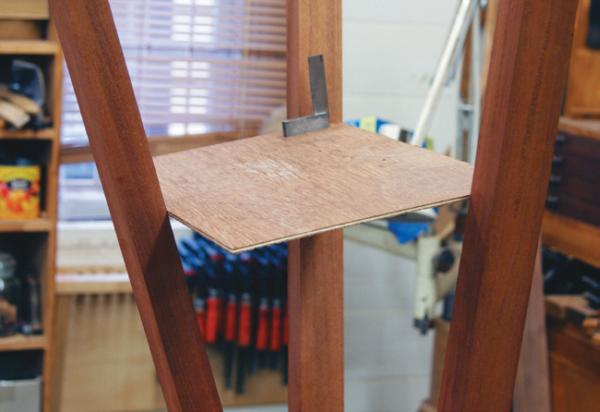
A sheet of ply was used as a reference to measure the angles in the joinery.
Protoype 2
I did think this might be the final stool, so in addition to starting with a larger seat block, I decided to take more care. I worked out a simple way to drill the compound angles required for the legs, and drilled the legs holes into the seat block while I still had flat reference surfaces to measure to. I machined up the leg stock and used a standard 25mm tenon cutter to cut the tenons, and scribed and cut the shoulders to fit.
I wanted to cut and fit all the mortise and tenons before the legs were tapered and shaped as it would be easier to measure from the flat surfaces. To make the rails into a form more like the seat I decided to have only two instead of three with their central hub. I shaped the back rail to echo what I imagined would be the finished shape of the top of the back of the seat. Cutting the mortises in the legs was easy, but cutting the matching tenons on the back rail was a bit tricky because they had to tilt to match the slope of the legs. Cutting and fitting a small sheet of ply to fit the space inside the legs in the proposed plane of the rails gave me a reference from which I could measure the angles of the tenons and the shoulders.
Once again, the direction of the main glue surfaces of each tenon had to be oriented long grain to long grain, not long grain to endgrain.
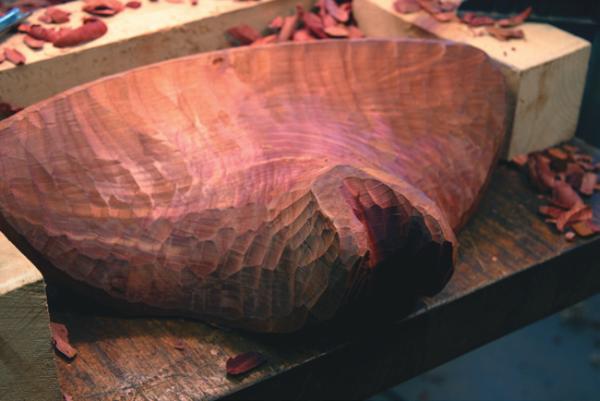
Once all the joints were cut and fitted, I bandsawed the tapers and did most of the shaping work with a drawknife, using a traditional chair bodger’s shaving horse. Once again I left a swelling in the leg shape around each rail joint. Then I set to carving the bulk of the material out of the seat block. The final fitting would depend on being able to sit on the stool, but a lot of preliminary carving could be done, particularly on the underneath of the block. I could also test the seat to some extent by carefully sitting on it with the legs dry assembled.
I found I really liked the seat with a flat, horizontal, top back edge, and decided not to curve it down on each side like a saddle. This meant changing my rough shape of the rear rail.
It wasn’t hard to carve a seat shape that was initially comfortable, but getting one that I could sit on for any length of time was very difficult. When I had most of the preliminary carving done, I glued the stool up.
Once it was together, I resumed carving, trying for a final fit. After a great deal of effort, I finally was forced to admit that the idea of sloping the seat was not going to work. The larger block had not led to a successful shape and there was a limit to how far down into the block I could carve before the leg joints would weaken. The only practical solution was to cut about 50mm off the back legs but that would take the backward rake out of the back legs. They were now almost vertical, and the stool’s stability destroyed. If I stood up without due care, I nudged the stool and sent it toppling over backwards. The top heavy seat didn’t help either.
Prototype 2
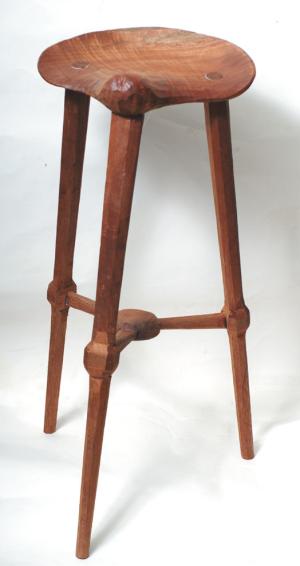
So this meant that I would be going on to P3. Before I rushed into that, however, I took the carving of this seat as far as I felt I could take it, and ended up with a shape that worked reasonably well.
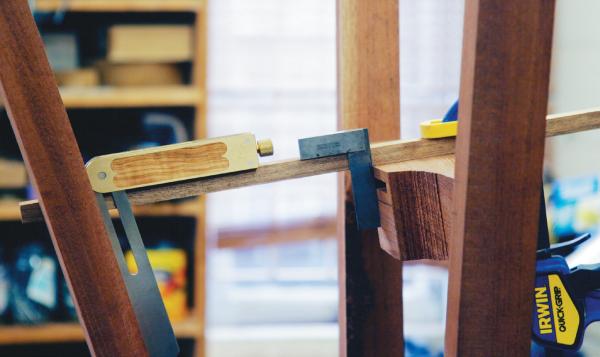
A straight stick clamped to the fitted rear stretcher allows the front tenon shoulder angles to be measured, and the position of the corresponding leg mortise to be determined.
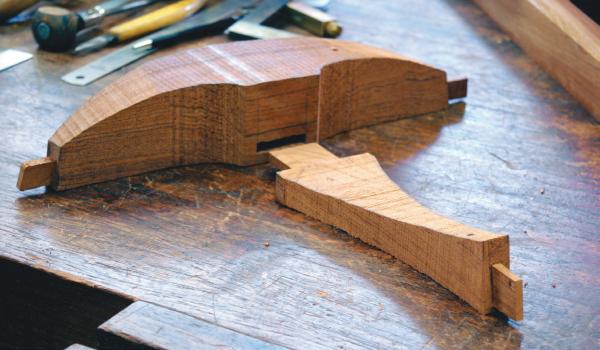
The basic stretcher assembly (P 2) showing the orientation of the various tenons.
Prototype 3
I now knew I needed to change the rear leg angles, redesign the rear stretcher rail, and keep the seat block level with the floor. I also decided to take a risk and make the seat block larger again, about 50mm deeper from front to back. To keep the weight down I made the block a bit thinner top to bottom. I hoped this would lead to a more comfortable seat even though it might backfire and lead to P4. The extra depth in the seat turned out to be a good change as it did make the seat more comfortable. P3 was built the same way as P2 but without the swellings on the stretchers. The restoration of the backward rake to the rear legs brought back stability.

Conclusion
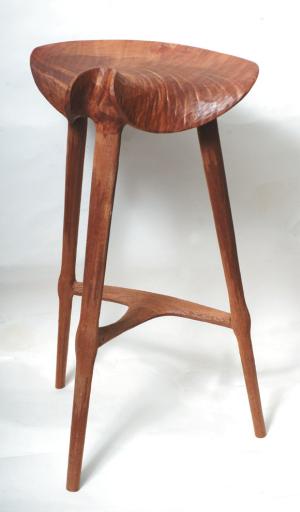
This concludes what I call ‘phase one’ of the design process for this stool. There will now be an extended period of testing by using this stool daily in the workshop. I have only given it a couple of coats of diluted shellac, partly because it is a workshop stool, and partly because I intend to keep carving the seat if repeated use indicates additional shaping would make it more comfortable. The first two prototypes are usable, even though they are not ideal, but I have not bothered to sand or polish them at all. What I hope I have been able to show here is that the design process is not strictly linear, or logical. Rather, it can be a risky process of play, experimentation and constant judgement, where there are no certainties and very few rules.
Sometimes a design can be worked out on paper, but compound curves are very difficult to draw, and even more difficult to judge on paper alone. The prototype process is, for me, a much more satisfactory way of tackling this type of design problem.
Once you have mastered the process of making furniture, the next frontier is design.
You will not be alone if you find the idea a bit bewildering at first. Most people do, and I know I certainly did. The best way to learn is to just do it. Start simple, start small, and slowly work your way into it. I don’t claim anything special about my own design sense. For all I know I could be making a laughing stock of myself by publishing this design. But so far I like it, and I will continue to do so until someone can convince me of its shortcomings.
And that brings me, finally, to one of the most important parts of the design process.
We must expect, and welcome, criticism of our design efforts. Hopefully, it will be specific (e.g. ‘I think the front leg is too heavy and not in balance with the seat.’), and not vague (e.g. ‘I don’t think the design is fully resolved in formal terms.’) or cruel (e.g. ‘Your design is garbage and you are an imbecile.’). Good criticism is a necessary part of our growth as designers.
We need to be open minded enough to listen to it, and to learn from it, but of course we are also free to disagree with it. So sharpen your pencil, and let me know what you think.
Robert Howard
Photos: Robert Howard, Rebecca Nathan