


Story and photos by Richard Raffan
A round carvers mallet is a useful tool to have around any workshop, and is an ideal beginner’s project. Turned between centres from a single lump of wood or length of branch, a mallet is a pretty straightforward bit of spindle-work. There are few technical demands, but you get to use a roughing gouge, spindle gouge, and skew chisel.
The wood
Just about any reasonably heavy wood will do, but your mallet will last longer if you select a hardwood known for its stability and resistance to splitting such as Robinia (black locust, honey locust), elm, apple, osage orange, horizontal scrub, or anything with interlocked grain like the fiddleback blackwood I use here. Generally you should cut blanks clear of the pith of the tree where the tight grain is very likely to split, especially if the wood is green (that is, recently cut down). Having said that, I’ve had excellent mallets from small seasoned logs of cotoneaster and horizontal scrub that didn’t split despite having the pith right in the centre.
Select a blank about 80mm square and 250–270mm long, or longer if you’ve a very large hand. The grain needs to run the length of the blank. The blackwood I use here is very well seasoned with a fissure of unknown depth (photo 3), so this will go at the handle end where it might be a problem if it goes too deep. It certainly rendered that end unsuitable for bowls or boxes. The blank has fiddleback grain throughout so it’s likely to be tricky to cut cleanly with a skew chisel, but it should be tough and less likely to splinter in use.
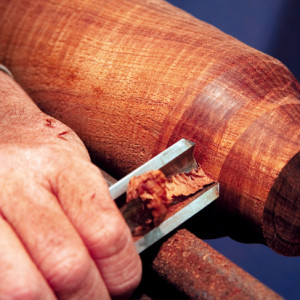
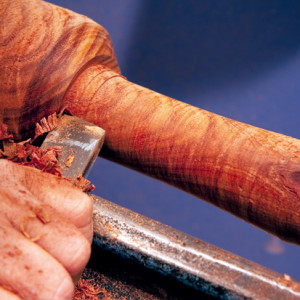
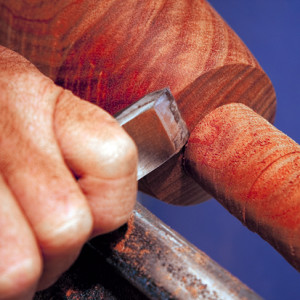
As this is centre work, mount the blank between a spur drive and a live (rotating) centre (photo 1).
1. 
If you’re right-handed have the handle towards the tailstock, and to the headstock if you’re left-handed. You can locate centre on the end of a blank by drawing the diagonals corner to corner (centre is where they cross), but I recommend mounting the blank between centres by eye, because the more you do things by eye the better you get at it. If you want to check the accuracy of your eye, hold a pencil against the endgrain as in photo 3 and rotate the blank by hand to mark a circle. It should sit in the middle of the squared blank; if not, then adjust the blank until the circle is centred.
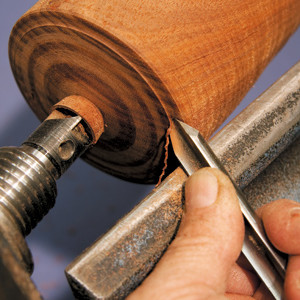
2. 
3. 
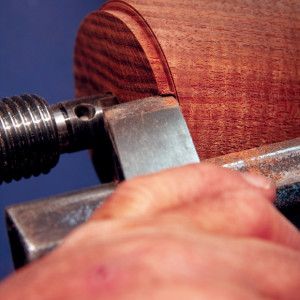
Roughing the blank
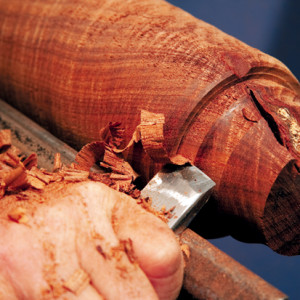
Remove the square corners of the blank using a roughing gouge (photo 2). This can be shallow or like the more common deep-fluted version used here. If you don’t have any of those, a deep-fluted bowl gouge is probably the strongest alternative. Take a series of scooping cuts working from one end back to the other. Do not start in the middle of the blank or you risk half a corner splitting away. This can be dangerous, but it’s also possible to split away a whole corner and lose more wood than you want to.
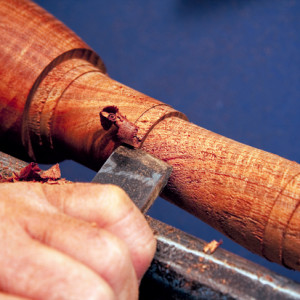
Once the blank is round you can begin shaping the handle using the same gouge (photo 4). As you can see in photo 5, the fissure was still hanging around, so I mark the bottom by holding a pencil at the base of the split as I rotate the blank by hand. I’m relieved that there seems to be enough thickness for a fissure-free handle.
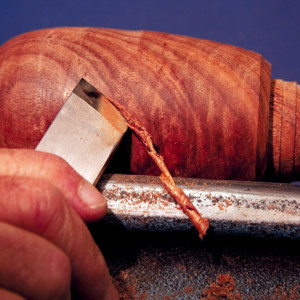
4. 
5. 
Rather than go straight to the overall shaping, my next task was to turn away the fissure. At this stage I want to retain as much of the cylindrical blank as possible in case the defect penetrates too far and there’s not enough of the blank left for the mallet I have in mind. Then if I have to abort the mallet, at least I’ve a cylinder of very flashy grain for an endgrain box or two.
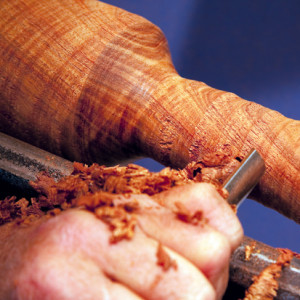
I can use either a gouge (photo 4), or a skew chisel flat on the rest used for a peeling cut (photo 5). If you keep the edge just below the surface of the wood you should get a roll of a shaving. Use the long point. Don’t have the tool pointing straight towards centre as you’ll be scraping and that’s hard work that leaves a very rough surface.
6. 
7. 
From now on all cuts should be from a larger to smaller diameter so you are always cutting downhill and across the grain. You can use a roughing gouge, rolling the flute in the direction you’re cutting (photos 6, 7), or continue using the skew chisel on its side as in photo 8.
8. 
9. 
When you get to roughing the transition between the head and the handle, the skew is the best tool for the job as it get right into the corner (photo 9).
10. 
When the handle is roughed out, true up the end of the mallet head using a similar peeling cut (photo 10). You’ll need to flip the skew over so you’re still using the long point.
Finishing cuts
Now to the exciting bits when you get to use the skew chisel. The skew chisel terrifies many novice turners because when it catches it tends to dig and leave nasty spirals, and these often demand a modification of your design to eliminate the defect. (In fact skew chisel catches rarely do more than mess up the wood, whereas bowl-turning catches involving gouges and scrapers are far more dangerous and frequently result in serious injury and visits to a hospital.)
When using a skew chisel keep the bevel rubbing the wood, use the long point for cuts across the grain, and for planing cuts use the leading half of the edge. If your cuts leave a clean but ridged surface, the bevel wasn’t rubbing. Remember that the constant in woodturning is the spinning wood forever coming down on to the tool edge. Wait for the wood to come to the tool: you don’t need to push the edge hard into the wood to get a decent shaving. The cleanest cut and biggest shaving comes when the portion of the edge cutting is about 45° to the oncoming wood.
To smooth the endgrain, you can use the long point of the skew chisel (photo 11).
11. 
12. 
Think in terms of using only the point, but be sure to keep the bevel side rubbing the wood. To avoid a heavy spiral catch keep the edge clear of the endgrain. A safer and more controllable alternative is to use a spindle gouge or a shallower-fluted detail gouge (photo 12), starting the cut with the gouge on its side, flute facing away from the wood. Roll the gouge very slightly clockwise once the bevel is rubbing for a better shaving.
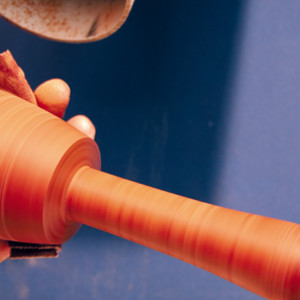
Smooth the mallet head by cutting in either direction off the crown of the curve using the skew chisel long point up (photo 13).
13. 
14. 
Interlocked grain will often pick-out no matter how carefully you shear cut with the skew chisel, so a good solution is to use a low peeling cut (photo 14). My skew chisels have a slightly radiused edge that makes this cut a lot easier than a straight edge, although on a convex curve using a straight edge shouldn’t be a problem as there’s no danger of the corner or long point digging in. For the low peel the edge barely brushes the wood so you get only dust and very small curly shavings. The surface is not quite as good as a shear-cut, but there’s no danger of the grain picking out and you won’t tear off lengths of fibres as you would scraping.
The handle
I start by smoothing the shoulder at the base of the mallet head using the skew chisel long point or a detail gouge to mirror the cuts made at the other end (photo 15). It’s like cutting half a V-groove: use the skew chisel long point down and think in terms of using only the point as you keep the bevel side against the surface you’ve just cut.
15. 
16. 
When you complete the shoulder using a gouge, to turn a well-defined corner where the shoulder meets the handle, roll the gouge right on its side at the end of the cut.
Once the handle is roughed to a point where it feels slightly fat in your hand, use the skew chisel to smooth the surface (photo 16). I use the skew long point down and pointing in the direction I’m cutting. This way there’s less chance of a catch and if I push the tool into the cut, chatter marks are not so severe as using the tool long point up. At the end of the cut drop the handle slightly to bring the point of the skew to cut right into the corner. After each pass with the skew, stop the lathe, move back the rest and test the fit to your hand. This is when you want the handle lined up with your hand, to the right for right-handers, to the left for left-handers.
17. 
18. 
Attend to the end of the handle first using a skew chisel long point to peel away the waste (photo 17), then the short corner to round over the end (photo 18).
19. 
20. 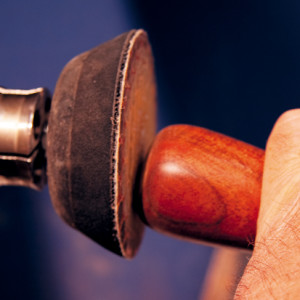
Finally sand (photo 19) as much as you can whilst the job is still on the lathe, then finish the ends off the lathe. You can do this by hand, cutting away the waste with a small handsaw and sanding by hand, but I prefer to use a small disk sander in a chuck with long-nose jaws mounted on the lathe (photo 20).

Richard Raffan is a Canberra based woodturner and author, and a Contributing Editor for Australian Wood Review. Read more about Richard here.