


Craig Thibodeau is a US furniture designer/maker whose cabinets, tables and consoles have solid timber frames that often feature panels with marquetry detailing. Panel surfaces need to be stable and smooth. Traditionally veneer work was applied to solid timber but quality modern substrates are a reliable solution.
Craig usually makes his own substrate with 1/4” or 1/8” (low formaldehyde glue) MDF skinning a poplar plywood core. The result is lightweight panels that can be used with regular fasteners and joints. It takes longer and costs more to make these panels but according to Craig the results are better. The photos show how Craig uses the Italian ‘packet’ method to create the marquetry for his furniture.
1. Producing a full scale pencil drawing on paper can take more time than the actual cutting work, says Craig. You need to create a pleasing design and work out how best to position it on the furniture you’re making. The original drawing will be your master copy, meaning it’s the one you’ll refer to and that all the cut out pieces of veneer will be assembled on top of. The drawing can show which coloured veneers will go where, taking balance, contrast and grain direction into account. Make copies of your drawing to use as a template when cutting the pieces out.

2. Select veneers for the background and motifs and cut into pieces sized accordingly. Figured timbers can add life to the background—Craig often uses figured maple, curly sycamore and satinwood for this purpose and has a good stash to choose from. Multiply the number of timber species by figured and dyed varieties available and there’s a lot to choose from.
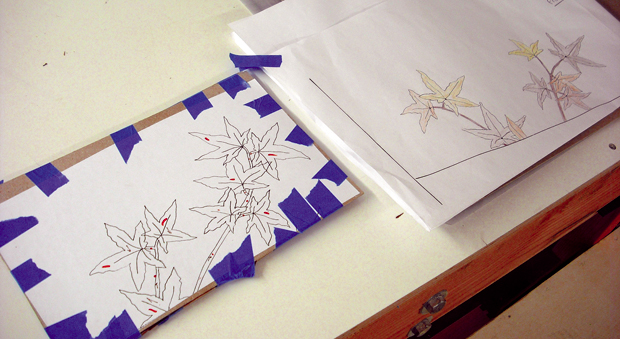
3. Craig next makes a veneer ‘packet’. The backing veneer is taped to cardboard cut to the same size as the background.
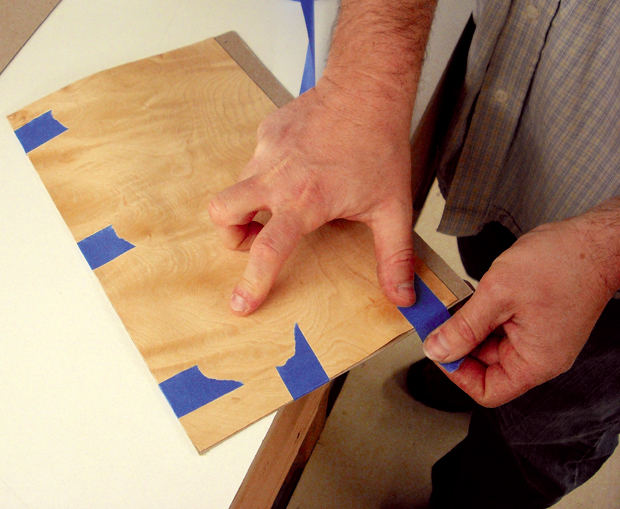
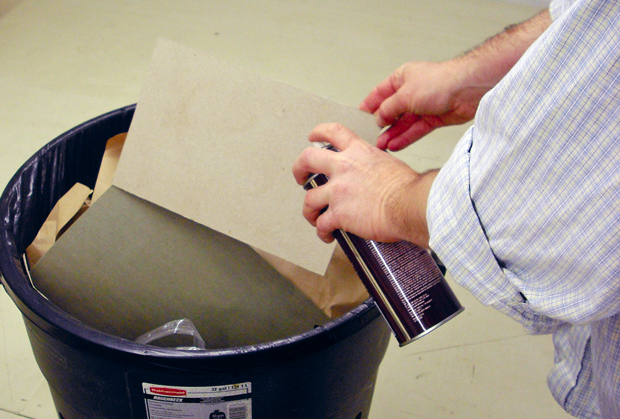
Use spray glue to stick a copy of the drawing to another piece of same-sized card.
Hinge the two pieces together with tape (Craig is using blue veneer tape). The drawing should be on top on the outside.By raising and lowering the drawing Craig is able to position the pre-cut veneer squares before securely taping them.
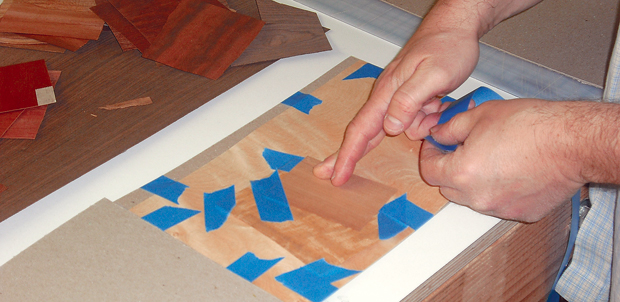
There will be a lot of overlapping.
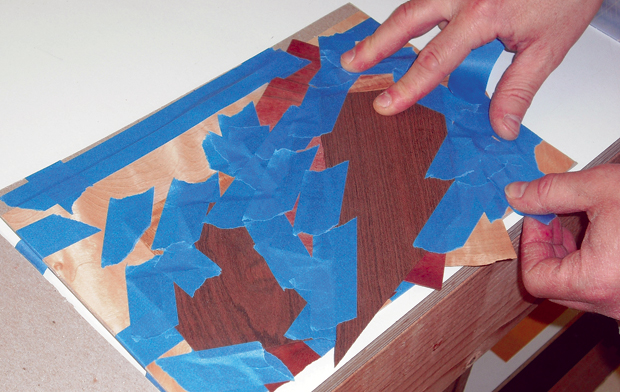
Craig marks the position and grain direction of each piece on the packet drawing and checks his progress against the master drawing. Fully tape the packet perimeter when finished with the inside veneer pieces.
4. Once the packet is complete the cutting out of the pieces on the scroll saw can start.
The blade enters through a leaf ‘stem’. Each piece, along with any overlapping waste, is removed as it is cut. The tape should hold the veneer for the uncut pieces firmly, even though the waste is being removed.
Craig saws fluidly to the pencil lines—geometric or measured shapes obviously require more precision.
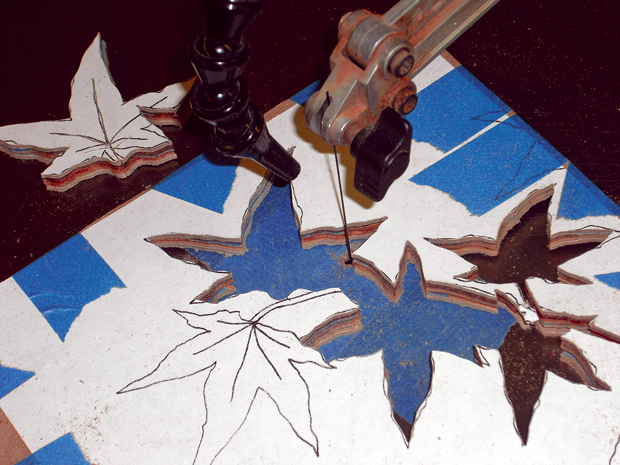
He uses a scroll saw but some people use a fretsaw or a knife. Some cuts, for example the leaf veins that enter the piece, need to be done before the outline because you can’t go back into the piece. The veins of the leaves are not ‘filled in’ with a veneer insert, but are spread slightly apart when the pattern is reassembled in its background to give a more life-like look. The cut out pieces are placed on the master drawing as work progresses.

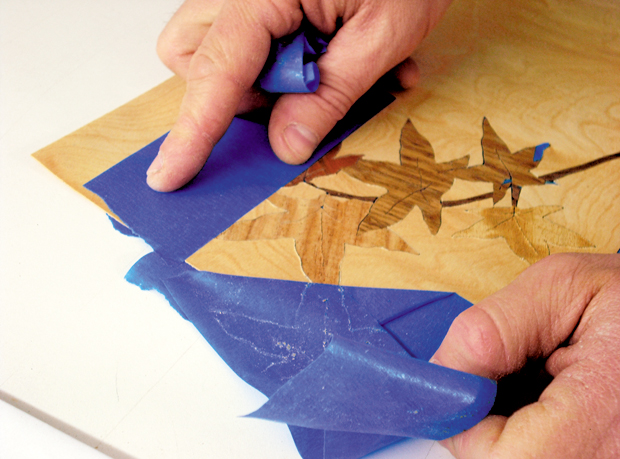
5. After the cutting is finished the packet is pulled apart and the remaining scrap and tape is removed from the background veneer. The openings on the back of this are taped over.

This is flipped over and the leaves are stuck onto the tape.
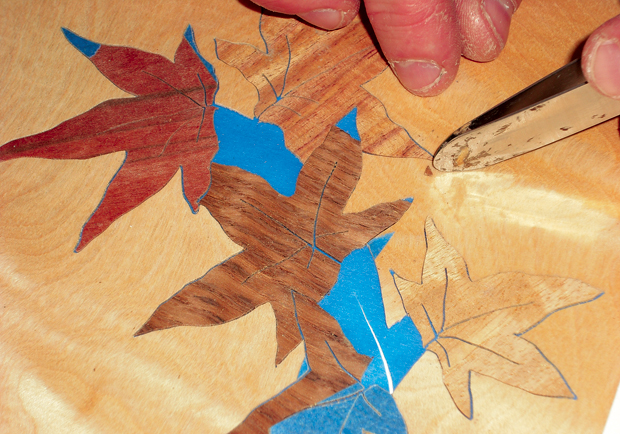
Craig uses V-tongs designed by Paul Schurch to pick up and position the pieces. Some distortion can occur in the veneer as tensions are released so fitting the pieces into the background can involve some fine tuning (pressing and easing). This is the front side of the completed inlay which is now taped over. The tape is burnished with a brass brush to secure it very firmly so it won’t move when the back is being glued to the substrate in the vacuum bag.
6. The tape on the back of the background is next carefully peeled off. Any necessary repair work of broken tips etc needs to be done from this side.
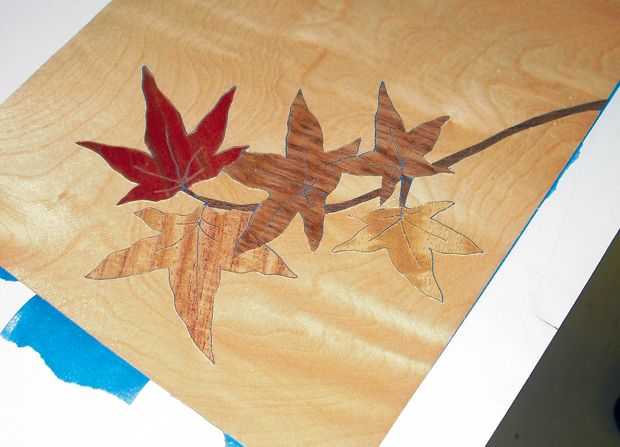
The photo below shows part of the completed back.
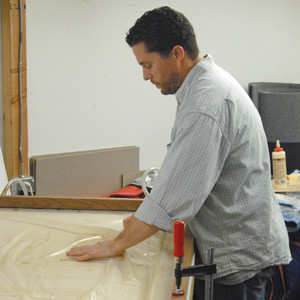
7. Glue is applied and spread with a roller over the MDF backing that will receive the marquetry panel.
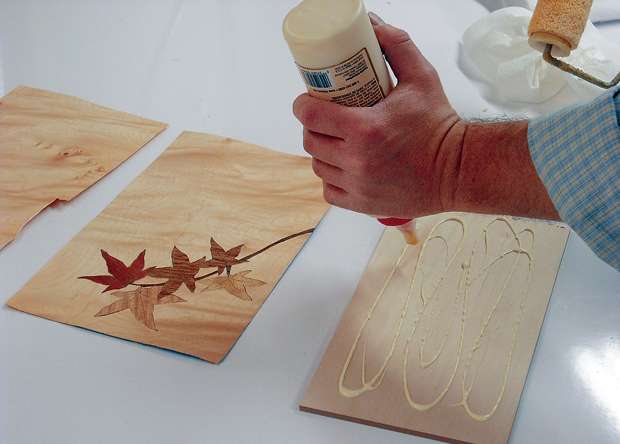
Another piece of ply acts as a caul with a piece of plastic between the two layers to sandwich the marquetry before Craig loads the lot into his custom made vacuum press. Craig doesn’t use a bag, his system is simply to lower plastic that is fixed to a frame over the work to be glued. The vacuum pump is switched on and left to run for an hour.
8. After the tape is removed from the marquetry the panel needs a gentle sand. Hand sanding would result in scratches as the veneer grain runs in many directions so Craig uses a random orbit sander with 180 grit to smooth the finished surface.
If desired, once the veneer has been shellacked or sealed, saw kerfs can be filled with coloured ‘Famowood’ filler that is sanded off when dry.
Even though the result is a precisely pieced together marquetry ‘painting’, to watch Craig work is to understand how this is still a fairly forgiving process where mistakes can be corrected and changes made.
Although he uses dominos, glue and screws to expedite his joinery, time consuming hand crafted marquetry and inlay are the details that set Craig Thibodeau’s work apart and make it sought after. ‘Patience and good drawing skills’ are the attributes of a good marquetry exponent says Craig, who encourages others to try: ‘it’s something you can get pretty good at, pretty quickly’.
This story first appeared in Australian Wood Review magazine, issue 68.
Learn more about Craig Thibodeau at www.ctfinefurniture.com