


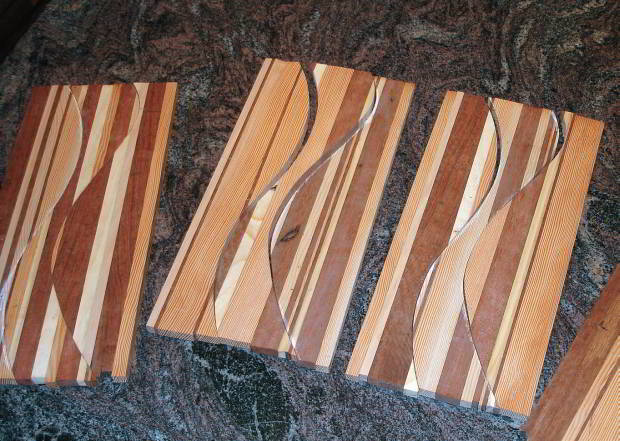
I made these boards at the end of last year to enter into AWR’s Recycled Wood competition (see AWR#62).
Any recycled material that has retained its strength, is suitable for this project, as are of course just about any workshop offcuts.
For these boards I used contrasting timbers of jarrah, karri, oregon and radiata pine — all salvaged from building construction.
The boards are easy to make. There are three stages of gluing to prepare the laminated stock.
First glue-up
Here I’ll prepare enough wood for four boards, that will become two doublesided cheese boards.

Each piece is planed and thicknessed to 11–12mm. The final thickness is not critical but they must all be the same.
The four laminated boards are temporarily glued together using a hot melt glue gun—just a dab on the corners is sufficient.
Arrange the pieces so the woods contrast.

Using chalk or pencil, draw two S-shaped lines on one side. I used to make the S-lines parallel but now I curve them towards each other in the centre as the result is more interesting.
Now bandsaw along the lines. It’s okay if the cut wanders a little from the line. The aim here is to have an even width of kerf so that later gluing leaves no gaps.
I take only one bite with the bandsaw and never back-off or restart the cut.

The hot melt glue joints are separated and the glue peeled off. The small burr from the bandsaw cut is gently sanded off without rounding the arris.
Now it’s time to have some fun interchanging the boards. With four boards there’s more opportunity for play.
If you make one cheeseboard starting with two laminated boards, then swapping the centres is all that can be done.
This works beautifully if the original boards are sufficiently different from each other.
Sometimes I have a situation where very similar coloured timbers are adjacent, thus spoiling the effect. This can be improved by sandwiching 2mm or 3mm thick pieces of contrasting timber in the glue joint to create a stringer effect.
On one side of the cheeseboards shown you can see where I used two stringers of pine. At this point, judgement is needed to determine the best colour of timber.
If I had used meranti or jarrah, the effect would have been different.
Second glue-up
Now it’s time to glue the rearranged pieces together, with the thin stringers included, if desired.
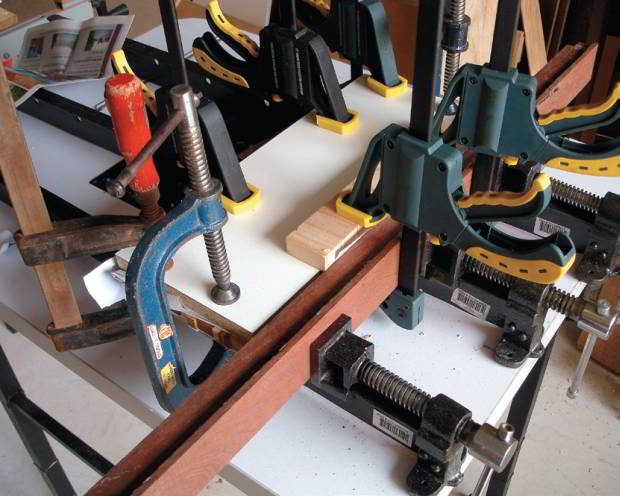
The four boards need to be clamped and held perfectly flat. I used melamine chipboard top and bottom to assist.
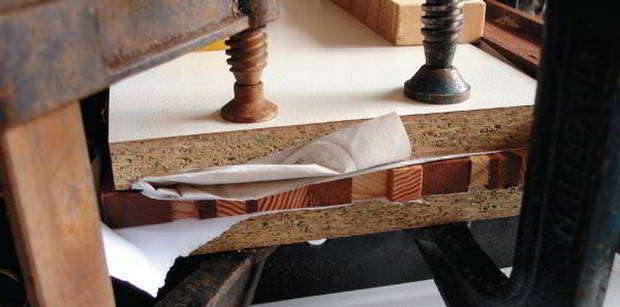
The glue joints between the pieces must also be closed. Sash clamps are perfect for this.
Paper is needed to avoid gluing the job to the melamine. Once the glue is dry these boards need a final run through the thicknesser to remove the paper and any irregularities.

Third glue-up
Now the boards are glued back to back in pairs.
One last opportunity to play exists before final glue-up. You can try the different boards together in different combinations.
One thing to ensure is that the curved bandsaw cuts cross each other, instead of running parallel. This provides extra strength, although they still retain sufficient strength without this.
The melamine is used again to spread clamping pressure when gluing the boards, back to back. Plenty of clamps will keep glue joints closed.
Shaping the board
Exercising creativity by designing the final shape before trimming edges is fun, although even a rectangle also looks good.

I use a 30mm diameter forstner bit to drill the hole and a 6mm radius router bit to round the edges.
Edges and faces are sanded in preparation for an oil finish. I use vegetable oil from the kitchen applied with a paper towel.

Glue and finish
I have used ordinary PVA, waterproof glues and Titebond III, and they all stood the test of time. On the boards shown I used Titebond.
These boards can stand repeated washing in the sink. Every few months, another coat of oil will replenish the rich colours.

Denis Tapley is a Design and Technology teacher in WA, who also has a passion for making boxes.
Email: denistap@hotmail.com