


Words and photos by Neil Scobie
Inspiration for a design can come from different places. A client request that proved popular led to what is now a small batch production piece for me. People have commented the lamps remind them of a frill-necked lizard standing up to run, others have ‘seen’ a giraffe. Maybe these ideas were at the back of my mind, but the curves are in line with most of my furniture.
Timber and templates
You’ll need one piece of 1800 x 200 x 40mm thick timber for each lamp. I have used blackwood and red cedar with good results. The first job is to make templates for the stem, back and front legs. I am not going to supply you with an accurate workshop drawing, but encourage you to make your own curves to suit. The photos will give you enough information to work on. All I did was to draw the shapes on a piece of 3mm thick MDF then cut out the shapes to make the templates. Allow about 30 or 40mm extra in length on the bottom of the legs to make sure you get the lamp sitting at the right angle.
Machine and bandsaw the parts
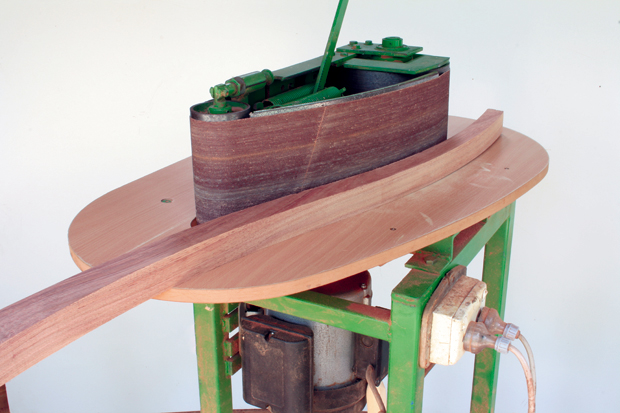
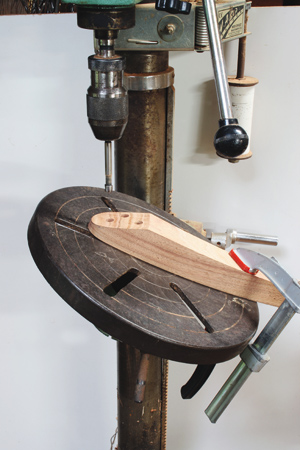
Machine the 200mm wide board back to 38mm thick in one piece before cutting out the shapes. Trace the shapes onto the surface making sure you have the grain running the correct way (photo 1).

Bandsaw the stem and legs then trim the waste back to the line with a spokeshave or a linisher (photo 2).
Leave extra on the top back edge of the back leg until after the leg is joined to the stem. This is because you will have short grain that could easily break off.
Halve, groove and join the stem
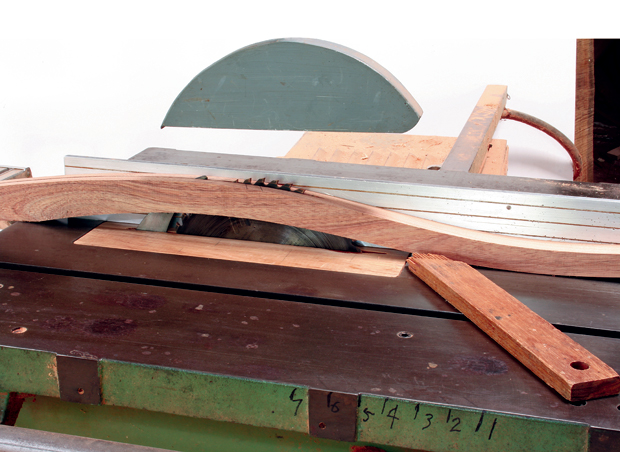
Set up the tablesaw to cut the stem in in half lengthwise (photo 3).
It is better to halve the one piece of wood rather than use separate pieces as the grain will match and you won’t see the join.
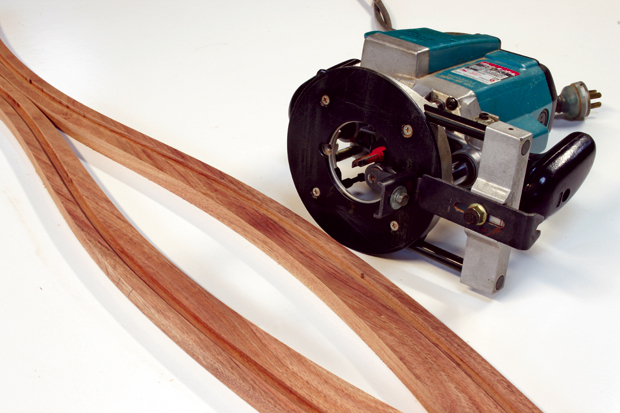
Run the two sawn faces over the jointer so they will join without gaps. To rout the groove for the electrical cord, use a 10mm diameter straight router cutter with a roller fence and rout 5mm deep into each half. The groove should be about 10mm from the front edge of the stem (photo 4).
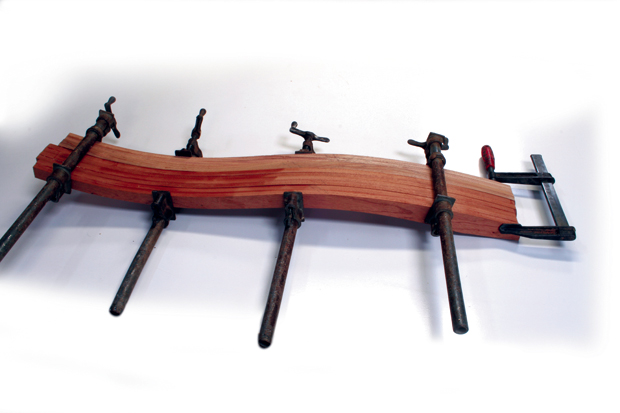
Now glue the two halves back together taking care not to get too much glue in the groove (photo 5).
Once the glue is dry, trim any places where the joins overlap and hand plane the bottom back of the stem and the front of the back leg (photo 6).
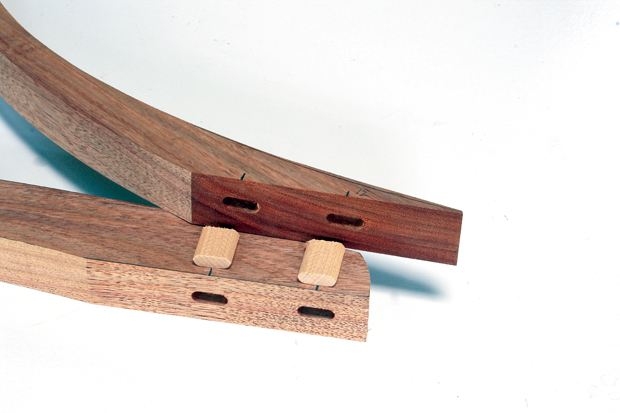
Mark out for domino or dowel centres and cut or drill them ready for joining. Be careful to check the depth of the holes so you don’t cut through the back of the leg or into the cable groove (photo 7).
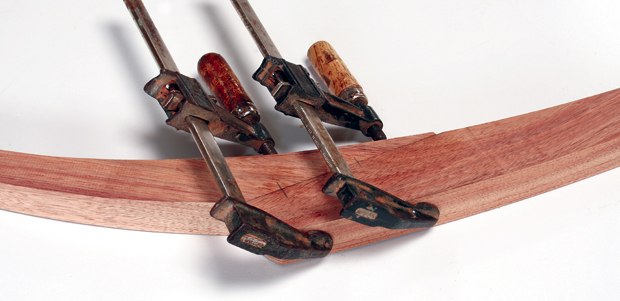
Glue the back leg and clamp it to the stem (photo 8).
Jointing the front legs
You’ve bandsawn and trimmed these back to the line, but now taper the front face of the legs to about 18mm at the bottom by bandsawing and planing the inside bottom section. The next step is to make a jig for the drop saw (photo 9) to cut the 30° angle on the inside.
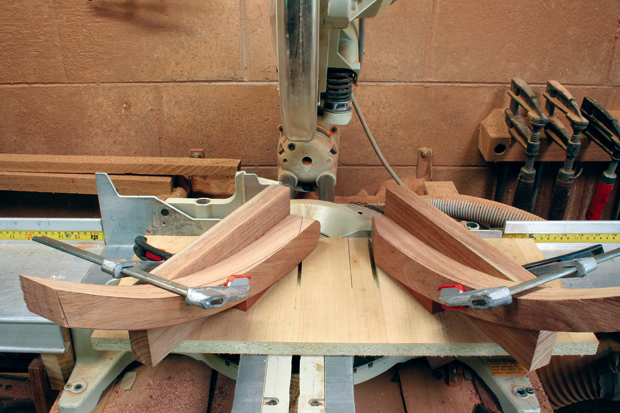
Making a second jig to drop saw the bottom of the front legs will make this easier (photo 10).

Mark out and drill three dowel holes in the angled part of the leg that meets the stem (photo 11).
Make sure the dowel holes are located away from the cable groove and also check their depth so they don’t break out to the outside of the legs.
Rout the rounds
The front legs and stem need to be rounded over before gluing. I used a table edge bit with a larger bearing so that I ended up with a D shape rather than a complete round. Temporarily fit the dowels and legs together and draw around the join so you know where to stop the router cut. Use a spokeshave to trim where the router can’t reach and sand all the parts to about 180 grit (photo 12).

Assembly jigs
A couple of simple jigs to pull the joined surface in tight make things easier (photo 13).
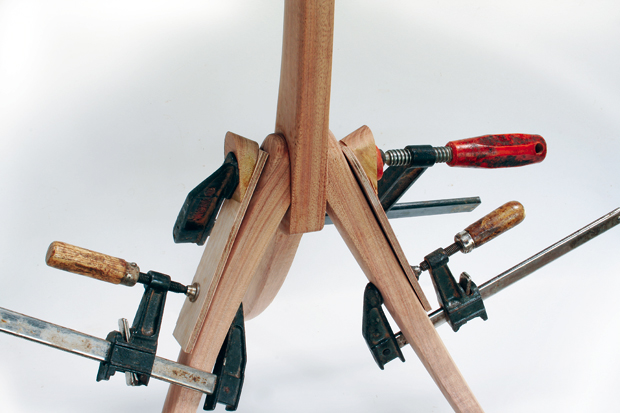
The jigs are dry clamped to the legs to stop them sliding up when pressure is put on the top clamp.
Make sure the lamp stands at the angle you want and adjust the bottom of the legs if it doesn’t. Drill a hole at the top to take a 12mm thread ferrule to which the lamp holder will attach. Fine sand all parts to 400 grit then apply some oil—I used four coats. After that, thread the cord through the groove and attach the fittings. You will need to get an electrician to attach the wires for you to be on the safe side.
This is a simple project that you can add your own design flair to. Buying a shade to suit is your next task, unless you are keen enough to make your own.
Neil Scobie is a furniture designer/maker and wood artist who lives in Lower Bucca, NSW. Neil also teaches woodwork in his home-based workshop. See www.neilandlizscobie.com