Making a Hall table with Roy Schack

Words and photos: Linda Nathan, Wood Review editor
For a beginner, signing up for a six day course to make a hall table might seem like a leap…and it is. For those who already have skills it’s also a leap…but to a better place of understanding. In a workshop situation you can learn some of the how and why of woodworking much quicker than you would by trial, error and YouTube.

A couple of weeks ago I went along to one of Roy Schack’s workshops to find out what it was all about. Here's a short report!
Day 1: A 9:30am start for most means missing out on peak hour traffic, unless you’re travelling from the Sunshine Coast as one of the other three participants was. It all started with coffee (Roy is a great barista), introductions and a workshop tour.
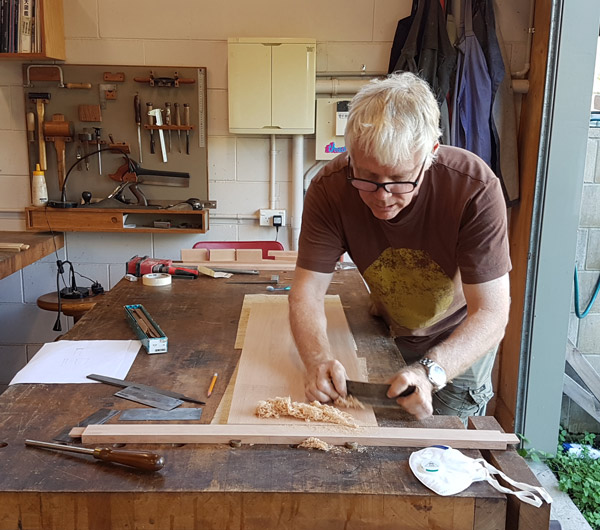
We received our allocated wood and then awaited the know-how to machine, handplane, glue and otherwise join it into the one free-standing unit. We each got a different species of timber. There was jarrah, American oak, New Guinea rosewood and I got American cherry.
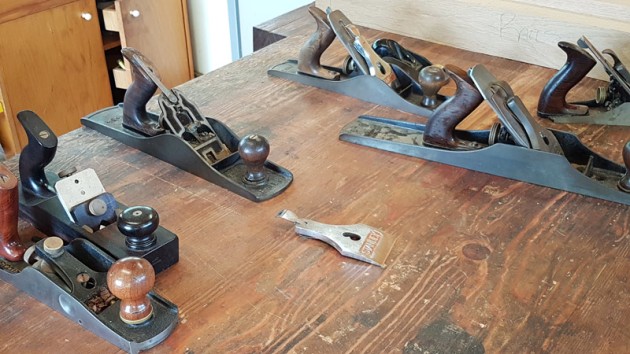
Handplanes. In the Stanley heritage they are numbered and have bedrock and Bailey bodies. They have frogs, dogs, cap irons, levers and adjusters. A remarkable amount of engineering has been handed down through the ages into figuring out how to present a sharp blade to a wood surface that can allow for the vagaries of species and grain direction. Roy gave an anatomy lesson and some cause and effect discussion followed.
We heard how using handplanes requires physical coordination: dominant hand finger pointed, fingers can hold the knob or thumb can rest on the body with fingers below acting as a fence against the workpiece. Stand square-on, lock your arms, use your core, step through, press at the toe to start, on the heel to finish, and above all…don’t forget to breathe!
And when you’re using a handplane with a sharp blade that an expert has set up for you, you will get shavings. Next step however, is to do sharpen one yourself. On the same day? Yes, Roy says you can!
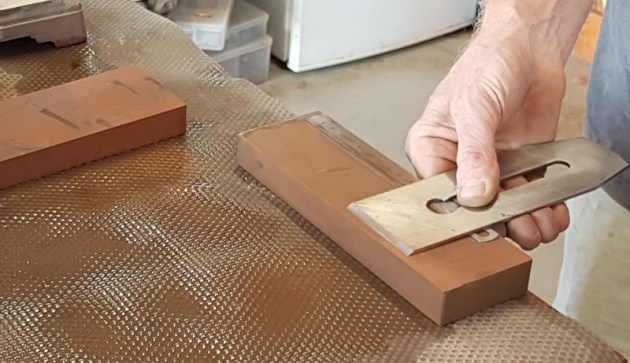
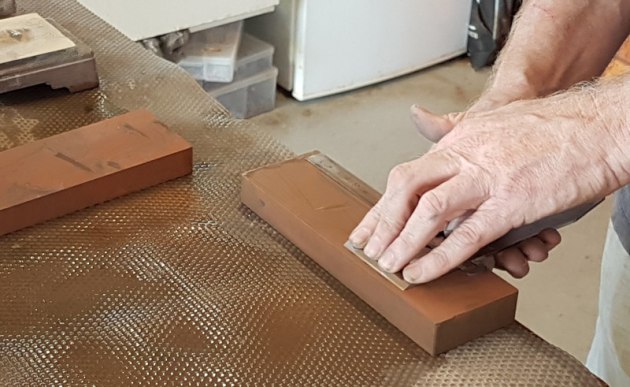
Sharpening. You’ll go nowhere if you can’t, so the demo begins. Waterstones – four to start with in this class in progressively finer grades. Stones are flattened under running water on a diamond lapping plate then go back on the bench in order.
A honing guide comes out (Veritas Mk II with a cambered roller) and info is given on how to use it. We watch the progression through the stones which is checked frequently with a small engineers square as a very small crown is created and an ever polished micro bevel is nurtured.
The ‘ruler trick’ comes out to create a back bevel on the plane blade back before we learn how to strop the resultant burr from both faces.
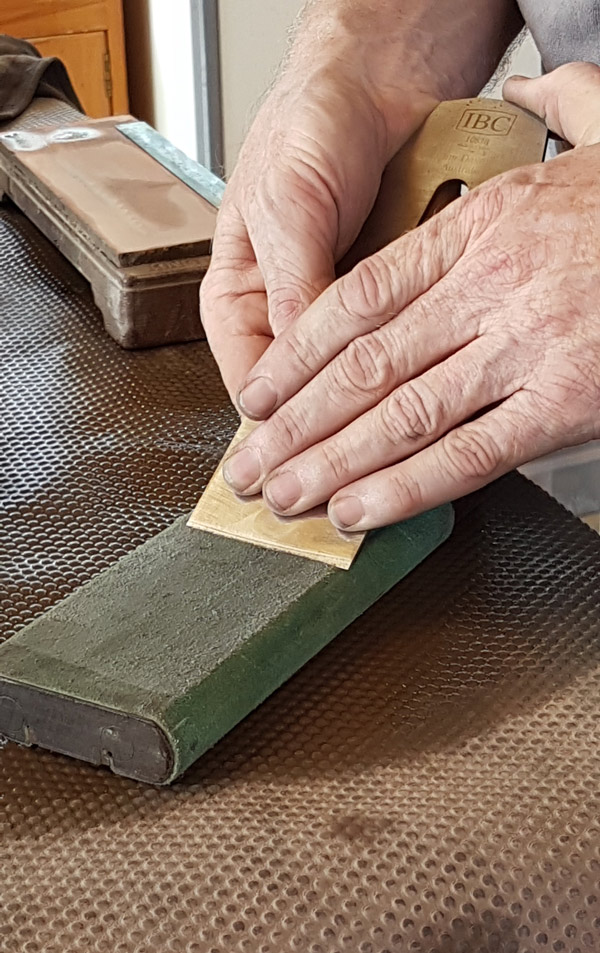
With blades reinstalled it’s back to the bench to observe the shavings achieved and make fine adjustments until those gossamer (well, almost) fly-away shavings curl out...it worked, those blades were sharp!

So much for the daily report idea as the information sessions and processes undertaken thereafter compounded throughout days 2, 3, 4, 5 and 6. Concepts of ‘flatocity’, ‘squarocity’ and many other ‘Roy-isms’ were encountered as wood was machined, hand finished and joined.
Scrapers were also sharpened and explained before Roy gave a demo of how effective this technique can be.
We used a range of machining processes including hollow chisel mortising, tapering, rebating and grooving on the tablesaw, bandsawing, planing, thicknessing as well as thickness and disk sanding. On day five the tables were all clamped up and placed outside for a family type photo.

Everything was explained and it was hard to believe such a ‘simple design’ entailed so many stages and so much nuanced care to accomplish. On the last day, finished off the plane, scraped and sanded, the tables received Osmo oil to complete. Wipe on and buff off, light sand between coats – it doesn’t get much easier to get a good result, provided the prep work is there of course.

If you’re near to Brisbane or thinking of a holiday travel experience that as a woodworker you’re bound to enjoy and learn from, contact the Brisbane School of Fine Woodwork or email Roy to learn about the range of workshops and ongoing classes he offers.