Words and photos by Patt Gregory
My love of tools started early. When I was little, my stepfather’s farm work shed was a fascinating but dark and mysterious place. I loved the tools with their glinting sharp blades and the earthy smell of grease and oil which protected them from the frosty winters, although as a girl, I was encouraged back to go back to the kitchen.
Trawling through the aisles in hardware and tool shops, it’s hard to believe we don’t need every new and bright, shiny tool that beckons from the shelves. As I teach woodwork from the very first steps, I want to show my students what they can achieve with few and sometimes less expensive tools by being discerning and practical when selecting and buying them.
I began teaching woodwork part time (mostly to women) from my workshop at home in northern NSW over 13 years ago and needed to have multiples of tools for up to six people at a time. The tools needed to be lightweight, not too big or intimidating, not too expensive, and they needed work properly.
Over the years tools for the workshop were bought on a budget. I’d pick them up at garage and car boot sales, from markets and from ads in the local paper. I’d watch out for catalogue specials on Father’s day and at Christmas and when birthdays came around, it was a new tool I would ask for first! Nowadays there is also e-bay where there are some wonderful beauties and bargains are to be had.
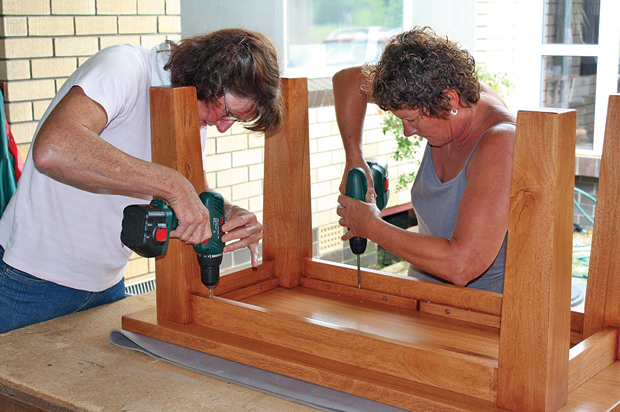
A simple project first
To know what tools you need, you have to decide what you first want to build. For instance, if it’s the chook shed and you will be using recycled hardwood pallets then you will need different tools than if you are building a small pine bookcase with traditional joints.
Begin with a basic tool kit

Above is a basic kit that should get you started.
1. Square: I opted for a cheap light square with a short blade (under 150mm) for just a few dollars. My reasoning is that as long as a square is in fact square (even some expensive ones can go out of square if dropped) then it will be adequate.
2. Clamps: G-clamps are great – strong, cheap – but don’t suit every job.
3. Sash clamps: I’ve had bottom of the range sash clamps for over 10 years. I keep them well oiled and don’t overtighten them. If they do fail, they can be recycled into longer clamps by bolting them together.
4. Hammers: I’ve paid just a few dollars for cheap lightweight hammers and they are still going fine after 10 years. You can get these in discount stores.
5. Tape measures: a $5, three metre one is fine—check it runs smoothly by pulling it in and out.
6. Short (300mm) metal rule: You can get one for under $2 in the stationery section of Big W or K-mart.
7. Long metal rules can be found in art shops for a reasonable price.
8. Irwin Jack tenon saws sell for under $30. These are light and easy to control. The razor sharp hard-point teeth last for an astonishingly long time (several years here at the workshop) but alas they are thrown away at the end of their life (or turned into an interesting piece of artwork!).
9. Jack panel (general) saws sell for just under $10 when on special. Great for cutting plywood backs for projects and for rough carpentry work.
There are simple and essential hand tools that are the foundation to most woodworking, such as a try square, a soft leaded pencil and eraser, a tape measure, a metal ruler (called rules), a claw hammer and clamps to hold the wood. You may already have some of these items.
For joinery or furniture making where wood is joined using joints that are glued together and at times reinforced with simple bullet head nails, add to your tool kit a lightweight hammer, a tenon saw (it has a rigid back and helps you to saw straight and square) a bench hook, (a home made jig which supports your wood and helps prevent it splintering) a 19mm bevel edged chisel for chiselling joints, and a wooden mallet for striking the chisel. An electric sander is optional but handy and consumes less time than sanding by hand. A random orbital sander or sheet sander can work well for furniture making and renovations.
For ‘rough’ carpentry which may include framework or other structural work where wood is joined with screws or nails, you may need a panel saw (general saw) a standard 20oz (600gram) hammer, a belt sander for removing material fast and a hammer or impact electric or battery drill which will drive into masonry as well as wood.
Tools that suit your needs
It makes sense to buy specifically for our needs. For example, I’m slightly built, in my late 50s and prefer a small lightweight power drill that fits in my hand but still delivers plenty of grunt. I use a small and light try-square (essential for accurate joints) rather than the heavier, longer ones and I choose a small lighter hammer rather than a standard hammer, (unless of course, I’m wanting to whack in decking nails).
Some electric belt sanders are so powerful, they can be exhausting to control. It’s handy to ask someone you know who actually uses the tools you are thinking of buying for their experiences. Reading the feedback on Woodwork Forums on the internet can be useful too.
Expensive vs cheap
It’s true that more expensive tools generally last for many years, that they sharpen well, and can be serviced and repaired. While I found there is no compromise on the quality of chisels, (I spend upwards of at least $30 on a new chisel) most of my portable power tools are mid to low range in price and quality.
Cheap tools are often made from inferior parts and metal that may break down with demanding use, leading to their eventual discard.
It’s very frustrating to see exceptionally cheap hand and power tools available on the market, knowing well that a $10 metal or wooden hand plane will never be able to be tuned and adjusted for accuracy. The $2 chisel with seductive wooden handle and shiny blade will no doubt be poorly engineered from inferior metal that will not keep a sharpened edge. Tools like these are useless.
Knowing what you can buy cheap is useful when on a budget. Mostly our own experience will be the teacher, because not everyone agree on the suitability of some low cost tools. What works for some, will not for others. I can use the small (under 150mm) F-clamps bought for $5 with no problem, but others tell me they don’t work for them.
Even to the trained eye, it can be difficult to always tell when items are a waste of time and money. Cheap power tools may have two or three year guarantees, but when broken down, are merely swapped for a new one rather than repaired, adding to our pile of environmental shame and guilt.
Buying secondhand tools
The great thing about secondhand tools is they are cheap by comparison and there are lots of good, sturdy useable tools still out there with plenty of life left in them. But when it comes to power tools or machines, it’s harder to tell how hard they have been worked. I always ask about a tool’s history before buying.
With hand tools (and occasionally machine and power tools) sometimes the older a tool is the better quality it can be. Look for stamped metal trademarks that reveal the manufacturer’s origin.
For between $3 and $12, I might pick up an abused old secondhand chisel and then pay $6–$7.50 at the local hardware or tool sharpeners to have it reconditioned and sharpened properly. I paid $20 for a beautiful 80 year old bevel-edged chisel made in Sheffield, UK with a slightly cracked handle. The crack doesn’t affect its performance and it’s now my favourite tool.
Deeply pitted chisel or sawblades from heavy rust means the tool won’t hold its edge for long when it’s been sharpened. Light rust can be removed with wire wool and elbow grease.
More ways to save
But there are still further ways to save. Get together with family or friends or neighbours to share tools and perhaps even a space. Or make your project with a friend, pool resources and get the job done faster. Then do the same for them.
I recycle tools which are not being used regularly. Like the clothes in my wardrobe, if I haven’t worn it in a couple of years I sell it, swap it, or give it away and buy something else. Sometimes I will pick up a tool at a garage sale, clean it up and sell it on. This small profit goes towards tools for the workshop.
Then there’s The Men's Shed movement that has grown all over Australia and some are very well equipped. Here you’ll find a wealth of knowledge being shared by the retirees and experienced woodworkers who gather there and there’s usually plenty of complete beginners so you will feel at home. Find out if you're near a Men's Shed at www.mensheds.com.au, or maybe you could start one in your area. Women are welcome one or more days a week at many Men’s Sheds.
I enjoy tools and never tire of the endless adventure of finding new ones to share in my workshop!
Patt Gregory teaches woodwork from her Mullumbimby workshop. See www.woodworkforwomen.com.au