


Words and photos by Nathan Day
The idea for this jewellery box comes from one of my favourite pieces—a fan shaped table made by the late Alan Peters, one of the UK’s finest furniture makers. Alan may have been skilled enough to carve the top by hand, but a few details suggested it could have been done another way. It wasn’t until a couple of years later, flicking through an old woodworking magazine that the secret to this technique was unlocked. By using a core box cutter in the router and designing a jig that tapered each cut from a central pivot I discovered I could achieve that beautiful fluted fan shape with relative ease.
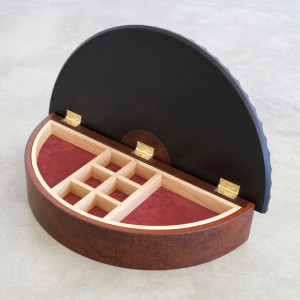
I really wanted to design a piece that incorporated this technique and settled on using it for the lid of a jewellery box. I felt it would be quite an unconventional yet interesting shape for a box. Also, a fan is a delicate and elegant form, appropriate for a jewellery box.
I came up with a set of dimensions that felt right and started working backwards (or inwards) from there to incorporate lift-out trays of different sizes.
Drawings and templates
The laminated semi-circular shapes of the lid, sides and trays decrease in radius until the trays are held snug inside. To start with I drew everything to scale and then replicated the top, box, trays and bases on MDF to create templates. From these I built the formers that would be used to laminate the box and tray sides.
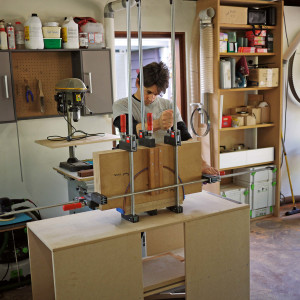
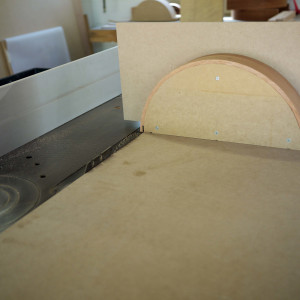
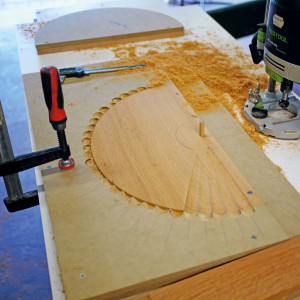
A basic jig was used to cut the semi-circles. I attached my router with a straight cutter to a length of MDF and marked a centre line down its length corresponding to the centre of the cutter. A single screw holds the jig to a base board which then acts as a pivot point to swing the arc. The screw is placed the radius distance from the cutter. This method produces accurate circles, semi-circles and arcs.
Re-sawing solid timber
Forming curved components is quite labour-intensive—lots of re-sawing and thicknessing to produce thin slices of timber that are easily bent into a curve without a great amount of tension. However this process does produce strong and stable components that have beautiful grain flow when your slices go back together in the order they were cut.
I used sheoak re-sawn to 2mm thick, then thicknessed to 1.7mm. Six slices gave me 10.2mm for the finished thickness of the box.
Formers
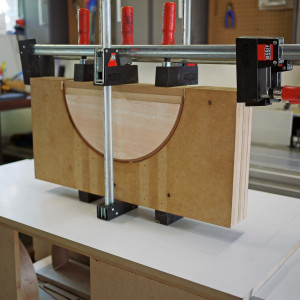
I use MDF two-part formers to laminate. Nice even clamping pressure can be achieved with minimal clamps. The finished width or height of the box is 65mm (without the lid). From the template I marked and cut four pieces of 18mm MDF for the former to give 72mm. This gave a bit of extra width for laminating which I then face-edged and ripped to finished size. The four pieces were then screwed together and profiled to my template on the spindle moulder. This method results in perfectly square and even formers that produce accurately curved components.
I like the width of my re-sawn slices to be 1–2mm narrower than the width of my former so I wanted my solid timber blanks to be 70mm before re-sawing. When gluing up, the alignment guides screwed to the sides of the former guide the two parts together and keep the slices aligned. There’s also less chance of the piece twisting during the glue up.
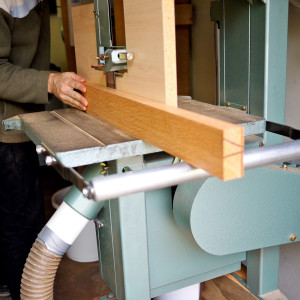
Keeping the component clamped in the former is a great way to square the face edge on laminated components (and to do a lot of the joinery as well). An edge lipping planer easily planes the face edge, but you could use a router also. This keeps the edge true and square to the face.
You could use this method to gauge your finished width as well, but I find ripping it on the tablesaw followed by a light hand plane works well too.
Dovetail secrets
The first time I made this box I did pretty much all the joinery by hand. The square housings in the back of the box and trays were marked and cut by hand and cleaned up with a chisel and a shoulder plane. I got nice joins but it was very time consuming. This time I was making two boxes so I came up with a quicker method.
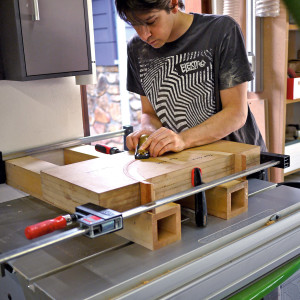
The joins were again marked with a pencil and a scalpel, but I cut all the square housings on the tablesaw using a modified version of my former, which meant I had a beautiful accurate square cut that just needed the shoulder to be lightly planed.
The dovetails were still cut and fitted by hand. For this piece it was far easier to cut through dovetails. However I apply a face veneer after the box is glued that covers the ends of the tails and gives a much cleaner look. I won’t go into the full process of hand cutting dovetails but I will mention a couple of things that really helped me when I was struggling.
The key to cutting tails is not the angle of the dovetail but cutting your tail square to the face. If you start your cut square then chances are it will stay square. Use the reflection of your work in the side of your saw to help keep your saw square.
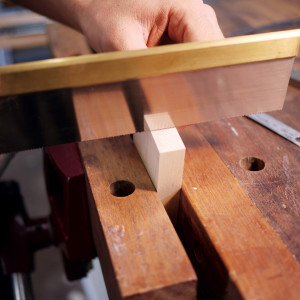
When the reflection draws a straight line, you are square and good to go. Try this a few times and you will know where to position your head to look at the reflection. A few goes and you’ll get the hang of it.
I also find it very useful was to mark the tails using only a pencil and extend the lines well beyond the shoulder line as a guide. I knife my shoulder line and also all my pins, but when I started cutting dovetails by hand I was marking everything with a knife line. I would then try and cut just shy of the line and then clean everything up with a chisel. If you can cut square to a pencil line then there is no need to touch that surface with a chisel and you save your self heaps of time.
I also use a paring guide to chisel the shoulder line to keep that line straight and aligned.
Glue-up
The construction of this box is like that of a traditional drawer. The solid cedar base is grooved into the curved front and into a slip, fitted onto the back of the box. The base is fitted and goes together with the main box glue-up but is not glued so the 1mm clearance distance between the tongue on the bottom and the back of the groove can allow for wood movement.
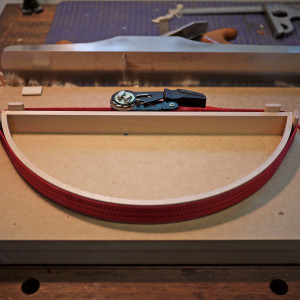
Band clamps fitted with a ratchet are very handy for this type of glue-up. You can also use dowels on the corners to build extra pressure around the joins.
The trays
These go together the same way as the main box as they are really just smaller versions. The trays are formed as one piece and later ripped into two. The bases are different as I make my own 2.5mm cedar-veneered MDF with one face lined with suede. There is some fiddly joinery in the compartments in the top tray—some half checking and angled housings that I do by hand. You have to be really accurate here, so as not to distort the shape of the tray when it is clamped up. If the tray is distorted you will either be disappointed with the fit or upset that you have to make another tray. After the glue-up I clamp both trays back together and make sure they are still the same shape and make any adjustments needed to fit them back into the box.
The lid
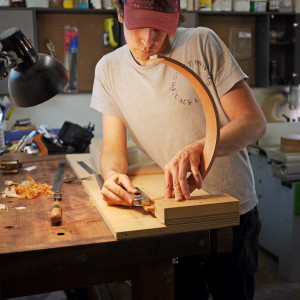
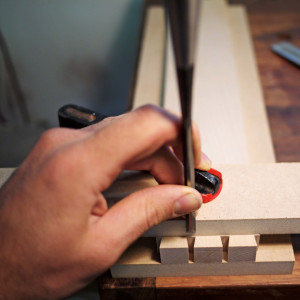
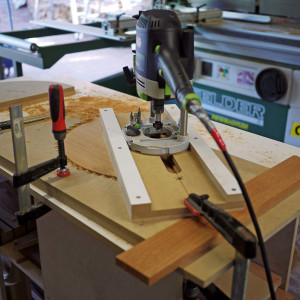
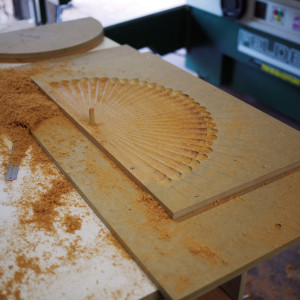
The fluting on the lid is done with a simple jig, a router and an off-the-shelf core box cutter. The 19mm cutter I chose looked in proportion to the lid size and number of flutes wanted. There was a bit of fiddling around at the drawing stage to get the number of flutes correct. I ended up with 30—divided into 180° this gave a 6° angle per flute.
The jig has two parts. The lower part, made of MDF, holds the lid tightly and has the centre point of each flute marked on it. The top part is the tapered sled for my router. The sled pivots using a dowel which locates into a corresponding hole drilled in the top.
The centre point of the cut (marked on the sled) is lined up to the centre point of the flute (marked on the base). The area of the top with the pivot hole is later removed and replaced with a contrasting piece of timber.
I left about 20mm extra width on the lid—room enough to drill the dowel hole and for screwing the lid to the MDF base for routing. Once the lid is finished it was ripped to finished size.
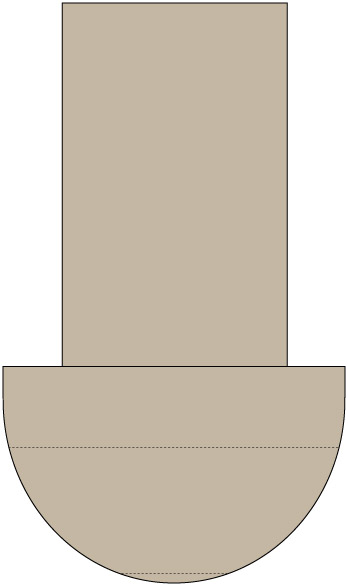
To get the amount of taper, I did a scale drawing of the box cutter. Find the point where the cutter diameter corresponds with the wide end of the flute (see fig. above), in this case 18.5mm, and draw a line through. Now draw another line at the bottom of the cutter corresponding to the width of the narrow end of the flute, about 0.5mm up from the bottom. Measure the distance between the two lines —this is the amount of taper your jig needs (7mm). To get the angle draw a right angle triangle. Base length (width if top) 210mm, height (amount of taper) 7mm and then join the two to get the angle—in this case close enough to 2°.
The centre of each flute is marked is marked on the base board. I also have the centre of the cut marked on my sled. Now it’s just a matter of setting the correct depth on the router, lining up the centres, clamping off the jig and running the cut. I made an MDF prototype of my top for an important test run. The section around the dowel hole was bandsawn out and a piece of sheoak added to contrast with the ebonised top. I grooved each piece and made a curved tongue to secure them together. Once the glue had dried, I ripped the top to size.
Finishing
From here it is all finishing. I tried a new oil and wax finish on this piece which was in keeping with the traditional elements of the box. There is a lot in the detailing—on a small item like a box it’s magnified as people look more closely than they might at a larger piece. So everything needs to be detailed to perfection—even surfaces that may never be seen, should be treated with care, as one day someone will notice.
I would say that this is one of my favourite pieces. It is not only visually interesting but has an interesting construction. For me it is a perfect balance of machine and hand work and very much in keeping with what I set out to design and make based on the original Alan Peters table.
Photos: Nathan Day
Nathan Day lives in Dunsborough, WA.
Thicknessing Thin Sections
- Because I don’t have a thickness sander (great for thin timber) I have to use a thicknesser to gauge each slice. My thicknesser is very accurate and can take just 0.2mm off without any roller marks. There are a few things to be mindful of when running thin stock through the thicknesser:
- Use new or freshly sharpened blades.
- Run each slice through with the grain. This can be really difficult. The wood I chose had a clear grain direction however slight changes of direction (especially in the maple) resulted in a few pieces being chewed up and spat out the other end. This leads to the next point…
- …cut more than you think you will need. You can waste valuable time if you go through this whole process only to fall a couple of pieces short.
- Take off as little as possible. I’m working on about 0.3mm per pass, but this will vary depending on your thicknesser. Also I use a damp sponge to wipe the surface of the timber before sending it through. This makes the timber cup down slightly so a tiny bit more is cut out from the centre of each piece. When laminated this will give nice tight glue lines on the edges. I tried this technique for the first time on my jewellery boxes and got great results. You could do this when thickness sanding also.