


Story and photos by Andrew Potocnik
As a maker I see my work as being quite calculated; symmetrical with clean, balanced lines. However, I’m fascinated by the looseness I see in other makers’ work. This piece was inspired by the work of Marc Ricourt, but the aggressive carving he applies to his forms became much more subdued in my final piece. I just can’t help my inner instinct taking control. I experimented on a small scale piece to see whether it conjured ideas for future pieces that I could stamp with my own style.
A piece of redgum about 150 x 100 x 100mm was mounted between centres, roughed down to a cylinder and a tenon cut at one end.
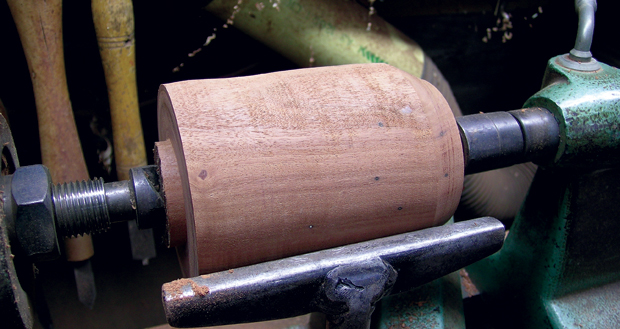
This was so it could be gripped in a scroll chuck and roughed down to the outer profile I had in mind.
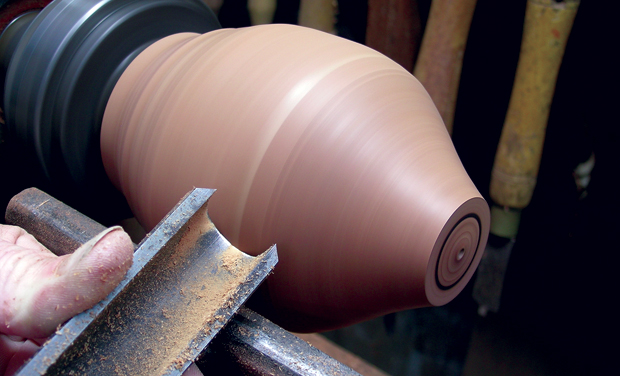
Once the form looked right I pencilled in the lines that I would later carve.
The interior needed hollowing but I only roughed out the bulk of material at this point using several tools including my Munro hollower. At this stage I wasn’t sure whether I would carve right through to the hollowed interior so I left a fair amount of wall thickness.
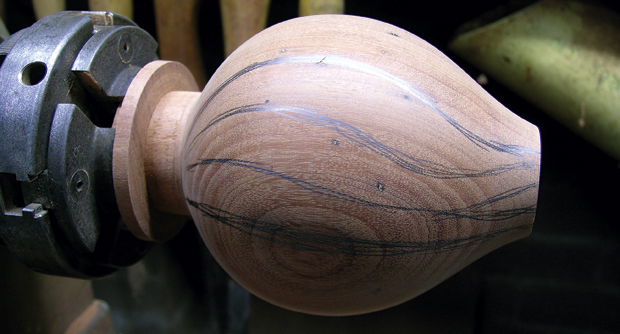
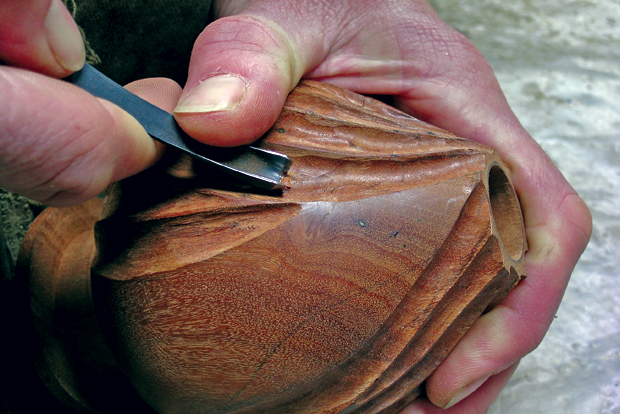
Transferring the chuck and hollowed wood to a carving clamp (these attach to the saddle of your lathe with a screw bit that allows you to thread a chuck onto) allowed me to begin carving S-shaped flutes into the form.
Later I found it easier to take the form out of my chuck, rest it on the padded edge of my workbench and carve it freehand: rotate, carve a bit more, hold it up, survey progress, work a bit more here, fill in a space there and just go by what seemed to look right.
With most of the exterior carved I re-chucked the piece and mounted it on the lathe ready for hollowing. Kelton hollowing tools and a handle allowed for plenty of support as the tool worked well over the toolrest. The problem here is that the further the cutting tip of the tool is, the less control you have as the tool touches the spinning wood. A heavy tool handle helps to counteract downward forces on the tool tip and reduces the battle between turner and wood. The longer the distance between toolrest and tool tip, the more effort there is for the turner. This is why I started with a fairly small form, followed by the fact that to sand inside the form, my fingers could only reach so far.
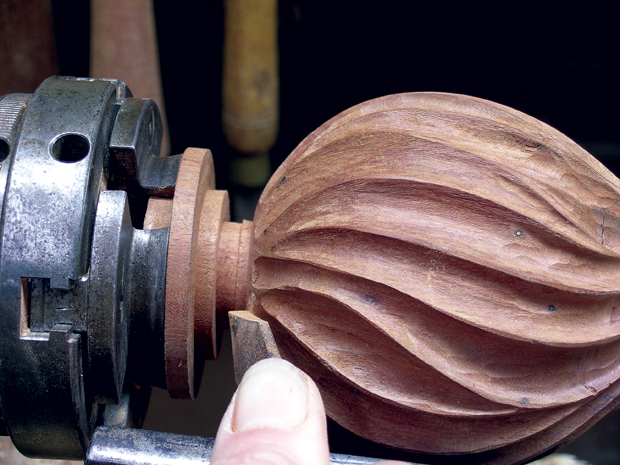
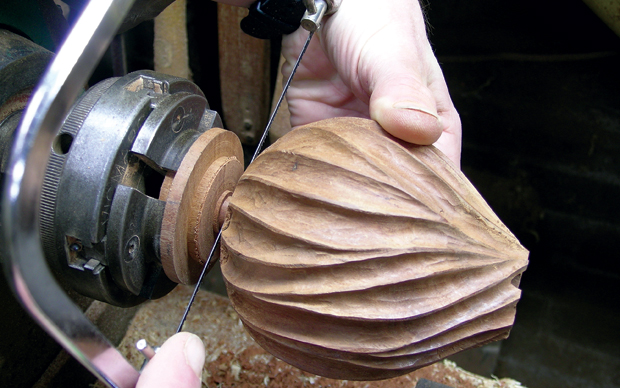
The photo above shows how the base of the form was reduced with a parting tool before cutting it free from the carrier with a coping saw, as shown below.
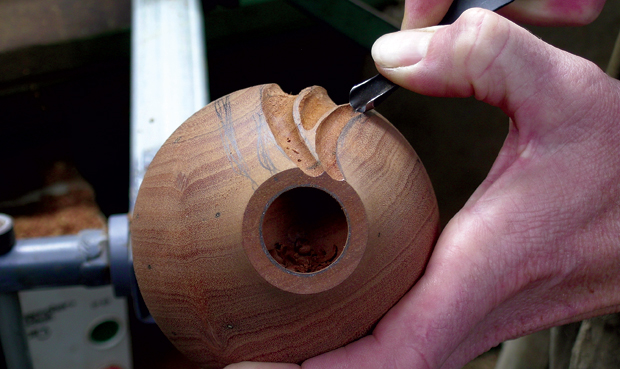
Now it was ready for final carving of the base. I used gouges in decreasing sizes to create finer flutes that converge.

Working on the rim a range of smaller gouges followed by files were used to break through the walls of the form and establish a prominent exit point for each of the flutes.
Inner edges were ‘eased’ with a file before final detailing.
Although I had decided that sandblasting the exterior, as shown below, would eliminate hours of sanding (while adding texture) in reality there was no possibility of recouping financial compensation for the hours that had gone into this 120mm tall hollow form.
Careful to not wear away the pointed ends at the top of the form, I concentrated on texturing the main body and its flutes, aiming to eliminate any stray carving marks. Beware though: even with this technique bad tool work will still show through and poor definition between flutes will simply blend into a mush of undulations—fine if that’s what you want, just don’t use the sandblaster to cover up poor workmanship.
In the main photo you can see how softer parts of the grain are worn away and harder parts remain whilst the carved ridges still stand proud. An unfortunate side effect of sandblasting is that the timber takes on a paler, whiter appearance. I counteracted this by applying a water based dye, which left me with something that looked like a strawberry coloured piece of wood. To darken and tone down the colour I applied a generous coat of Feast Watson’s Black Japan, filling pores and worn away grain before rubbing the finish back vigorously with plenty of elbow grease, turpentine and sweat to reveal high spots of red and black residue. This formed my final outside finish while the inside was coated with acrylic ‘henna’ paint.
All in all, I enjoyed making this piece, I learnt a lot about carving textures onto forms, dealing with dyes and unwanted effects, but it did take ages to complete. It’s a wonderful example of how to convert a simple form into something more, but if you’re inspired by another persons work, go with your gut feel, do it your way but also take time to reflect on what has influenced you personal touch.
Andrew Potocnik is a regular contributor to Australian Wood Review. Learn more about him here.