


Words and photos by Neil Scobie
You can’t help being inspired by what nature has to offer. I have been making what I call my ‘Erosion’ pieces—bowls, free-standing and wall-mounted sculptures—since the late 1990s. The idea of ‘eroding’ and undulating forms first came from growing up on a farm where we had to control soil erosion on steeper country. More recently inspiration has come from white water canoeing, when you see a log or a tree caught up in rapids and how water runs over these surfaces to ‘erode’ their lines.
Developing a design
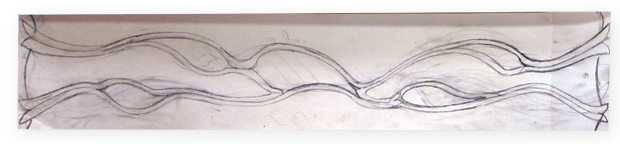
I started with a piece of Huon pine measuring 700 x 155 x 35mm and planned to make a Christmas present for my wife Liz that would be mounted on a 300mm square post inside our house. It was important that the design would blend in with other pieces in the room and not dominate the space. I first made a full size drawing of what I thought I wanted to make and hung it up within easy view on the wall in the workshop. After about a week I started to feel the drawing was too busy and so made a second one which seemed a better way to go (photo 1). I also checked the design by hanging it on the post inside the house when Liz was not at home.
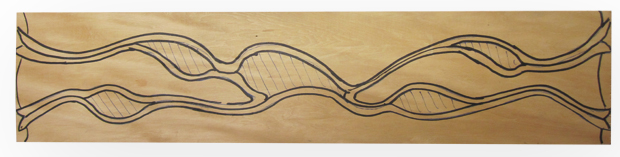
If you are going to attempt a piece like this it’s important to have a full size drawing that you can refer to while carving. You will need to draw the design on the wood, but as soon as you start carving you will lose the lines. I used a broad marker pen so the lines would be clear in the photos (photo 2).
Roughing out the waste
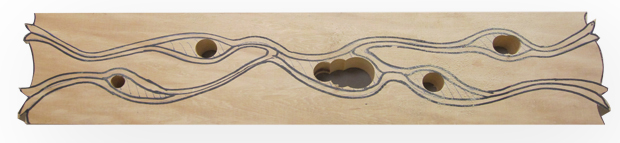
After the design has been drawn onto the wood, the first job is to drill holes in all the shaded areas ready for sawing out the waste areas (photo 3).
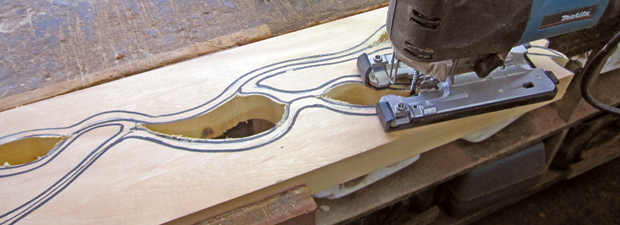
Now you can jigsaw out from the holes, being careful not to overcut the corners (photo 4).
Initial shaping tools
You can use only hand carving tools if you prefer, but I like to use a combination of power and hand tools to speed up the process. I used an Arbortech carver to remove most of the background waste (photo 5)...
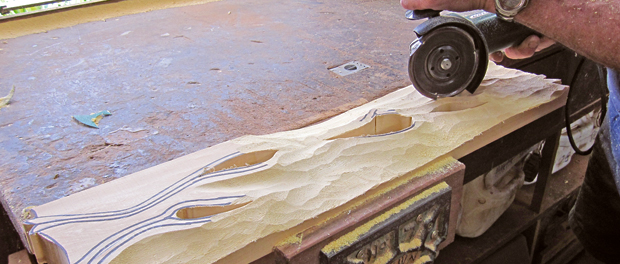
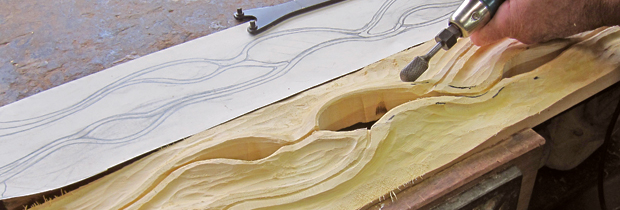
...followed by an Arbortech mini-carver to cut the track lines. The smaller mini-carver disk allows you to cut closer to the lines. A die grinder with a 19mm diameter double cut carbide burr is really useful for trimming the carved areas (photo 6).
Carving the ‘water courses’
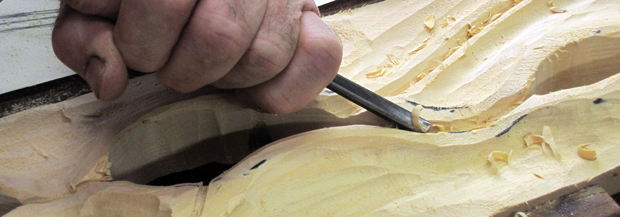
These lines, or tracks as I like to call them, can be roughed out with the mini-carver, but for accuracy and detail a V-tool is best—here I used a Pfeil 12/6. A series of light cuts will give a better result than one deep cut (photo 7).
Carving the back
The backs of the raised sections are hollowed out to even the all-over thickness and to give less depth when abrading the erosion holes through from the front. You can use power tools for this, or a wider gouge like the 32mm one shown in photo 8 will get the job done fairly quickly. On a soft timber like Huon this is a simple task as long as you carve with the grain. If the timber was harder a wooden mallet would be needed to help the gouge cut.

At this stage I like to add more detail to the front before finalising the back section, just in case you need to reduce the thickness some more. The back should be fine sanded after all the texturing has been completed.
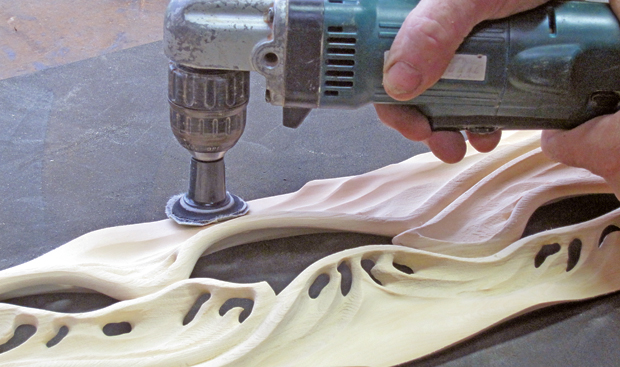
Detailing the erosion lines
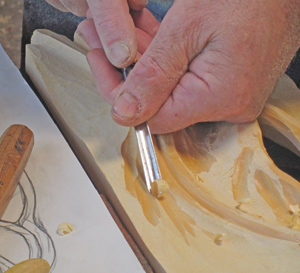
The look I am trying to achieve is that of water coursing in curved flowing channels, some shallow and some wider and deeper. These channels can be cut in with any of the tools that you prefer such as the carbide disc on the Proxxon long neck angle grinder (photo 9)...

or with a smaller curved 10/6 gouge (photo 10).
I also picture in my mind how water can run down a steep dirt road. It runs in curved lines, stops when it hits something hard like a rock, changes direction and flows on again. My aim is to have free flowing lines that vary in width, depth and direction, depicting what I see in nature. These lines should be reasonably finalised before you mark in where the ‘eroded’ holes will go.
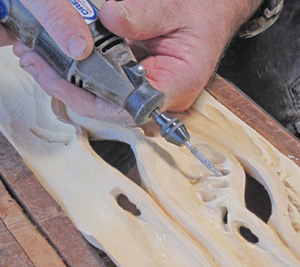
Creating the erosion holes
I draw and shade these in with a soft pencil like a 4B so I can get an idea of what they might look like. When you are happy with the look I start with a tapered carbide burr in a rotary tool, making sure I create room for the cutter as the hole is widened (photo 11).
The erosion holes can be C-shaped, tapered or have dog legs but there shouldn’t be too many round holes. To carve the channels that run from the holes a rotor wheel on a rotary tool works really well (photo 12).

Sanding the holes though is a tedious process of pulling torn strips of cloth backed abrasive through the holes to remove the tool marks. The strips should only be about 5mm wide and about 200mm long and it is a good idea to place a strip of masking tape over the last 40 mm of each end of the strips. This to stop you wearing the fingerprints off your fingers. I like to use 120 grit to start, followed by 180 and 320 grits and then up to 400.
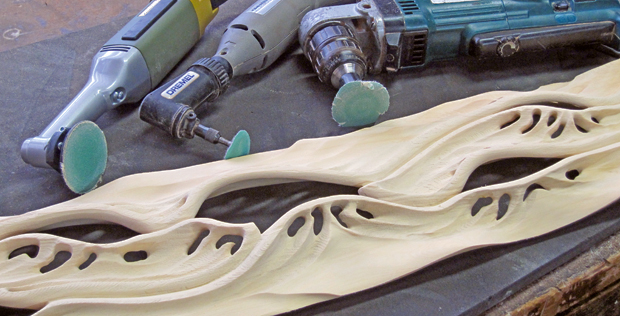
Sanding the channels
There are a few tools (photo 13) you can use to remove the tool marks from the channels, all of which can hold soft sanding pads that attach with Velcro.
Woodturning suppliers sell sanding arbors for sanding bowls and these can be tapered or feathered out on their edge (photo 14) to mould into the rounded channels and grooves. I start with 120 grit and progress finer and finer to 600 grit.
Texturing
Sometimes I sand these pieces smooth or texture some parts for contrast. A rotary tool with a small dentists burr about 1.5mm in diameter will give a leathery texture. This type of texturing can be quite tedious and time consuming.
The wall piece I’m making here was sandblasted, a much faster way to texture and more in keeping with the erosion theme. Once the piece has been sanded to about 120 or 180 grit, use masking tape to shield the areas you want to keep smooth.
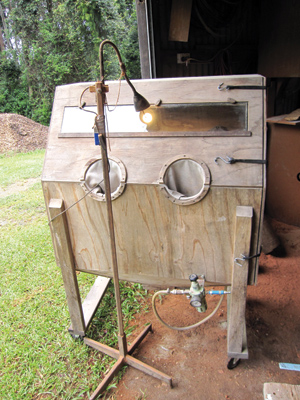
Sandblasting is quite an easy process but you should try to contain the blasting material as it is too expensive to just blast out into the outside world. I built a free-standing sandblasting box from CD plywood (photo 15) that can accommodate pieces up to one metre long.
The abrading material that I use is ground glass beads, about 60 grit. With a reasonable gun it will only take you 10 to 15 minutes to blast an area of this size. It’s important when sandblasting to consider the grain pattern of the timber you’re using. Quartersawn timber with ribbon grain will generally look quite boring as the growth rings will be running parallel up and down, or across the piece. Backsawn timber will have a growth ring figure which will look much more interesting when sandblasted.
Finally…
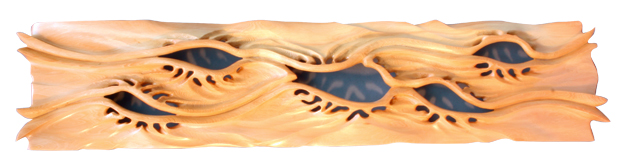
Once the piece is sanded to your liking, get out your favourite finish and apply it. This piece has had four coats of a non-toxic oil finish with a rub back between coats with a white scouring pad.
When I make these pieces I like them to be individual so they don’t look like they have all come out of the one mould. Using the one theme you can still come up with many ideas and ways of developing it. Making a project like this will be rewarding as long as you plan well and are prepared to put in the time this will take.
Neil Scobie writes regularly for Wood Review. Learn more about him here