


Supplied with a sketchy diagram from a mystery client, Keith Briggs dips into his dwindling supply of highly figured WA jarrah to create a contemporary bedhead.
Starting this queen size bedhead was a real challenge in more ways than one. It was a commission from a gallery so I had no contact with the client, just a brief to design and make a jarrah bedhead with the central piece supported by marri dowels.
The concept was the client’s and the description came with a diagram (below), though I am not sure who drew it. I was grateful for the diagram despite its sketchy appearance, and rest assured it was extremely informative compared to some that cross my path.
The timber selection was the easy part as I had earlier made a chest of drawers for the same unknown client from absolutely stunning jarrah that was not only curly in grain but had black spot as well. I still had some more of this timber in my storeroom.
As the design was quite ‘open’, going through previous templates provided the basis for the general shapes of the various components. Many years ago I read that you should avoid throwing away old templates and I must admit mine are used constantly.
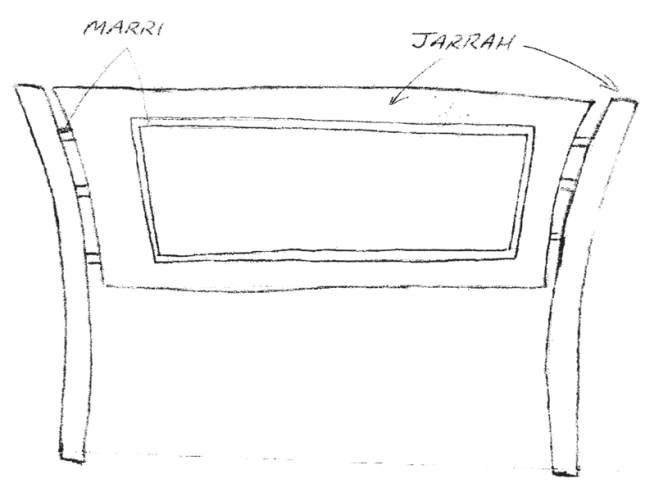
The sketch provided by the client.
As this was a one-off design I drew the bedhead full size on a 3mm cover sheet of MDF without any preliminary paper drawings. The drawing gave me an accurate reference for the unusual shape and angles of the top section.
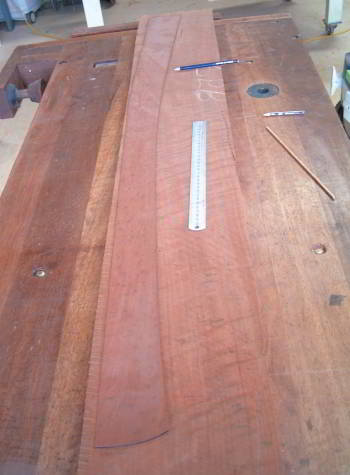
First cuts
Marking out the uprights on 50mm rough sawn stock using the template comes first (below). Cut the shapes slightly oversize on the bandsaw then machine to the final thickness and plane straight sections for the inside edges.
The two uprights are then cut to final size (1200mm long) and receive 32mm deep mortises 200mm up from the bottom to accommodate the 1500mm long x 90 x 30mm bottom cross member. This length is slightly less than the width of a queen size bed.
The outside edges of the uprights receive a 12mm radius and the tops are rounded slightly about 4mm.
Veneering the central panel is next. I used 2.2mm veneers which I cut myself. These are laid onto 25mm MDF that is cut slightly oversize so it can be trimmed when it comes out of the veneer press.
As with all quality work the veneer goes on both sides. Solid timber could be used but it would not be as stable and achieving the continuous book-matched pattern would be highly unlikely. It is that pattern created by such beautiful timber which makes this bedhead really stand out.
The panel is now solid-edged with 25mm wide x 30mm thick timber on the sides and bottom and 60mm wide timber on the top. Do not cut the curve until the groove for the inlay has been routed.
The inlay here was West Australian marri 6mm wide. Once the inlay is in, both sides can be sanded flat and the top curve cut, planed and routed with the 12mm radius router bit.
Marri spindles
The 10 small marri spindles were turned on the lathe. The centre section is 30mm diameter tapering to about 23mm, and the protruding dowels are 12mm diameter.
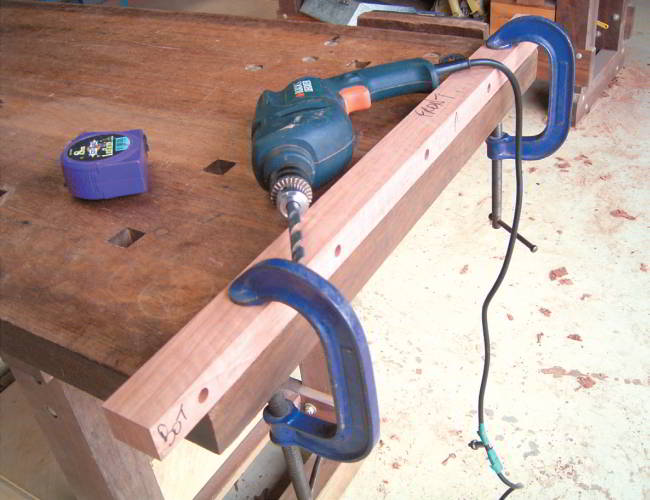
So the dowel holes line up on both the central panel and the uprights, a jig is made from timber the same thickness as the main leg (40mm) and predrilled on the drill press with the holes in the centre and evenly spaced.
This is then clamped to the bench, and the holes in the legs then the central panel drilled (below). The central panel will have to be raised 5mm, half the difference of the thicknesses of the leg and the panel, so the holes will be drilled in the centre.
Assembling the components that have been made so far will allow you to check that the cross member has to be 1500mm plus 60mm for the tenons. The cross member is machined from 40mm rough sawn stock and a tenon 30mm long is cut on each end.
This bedhead attaches to the wall as do most of the bedheads that I make. Modern bed ensembles have nowhere for the bedhead to attach to and the only other way to overcome this problem is to make a complete bed frame, which is impractical most of the time.
Three blocks of 25mm thick timber glued and screwed to the back of the central panel and cross member are used to screw the bedhead to the wall.
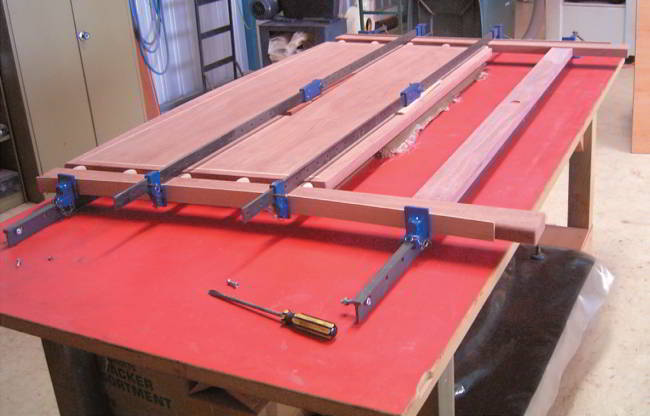
Glue and clamp
The whole assembly is now glued and clamped together with thin flexible strips of timber protecting the uprights from the metal clamps (below). I use an epoxy resin for most of my glue-ups as it provides ample working time and excellent strength.
After leaving the clamped project overnight the bedhead is now ready for finishing. Although I sand all components before assembly, everything is checked and re-sanded with fine paper, usually 240 grit.
This bedhead was sprayed with catalysed lacquer, two coats of sealer followed by two top coats, meticulously sanding between coats. To sand curved surfaces and the spindles between coats I use fine abrasive foam backed pads as they easily conform to the curve.
The result is a bedhead that really shows off the unique and beautiful grain of this timber. It is just a pity that the timber that went into making this and many other commissions is now almost gone.

Keith Briggs is a furniture designer/maker in Australind, WA.
This article was first published in Australian Wood Review magazine, issue 55.