Words and photos: Robert Howard
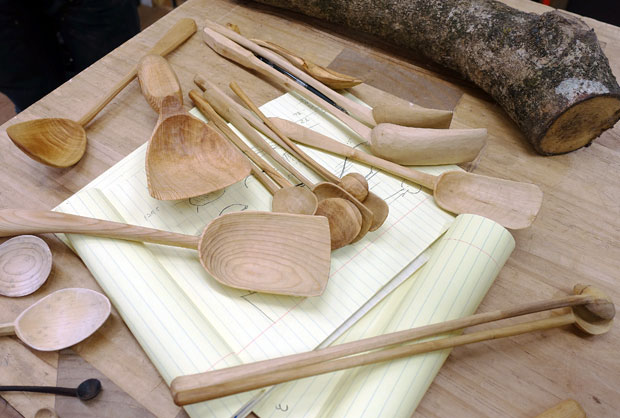
Spoon carving is a widely practised art with a long history. For me, spoons are to carving what chairs are to furniture. At their best, both are three dimensional, functional sculptures. Their forms can be infinitely varied, but are subject to the disciplines imposed by successful use. There is an ‘art’ end to both, where collectors buy non-functional versions, but the real ones are those made for daily use.
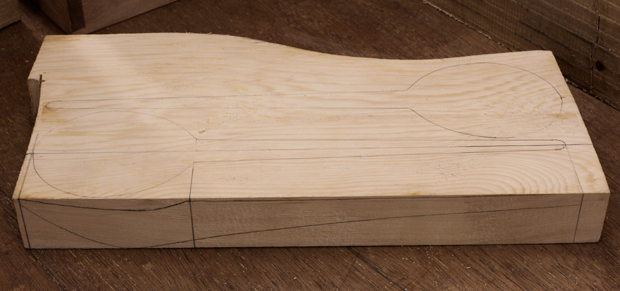
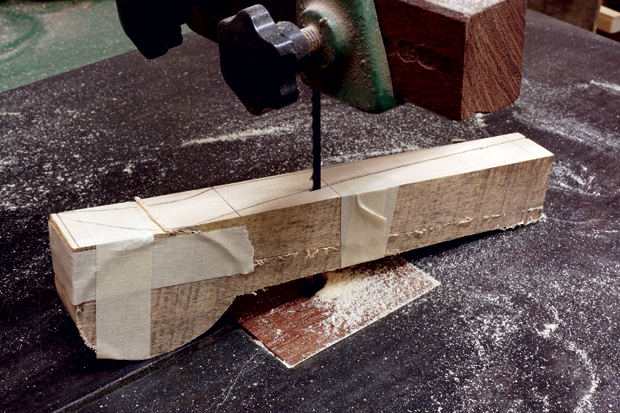
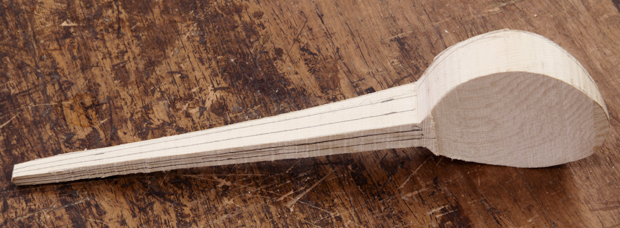
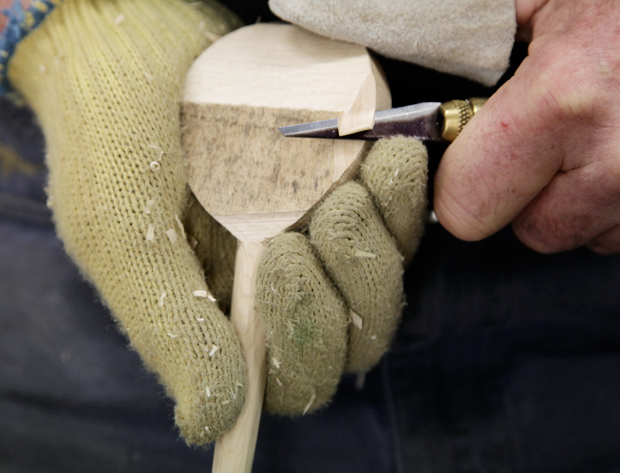
Spoon makers can be divided into two camps. There are those who begin with a piece of (green) wood taken directly from a tree or shrub, and use axes and knives to split out a blank that is then carved. Then there are those who take a short board of suitable wood and use a bandsaw to cut out a blank, which is then shaped with either with traditional or specialist tools. In Europe and America, spoon makers tend to be of the first type. Here in Australia, suitable wood is not readily available, and so we are more likely to fall into the second category.
Scroll down to the bottom of this page and you will see the latter process step-by-step.
What tools do you need?
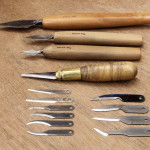

Above left, top to bottom: Knives by Jim Wester (large, medium and small), and Warren Tools.
Above right: Grunfors Bruks carving axe (top), and carving hatchet (bottom).
Traditional straight and hook spoon knives are better to use than traditional carving chisels and gouges, because knives are designed to be used with one hand, freeing the other hand to hold the wood. It is possible to use gouges and chisels with one hand, but it is neither as easy or safe as using two hands. But if you use two hands on the tool, the wood must therefore be held by some other means, and with the variable curvature of a spoon, that is no easy matter.
Straight knives are easily sourced, and can be anything from a well sharpened pocket knife through to a hand forged, specialist carving knife. The most favoured knife around the world seems to be something based on the Sloyd knife, a Swedish long bladed, general purpose carving knife. Personally, I prefer a shorter blade, so I like the small and medium North Bay Forge straight knives.
North Bay Forge hook knives are made by a blacksmith, Jim Wester, and are quite different from the other knives I have. He lives on the north west coast of the US, where the native Americans carved their fabulous totem poles, and his knives reflect that carving tradition. They are double edged, and of different sizes and shapes. The double edge means they can be both pushed and pulled, but they require care in use because of the exposed rear edge. They also have the most exquisitely fine blades, and come razor sharp.
My other hook knives are traditional spoon carving knives from Ben Orford (England), Svente Djarv (Sweden), and Del Stubbs (USA) who trades as Pinewood Forge. They are single edged, and therefore easier and safer to use, but you need two of each: one to push, and one to pull.
That, incidentally, is why carving tools often are offered in left and right hand versions. It is not to suit whether you are right or left handed, but because, in carving, sometimes you need to cut on the push stroke, and other times on the pull stroke, so every carver needs both. I have not used these tools enough yet to be able to offer an opinion as to their relative merits, but they are all fine looking tools, and all come very sharp. All these makers have very good reputations. To begin with, you need to buy one straight knife, and a left/right set of hook knives. As you learn to carve your spoons, you will gain an understanding of what additional tools you might want to further refine your evolving methods.
If you don’t have access to a bandsaw, you might like to explore using an axe instead to rough out your blanks. Shown above are two Swedish axes by Grunfors Bruks, and I bought them in part because they have the most extraordinarily beautiful handles that I have ever seen. They also happen to be very fine, blacksmith forged, axes. One is a carving axe, designed by Swedish carver, Wille Sundqvist, and the other is a carving hatchet. The axe is designed for the rougher, beginning work; the hatchet for the finer, more detailed work.
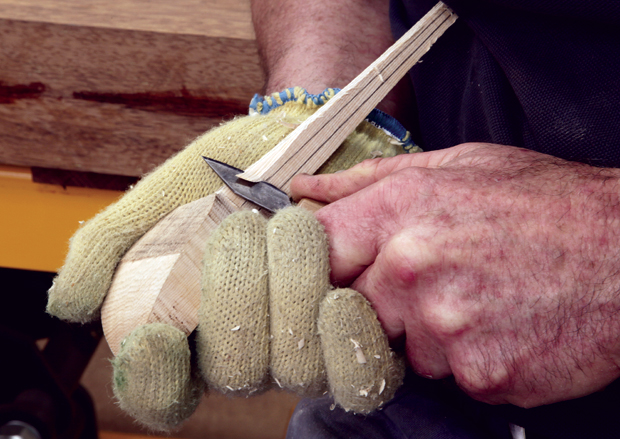
The final tool you need is a protective glove of some sort for the hand that you use to hold the wood as you carve it. I use a kevlar glove (sold by Carbatec), but recently I had need to visit a fishing tackle shop (no, I am not a fisherman), and I saw there an interesting filleting glove made, the blurb said, from stainless steel. Whatever you choose needs to allow you to hold the spoon blank with your gloved hand with whatever sensitivity and deftness that you require. These gloves will probably only ever fully protect your hand from glancing blows, and soft direct blows. They will not prevent you from stabbing your hand with a sharp point, for example.
What woods should you use?
Europeans, and those Americans who live in the right states, seem to be surrounded by suitable carving woods. We aren’t. The most promising wood that I have tried is celery top pine (Phyllocladus aspleniifolius). According to Bootle it has no odour or taste and is suitable for kitchen utensils. It proved to be a bit hard for ideal carving, until I sourced and tried it when it was wet or green. Most woods are easier to work before they dry out, and the celery top certainly was.
Bootle also produced some other possible candidates: Queensland kauri (Agathis microstachya in the north, or Agathis robusta in the south), ivorywood (Siphonodon australis), candlenut (Aleurites moluccana), yellow boxwood (Planchonella pohlmaniana) and brown pine (Podocarpus elatus). If you know where I can get some of any of these woods—or if you know of any other possibilities—I would love to hear from you. Fruitwoods such as apple or pear would also be good to try, but are hard to get in any decent size.
Why you need to keep tools sharp
I purposely said ‘keep your tools sharp’, rather than ‘sharpen your tools’. The normal but incorrect routine is to use your tools until they are blunt and then resharpen them. The correct and far easier method is to constantly touch up the edges of your tools as you use them, thus never having to resharpen them unless an edge is damaged.
These knives are tricky to resharpen because of their complex shapes. It makes very good sense right from the start to be fastidious about keeping them sharp. The big question of course is how to do that, and it boils down to learning how to wield your strop, and getting into the habit of doing it after every few minutes of carving (not days, weeks or months).
How to strop
Stropping means rubbing or polishing the edge of a tool with a very fine abrasive compound. A sharp edge is produced when two highly polished surfaces intersect, with the sharpness being dependent on the degree of polish applied to both surfaces. The type of polish used is important too, with some being finer than others. Buffing or polishing rouge is usually used, with chromium oxide being one of the better ones. I have used a buffing wheel to sharpen my carving tools for almost 30 years, and have had most success with the white and the green rouges.
Other people have had good results using Auto-Sol, a compound used to polish the chrome on cars, available from auto parts stores.
The compound is applied to a leather surface or a buffing wheel, or even to a block of tight, hard endgrain wood. The blade being sharpened must always be held or moved so the polishing is done away from the edge (opposite to what usually occurs with a grinding wheel, for example). Failure to do this with a buffing wheel can lead to a nasty accident. In any case, whilst a buffing wheel is great for conventional carving tools, I would not recommend it for these tools unless you are very experienced with it.
Two types of strop are needed. For the outside surface of hook knives, and for straight knives, a flat strip of leather fixed to a flat surface will work. For the inside surface of the hook knives, wrap a piece of leather around a length of wooden dowel of an appropriate size (mine is 19mm or ¾ inch). Then work some of the stropping compound into the leather surface.
The key to successful stropping is to use the lowest possible angle that you can lay the blade at while still allowing the edge to be in contact with the leather. The most common error is holding the blade too vertical to the surface, resulting in a blunt, rather than sharp, V-edge profile.
Allowance needs to be made for the fact that the leather is soft, so the edge of the blade sinks into it a bit. When the blade is drawn back, the leather surface flows across the blade surface and up and around the edge, causing what is called ‘dubbing,’ or rounding, of the tool surface at the edge. This effect is made worse if the blade is held at too great an angle. Stropping can be done either by drawing the strop across the blade, or the blade across the strop, whichever you find easiest and/or best.
Sources of tools and information
Anyone who is interested in carving spoons should read the blog of an eccentric English spoon carver called Barn the Spoon. The old posts are full of excellent information, including videos of the carving process, and, most importantly, of various cutting grips and how they work to ensure both efficiency and safety. There are also many links to other internet sites.
There are a number of websites that have sections on spoon carving and/or the tools you need for it. Del Stubbs’s website at www.pinewoodforge.com contains a mountain of information; www.countryworkshops.org is the site of green woodworker Drew Langsner; www.woodsmithstore.co.uk which is a good place to buy tools, including the axes I have; and www.woodlandcraftsupplies.co.uk is another good site for tools. The other makers I have mentioned are at www.djarv.se, www.benorford.com and www.northbayforge.com. Although out of print the best book on the subject that I know of is Swedish Carving Techniques, by Wille Sundqvist. What is available still is a companion DVD, Carving Swedish Woodenware, by his son, Jogge Sundqvist. I found mine at Pinewood Forge.
And finally
Spoon carving requires very little investment in either tools or space and can suit people with a lot of time on their hands, or perhaps more importantly, those with a much more erratic availability of free time. It can provide a welcome, if small income, but I know through hard personal experience just how valuable even a small amount of cash can be when you are hard pressed. If you set up at a market, and actually carve while you sell, you will provide potential customers with a story, and that might be just the incentive needed to turn them into a loyal buyer.
Finally, by exploring the intricacies of these small, three dimensional, curved forms, you will gain extremely valuable knowledge that just might change the way you design everything that you make.
Robert Howard is a Contributing Editor for Australian Wood Review. His most recent story 'Reading the Grain' appeared in issue 87 of the magazine. Learn more about him here.
Wood Review's Maker of the Year competition is open for entry now. There are four categories: Furniture, Bowls & Boxes, Art & Accessories and Student. Why not enter your spoons and other carvings in our Art & Accessories category? For information and entry see www.woodreview.com.au/moty