Planes on a platter
Words and photos: Iain Green
Getting comfortable with using hand planes with a flat sole can be challenging. Even so, I haven’t been able to resist the occasional purchase of a plane with a curved sole in the hope that it might lead to some interesting new uses for hand tools.

1. Curved soled planes: a modified flea market plane on the left, and a Japanese plane purchased in Tokyo.
Photo 1 shows a Japanese plane I purchased from my friend Tokio Inoue in Tokyo (on the right) next to a flea market plane I have modified.
Both are straight along the length of the plane and the section across each plane is a segment of a circle. This allows these planes to cut a surface that is a section of a cylinder. The radius of the section of the Japanese plane is about 62mm and for my adjusted flea market plane, 140mm.
The flea market plane is a numbered plane which has the German words Guss Stahl (cast steel), punched onto the blade. My impression is that it’s a well made unit with a high quality steel blade.
The sole was rounded by cutting a guide to the proposed curve and then planing a series of flats along the sole that progressively took it to the shape I was looking for. This process opened up the mouth so much that I had to make and insert a new mouthpiece ahead of the blade so I could reset the gap. I generally aim for a gap of about 0.7mm for a plane that is to take fine shavings.
I used a guide to check the curve is uniform along the length and confirmed that a straightedge touches along the length, and particularly just in front of the blade. To sharpen the blade, I started by holding the blade at right angles to a grinding wheel and ground the edge back to a curve so that it protruded uniformly across the sole.

2. The blade for the flea market plane was hollow ground and sharpened to a matching curve.
Then I hollow ground the blade to this curve and hand held the blade to sharpen it on waterstones (photo 2). I use a slow speed grinder to make sure the blade doesn’t get too hot, and hollow grinding makes it simpler to hand hold the blade.

3. The curves on the base of this platter were first planed with the larger radius plane.
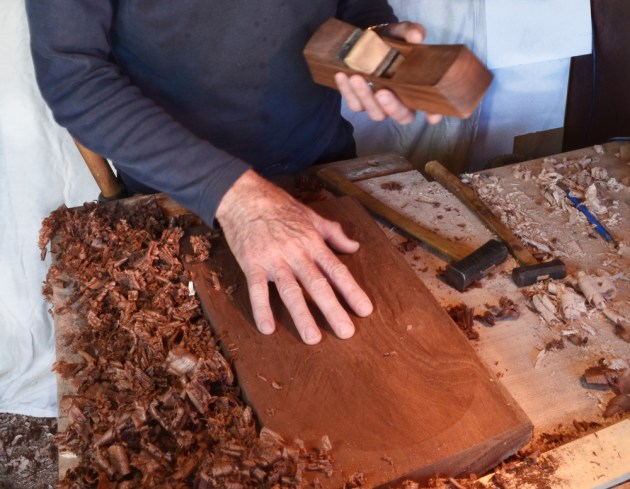
Recently, I used these two planes to make a small platter from a 155 x 85 x 18mm block of oak. I cut curved surfaces on the top and the bottom with the larger plane. It took a few strokes for the sole to bed into the cut but then by taking more shavings it was straightforward to take the new surface out to the edges (photo 3). By continuing strokes through the centre until the plane stopped taking shavings, the surface came to the curve of the sole.

4. The platter was placed on a 45° shooting jig to plane the arched sides.
I used the smaller plane to cut the curves for the sides and the ends. As I wanted a fine, arching edge, I placed the platter on a 45° shooting guide (see AWR#75, p.79 for a description of this jig) to plane these sides (photo 4).
Planing a shallow bowl

5. The finished oak platter.
Without doubt, platters like the one described above and shown in photo 5 would be more useful if the top is planed as a shallow bowl, which means that the sole of the plane needs to be curved across and along the sole. My starting point was to aim for a 20mm hollow across a 380 x 240mm platter. My calculation is that this means a radius of 912.5 mm along the length of the sole and 370mm across. You could modify the sole of a flea market plane or any of the options for making a plane to accommodate these curves. Hock Tools also have plane kits and excellent blades.

6. Components cut to make a plane with sole curved across and lengthwise.
I decided to make a Krenov style plane similar to that in my article in AWR#65 with a good 45mm Marples blade I found in an old plane in a marke (photo 6).

7. A steel pin and rods helped position the sides when gluing them to the body.
The only difference to the plane made in that article is that the mouth gap needs to be kept to about 2mm to make sure that the mouth doesn’t open too much as you contour the sole. Also, I’ve converted to a steel pin for wedging the blade and I’ve added a couple of rods above the cut line, to help position the sides during glue-up (photo 7).
8. Perspex templates were made to guide the shaping of the curves across and along the length.
I cut perspex templates for the curve along the length and the curve across the sole (912.5mm and 370mm). For simplicity, I shaped the sole to the curve along the sole before adding the curve across, using these templates to gauge progress (photo 8).

9. A scraper plane was useful for removing high spots.
I think that all the insights into tuning a flat sole apply equally to a curved sole, though the added complexity of the curves makes it more difficult. A useful aid is to mark the edge of the perspex guides with soft lead pencil and then rub the guide along the length or across the sole, in order to mark high spots. I found that a scraper plane is useful to remove these high spots (photo 9).

10. Sanding with the aid of a curved block is another way to fair the curves.
By taking small shavings at high spots and alternating between the two guides, I gradually came to a good fit. Alternatively, use sandpaper on a curved block to reduce these high spots (photo 10). Make sure that the guides show good contact just ahead of the blade mouth.

11. The finished gidgee plane with blade fitted and the mouth opened to 0.7mm.
Photo 11 shows the finished plane with the blade fitted and the mouth opened to 0.7mm. The timber is gidgee that I picked up in central Queensland some time ago. It is hard and stable but not too difficult to work.

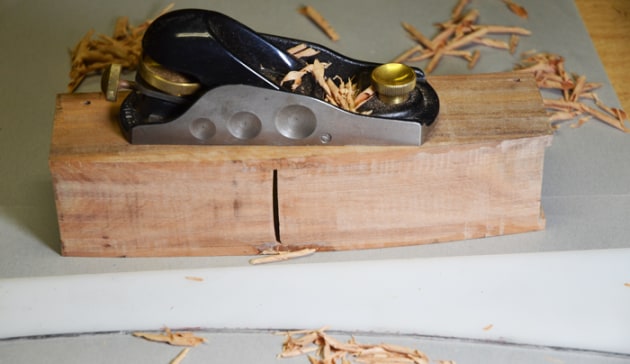
12. The plane will define the top edge. As it comes to full depth, it will stop taking shavings.
Planing the top surface is similar to the earlier description except the plane will define the shape of the top edge. As it comes to full depth, it will stop taking shavings (photo 12).

Photo 11 shows the finished plane with the blade fitted and the mouth opened to 0.7mm. The timber is gidgee that I picked up in central Queensland some time ago. It is hard and stable but not too difficult to work.
I marked an edge a few millimetres outside the planed surface, transferred this shape to the bottom and marked a bottom edge 30mm inside this. I then used a jigsaw to cut the sides roughly to shape.
13. Clamping the bowl upside down on the bench and running a plane around the edge, while in contact with the bench, is a good way to start the cut.
The planes described initially proved ideal to smooth the sides down to the marked edges and to add a curve up the side. I’ve found that clamping the platter upside down on the bench and then running a plane around the edge, while in contact with the bench, is a good way to start the cut (photo 13). I was able to progressively take the cut up to the top edge. To come down to the bottom edge, I had to raise the platter on a piece of ply.

14. Refining the top edge and adding a shallow curve to the bottom finished the piece.
Coming around the endgrain is challenging. It helps to bring your elbows into your side to put weight behind the plane, engage the blade at the start of the curve and bring it around the end slowly, taking a shaving as you go. Having defined the sides, I refined the top edge and added a shallow curve to the bottom so the platter rests on a small edge (photo 14).
A plane with a curved sole has proved a quick and effective aid for preparing a platter surface. I’ve had very little tear-out coming up into the opposing grain, even though this plane doesn’t have a chipbreaker. Of course, a blade with a chipbreaker could be used, if you think this might be an issue. Also, a deeper surface can be planed if the sole is prepared to smaller radius curves – another project in the future?
* Hock tools are available from Professional Woodworkers Supplies, www.woodworksupplies. com.au
Iain Green lives in the Sunshine Coast, Qld and has written several stories for Australian Wood Review magazine.