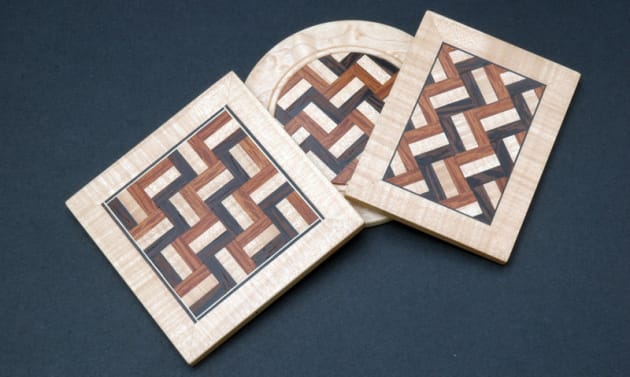
Parquetry Wood Brooches
Words and photos: Andrew Potocnik
Watching my partner cut fabric into lots of small pieces ready to be stitched together to form larger ‘blocks’ that would later be combined to form a quilt, I realised that quilters are merely woodworkers in disguise, creating patterns with fabric rather than wood! Or should that be the other way around?
In a moment of insight I realised the pattern of her next quilt really could be made of wood I set about selecting timber as carefully as she does her fabric, looking not just at colour but patterns in the grain too. I settled on a three timbers of distinctly different colour and pattern. Wenge for its flecked blacks and browns, fiddleback maple for its pale highly figured lines and sheoak for a different striped figure. I set up a guide on my bandsaw to ensure I’d cut uniformly thin strips of wood and keep unnecessary waste to a minimum (photo 1).

Then with all timber cut, planed and thicknessed I tested how the combination would look before trimming all pieces to the same width (photo 2)...

...and gluing them together with a gap-filling PVA glue and plenty of clamps (photo 3). The gap-filling glue was a form of insurance.

Once the glue had dried I planed one edge using a push block to keep my fingers out of harm’s way (photo 4).

This was bbefore cutting it into strips (photo 5) and thicknessing all the strips. I ended up with about five strips of usable wood. This part of the process was the most time consuming but it did leave me with enough wood to make several finished configurations of the initial idea.

To cut small squares I made a jig out of MDF that I fitted onto my drop saw (photo 6).

The first task was to ensure it allowed wood to be cut perfectly square to the blade. I needed to set the jig so the strips could be cut into perfect squares. As any quilter will tell you, it’s all in the detail and getting ‘points’ right, so precision was a priority. I made an elongated slot in the jig so the stop block could be set easily and accurately. Photo 7 shows how it was positioned and a locking screw tightened to hold it securely.

Once everything was set I could cut my squares, known to quilters as ‘blocks’ (photo 8).

After losing a couple I decided to tape material to the jig, cut, wait for the saw to stop spinning before raising it up and removing the block. I did lose a few along the way and a couple had a less than perfect edges. Maybe a hold down mechanism needs to be investigated.
With enough blocks cut it was time to try various patterns and configurations.
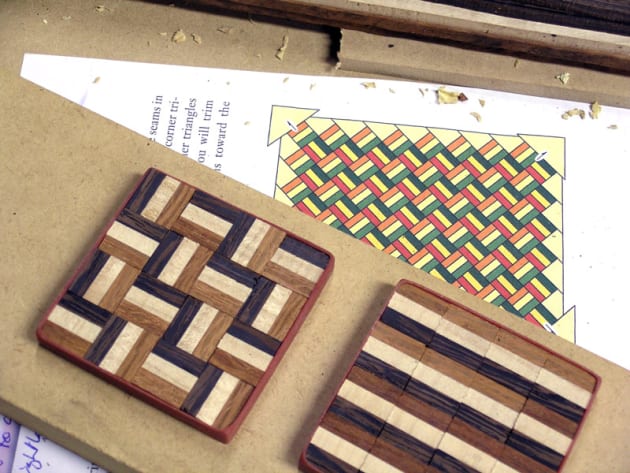
Photo 9 above shows the pattern I settled on and the drawing that got me started in the first place. To glue all the pieces together I made another jig out of MDF (photo 10) so the blocks could be squared and aligned with a minimum of fuss.
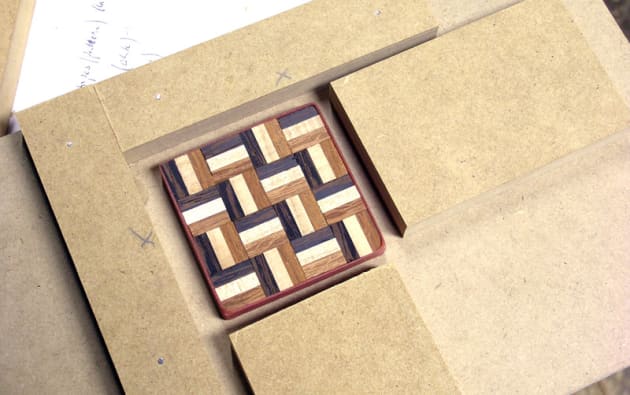
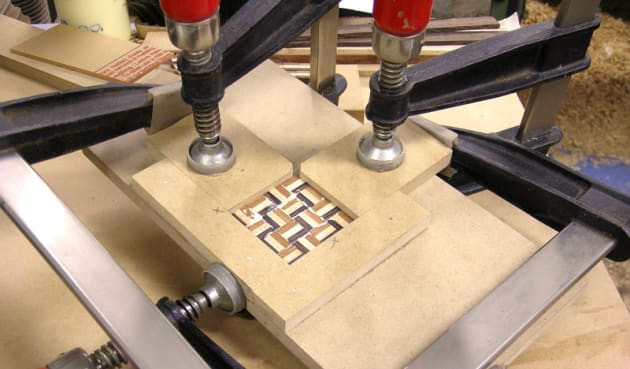
I waxed the MDF against glue squeeze-out and placed sacrificial paper under the blocks before applying glue (photo 11) and clamping everything together.

Extra MDF was used to apply pressure within the clamping jig (photo 12). Another two clamps held the extra MDF pieces down flat.
After the glue had dried I ventured into my stash of veneer to make a border for my ‘patchwork’. Isn’t it funny how quilters and woodworkers both seem to have a stash of bits waiting for that special piece?
Some offcuts of artificial Macassar ebony and maple veneer would do the trick, so I laminated and glued these to two edges (photos 13, 14) with MDF support blocks.
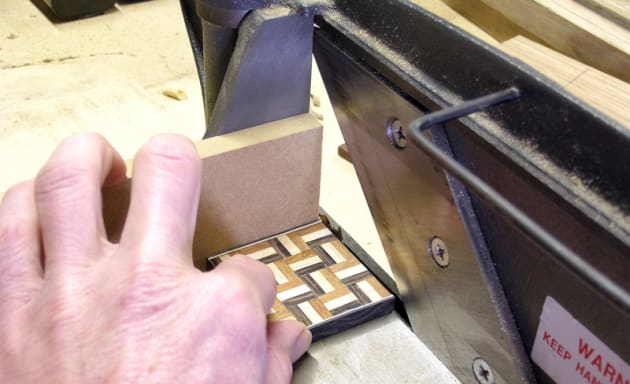
Once dry, excess material was trimmed off with a guillotine (photo 15) before the process was repeated for the other edges.
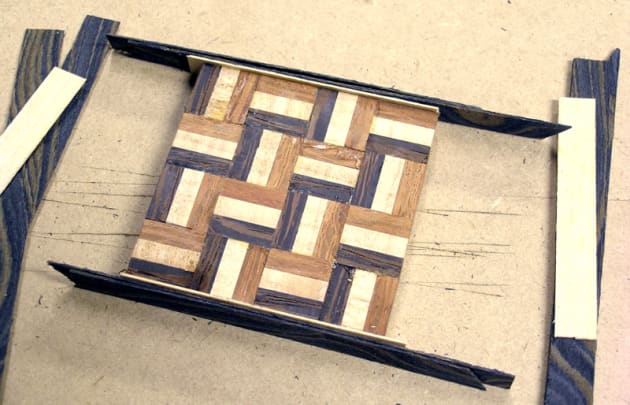
Time for a border now. Fiddleback maple with mitred corners was my choice, so I selected and machined material to suitable width and thickness before trimming accurate mitres on my guillotine, working carefully around, one side at a time (photo 16) marking matching surfaces to ensure all pieces would fit together perfectly.

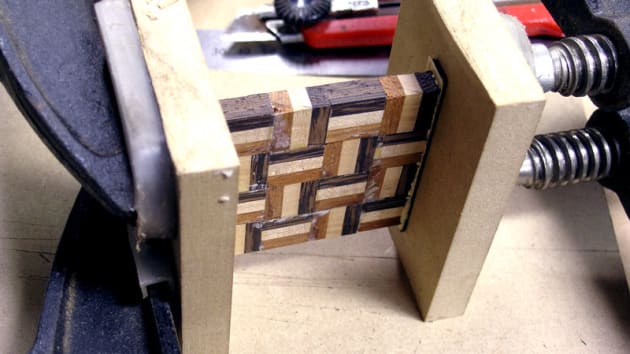
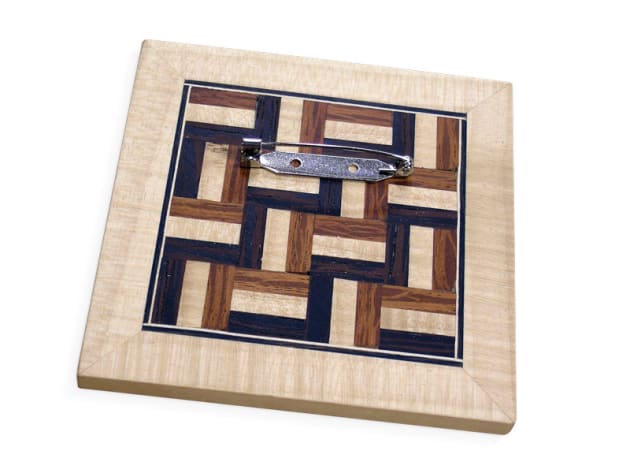
The border was glued together using the jig I’d used earlier (above in photo 17), then I sanded the face and back on a belt sander followed by hand sanding, applied a finish and finally, attached a clasp to the back (photo 18).
Something I’d do differently next time is attach the veneer to the border timber so it too could be mitred, because, as any quilter knows, the ‘point police’ can be very tough judges.

Republished from issue 78, Australian Wood Review. Learn more about Andrew Potocnik.