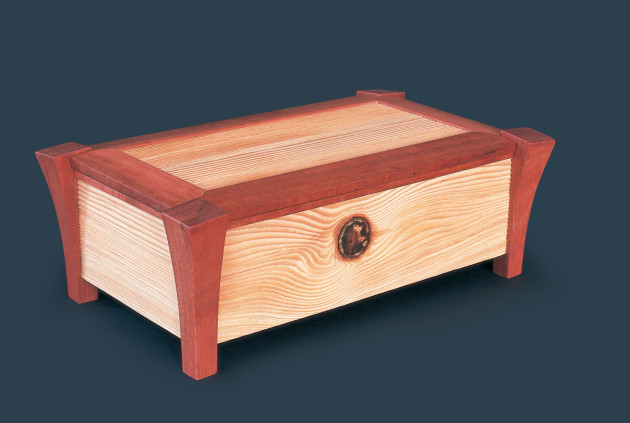
Outback Box
Recently I did some experimenting with the effects of sandblasting on various timbers. Applied to oregon, a timber with broad growth rings, the technique yielded some inspiring results (photo 1).

With the softer material worn away the harder rings formed a striking pattern which reminded me of a rippled desert landscape I had once seen in Namibia in south-west Africa. I decided the oregon panels would feature well on a box which would in turn form a good teaching aid for my year 10 students who undertake a unit of work on boxmaking.
Rather than face the problems of cutting joints in such soft material it seemed easier to fit the panels into corner pieces routed with grooves. The blocks could be shaped and extended to form feet so the box would sit up and have a lighter appearance.
The corner blocks were slid past the spinning cutter on the router table to create the grooves. Pre-marked lines on the blocks and table ensured all grooves were of equal length and in the right position. Students like to work with machinery and the router reduces production time and increases the likelihood of correctly fitting joints. Safety is paramount, so using feather boards, stop blocks and push sticks reduces chances of personal injury and damage to work.
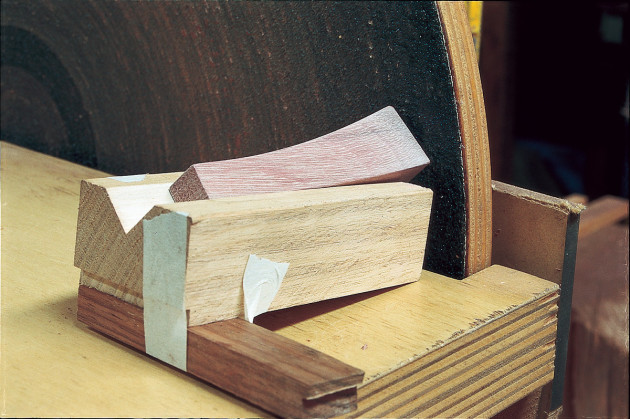
The legs were cut and sanded to a curved taper, but only on the two outside faces (photo 2).

The inside faces were left square so it would be easy to fit the panels. The top and bottom edges of each panel were carefully trimmed to ensure a neat fit into the legs.
Scrap material was placed against the panels to make sure the soft sandblasted wood didn’t chip from each pass of the cutter (photo 3).

Photo 4 shows how the components fit together.

Once satisfied with the fit I turned my attention to refining the legs as I felt the tops needed to be angled. Using offcuts and masking tape I made a simple jig to help me sand each leg to an angle which seemed to look right (photo 5). Afterwards I realised that the angle between the curve and top was pretty close to 90°. Well, how about that!
To neaten the torn inside surfaces of the oregon panels and add interest to the box I decided to line it with textured paper I’d bought in Kathmandu. It has a lovely leathery appearance and I thought its colour would complement the box. A 3mm thick piece of MDF was lined on both faces to serve as a base and then I began assembly. Each long panel was glued with a leg at each end and left lying flat to dry.
Next the base was slipped into place and glued, and the end panels then glued to enclose the base. Strong rubber bands held the box together while the glue dried. All components were pre-finished to avoid a build-up of finish in the corners or the chance of contaminating the lining. The sandblasted surfaces were sealed with a matt polyurethane.
To prevent the lining from fraying, I routed some pieces of red gum that clipped over the top of each panel. Routing thin material can be hazardous, so I used a thick piece of material, routed both edges then cut off thin strips. The photo opposite shows these routed pieces fitted in place. I used the same method to make trap panels within a frame to make the lid.

I mitred the lid corners to give a softer appearance by allowing the grain to flow around the frame. Part of each corner of the box was cut away so the lid slips over the protruding legs and simply rests in place. The edges were bevelled slightly at 90° to the sloping top frame for visual harmony and to allow finger access.
As the piece progressed, shadows cast by panels reminded me of worn weatherboards on houses, and sunlight beating down on corrugated iron country water tanks.
So even though initial inspiration came from memories of Namibian deserts, ties to our own environment led me to call it an Outback Box and that is how I would market it if it was in production.
The construction method used for this box could be used for a chest, a seat or a cabinet, and any of these could include sandblasted panels to remind you of landscapes you’ve seen in your travels.
Andrew Potocnik is a regular contributor to Australian Wood Review. In the September issue of the magazine (AWR#92) he reviews track saws. This story first appeared in issue 44.