Making Lego People

On the right, David Lim with Simon Beggs and their Lego people.
Words and photos: David Lim
Engaging young people in the workshop can be difficult when you are competing with screens. I have found that my own children are interested in what I’m doing in the workshop, but lose motivation if they are not able to quickly create items that have meaning for them. They are not interested in furniture, spice racks or lamps. What they do like are projects such as billy carts, percussion instruments and spinning tops, because they have real world uses.
The Lego people shown above immediately attracted the interest of children, and lots of adults too. I first saw the original large-scale wooden Lego Person made by Simon Begg on his Instagram account. Simon, being a world class turner, turned most of the figure on a lathe. Turning the pieces on the lathe, especially the arms and hands, produces a high quality outcome; however it’s technically difficult to achieve, especially for younger or less experienced woodworkers.
In collaboration with Simon, I adapted the original instructions that Simon authored for the instructables website. A similar end product can be achieved using smaller, safer machines such as a small bandsaw, drill press and sander. I am now comfortable with my teenage kids using these machines with limited supervision. I generally prepare the stock prepared before the student arrives in the workshop.

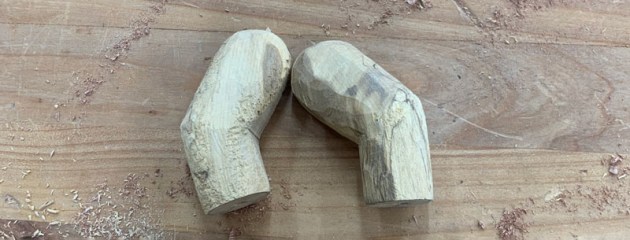
Shaping the limbs

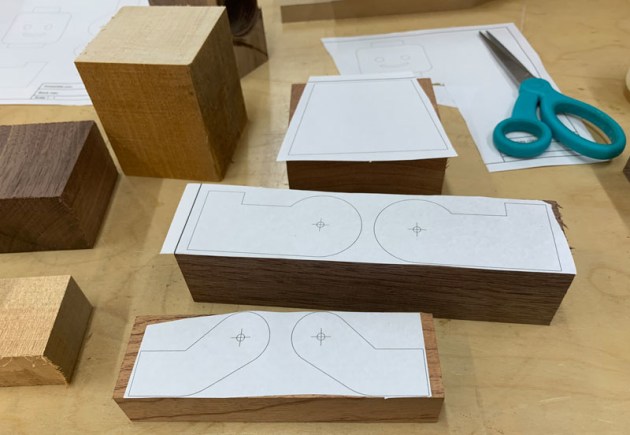
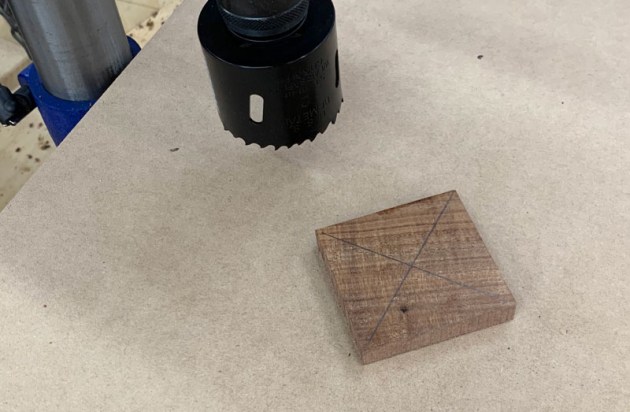
Overlay the patterns (fig.1), onto their corresponding blanks. Cut out and glue the parts to the stock with PVA or spray adhesive (photo 1).
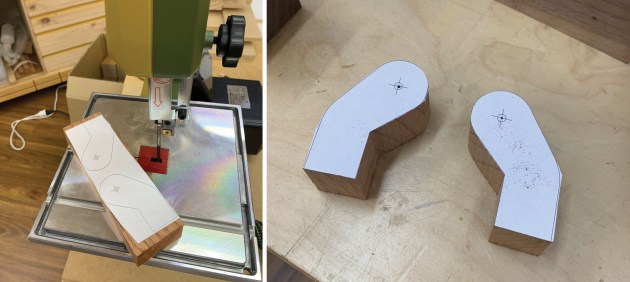
Using a pointed tool like an awl, mark the centre of each as the dowel position. With a bandsaw or scroll saw, trim the blanks to just outside the lines of the drawings (photos 2, 3). Instead of a bandsaw, you can do it the old fashioned way with a fretsaw. Cut to just outside the lines and use a disc sander to sneak up to the line.
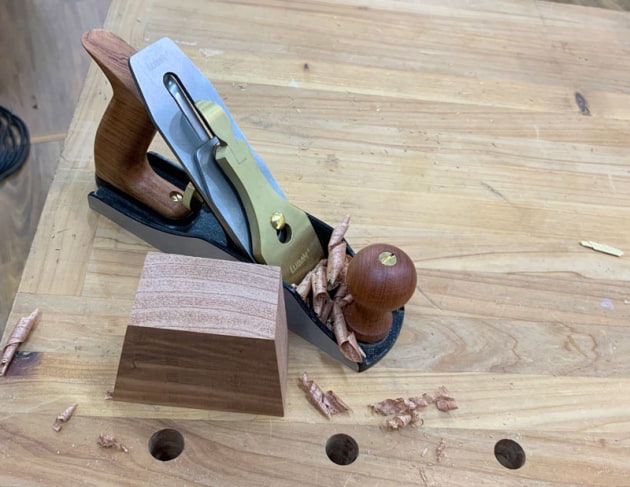
Use a smoothing or block plane to take the edges off the cut-off wedges (photo 4).

Commercial 6mm and 10mm dowels are used to join everything together. This is not only quick and easy, it allows for the all the parts to rotate like a real Lego figure. Locate the head and hip mortise on the centre line of both the top and bottom of the body (photo 5). The shoulder mortise is 24mm down from the top edge on the vertical centre line.

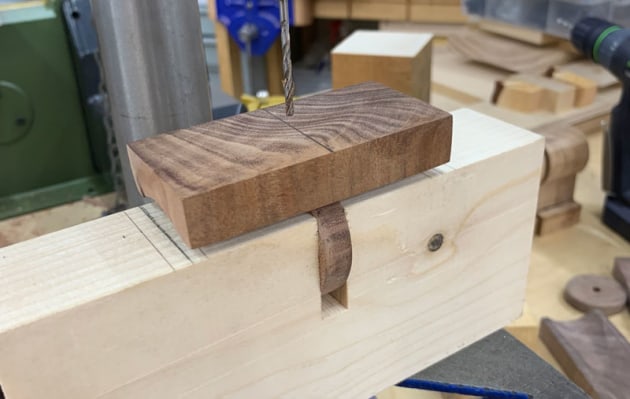
Using a 6mm drill bit, drill a hole 20mm deep for the shoulder, neck, hip and wrist joint. You can drill the hole using a hand held drill but I like to use a drill press. It is an accurate, easy and safe way, however the shoulder is on an angle so you need to make a jig like the one shown above to present the shoulder surface perpendicular to the drill bit if you want to use a drill press (photo 6).

Do the same with the two arms (shoulder joint) but only 12mm deep. Any deeper and you run the risk of exposing the hole on the other side when it comes to shaping the arm (photo 7). Then using a 10mm drill bit, drill a hole 20mm deep on the two legs. Use tape to mark the correct depth on the drill bit to avoid breaking through.
Hips and crotch

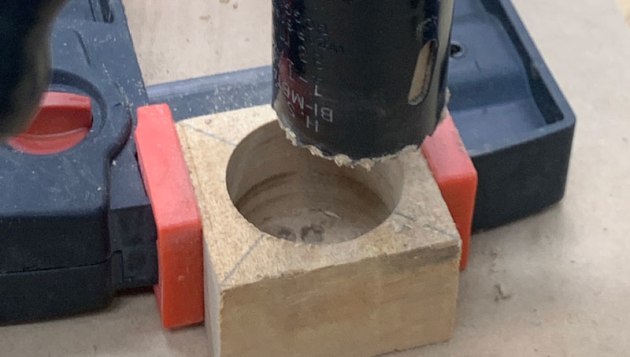
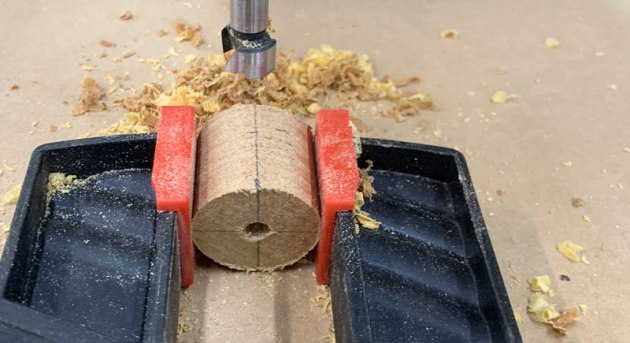
Shaping the hip pieces is difficult – I found this method to be the easiest way. Begin with a blank that is 93 x 50 x 66mm. Using a 45mm diameter forstner bit, drill into the centre of the blank (photo 8). High speed can overheat and blue large 45mm forstner bits. Take your time and slow the speed to about 500rpm. I also bore down 25mm then allow the bit to cool to room temperature before taking another 25mm.

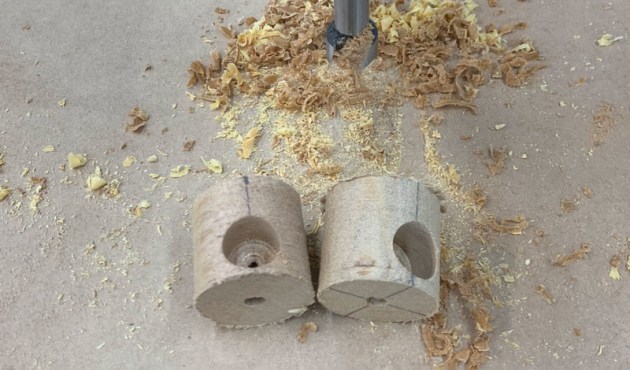
Once you have bored down the blank, mark two lines 15mm from the edge in the direction of the hole from each end and trim with a bandsaw (photos 9, 10). This will produce two hips.
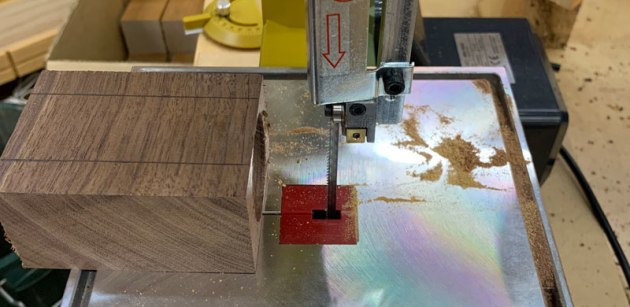
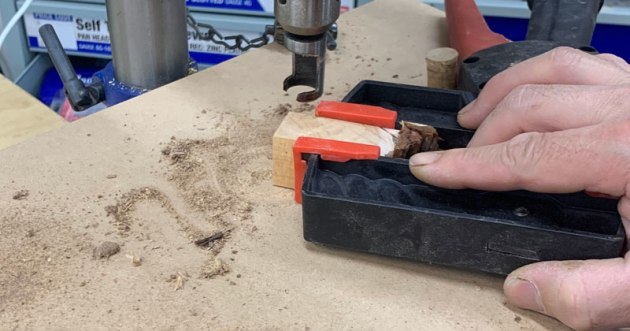
The crotch piece is made using a 54mm diameter hole cutting saw. If you’re cutting the crotch from a small piece of wood, it is a good idea to hold the blank with clamp to prevent it from catching on the bit and ripping off a bit of your skin (photos 11).
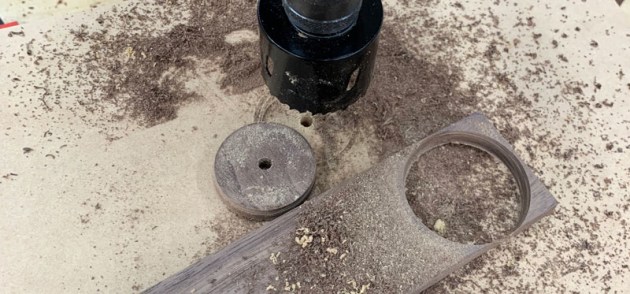
If you can, drill the crotch piece from a long board – it’s a lot easier to hold (photo 12).
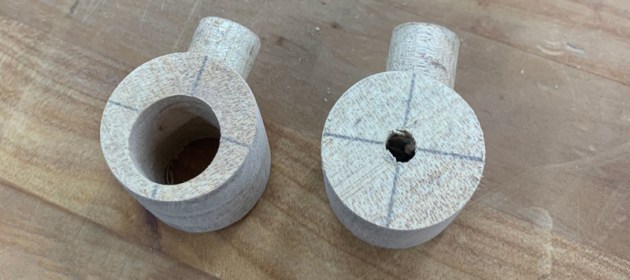
The hole saw will normally have either a 6mm or 1/4" pilot drill which we need to enlarge to 10mm. Clamp the crotch to a sacrificial piece and enlarge the hole with a 10mm drill bit on a hand held drill. Give the hip and crotch pieces a final sand to 320 grit sandpaper before you glue the crotch onto the hip piece.
To glue the hip to the crotch piece, I created a little jig to hold the crotch in position with the hip on top (photo 13). This jig holds the crotch parallel to the drill bit and keeps the hips perpendicular. It’s made from a scrap of pine with a slot the thickness of the crotch removed on the tablesaw. These pieces are difficult to drill without the jig.
I used a bamboo skewer to create a loose tenon to stiffen the joint. Using a drill bit that is the same size as the bamboo skewer (in my case 2.5mm), drill two holes 30mm deep through the top of the hip and down onto the crotch.

Apply some PVA glue between the crotch and hip, reposition the hip on top, flood the holes with thin CA and drive down two bamboo skewers as tenons, apply a clamp and allow the glue to set. The joint may look a bit weak with only two bamboo skewers, but we will come back later and put an additional 6mm dowel to reinforce the joint (photo 14).
After the glue is set, pare flush the bamboo skewers and drill a 6mm hole in the centre of the hip 20mm deep using the same jig.
Hands
The hands are fiddly to make. Simon makes his hands on the lathe, turning four separate sections: first the outside of the hands, then the inside (off centre), then wrists, and finally the tenon for the wrists. To simplify things we will do all these steps on the drill press.

Begin with the outside of the hands. Mark the centre of the blanks and cut using a 38mm hole saw which will produce a 34mm diameter cylinder (photos 15, 16). Once again, use a clamp to hold small blanks while drilling. Small pieces are hard to control on the drill press.

Once each hand has been cut, using a square draw a line down the length of the hand along the diameter, and mark a centre line 12mm from the edge for the position of the wrist (photo 17).
Using a 16mm forstner bit, drill on the marked centre line down to a depth of that is half the diameter of the hand blank (photos 18, 19).
The wrists can be turned on a lathe with the final dimensions being 18mm in length with a 16mm diameter. The easier way to make them is to use a 16mm or 5/8" dowel plug cutter (photo 20). Once the wrists are made, drill a 6mm hole down the centre line of the wrist 10mm deep which will be used to house the 6mm dowels that connect the wrist to the arms.
At this point, it is a good idea to give the outside of the hands a good sand. Once the wrists are glued into place, it will be difficult to sand the outside of the hands. After sanding, glue the wrists onto the hands with the end that has the 6mm hole facing outwards.

The inside of the hand is offset from the centre line to create a slight taper in the fingers. From above, mark a centre line 12mm from the edge – opposite where the wrist is located. Again, it’s a good idea to use a clamp to hold the blank when drilling (photo 21). Shown above, another small pine offcut jig holds the hand. The wrist is supported by a notch that stops the hand from turning when the bit is removing material.
Using a 19mm forstner bit, bore out the centre of the hand. Drill all the way through to create a negative cylinder which forms the inside of the hand (photo 22). Slow the speed of cut when the bit is close to exiting the blank to avoid tear-out.


The final process to complete the hands is to define the fingers. This is a two- step process. First, we need to apply a radius to the outside of the finger. You can shape the radius with a rasp or a scroll saw, but I find it easiest using a jig and a disc sander (photos 23, 24). The radius on the outside of the hand is applied to the opposite side of where the wrist is located.

The final step is to split the hand to create 'fingers'. Mark two lines parallel 3mm each side of the centre line. With a handsaw or a bandsaw, cut to the lines to create the separation. Give the hand a final sand, then glue a 6mm dowel into the mortise in the wrist (photo 25).
Shaping the arms
If you want a block figure rather than a Lego shaped figure, you can skip this whole section. Shaping the arm gives the figurine a much more refined look. This step can be challenging because you are working with a small irregular object that is difficult to clamp down while working on it.

Begin by marking a circle using a 25mm diameter template, here a 1" nut was used (photo 26). From the top of the arm, mark a line 12mm in towards the shoulder and another line on the elbow crease.

With a bandsaw or hand plane, remove a wedge to reduce the profile of the arm (photo 27).
The final step is to round over the arms with a carving knife, rasp or sandpaper (photo 28). Carving these with a knife is quick and easy, but could be risky for younger kids. The rasp is a safer option. After shaping the arms, the body is complete. Give all the parts a final sand to 240 or 320 grit sandpaper.
Turning the head
Mount the head blank on a lathe and turn between centres. The head is simple spindle turning. Get your diameters and markings right with the calipers. Use the parting tool to get accurate diameters. Roll the radius with a skew or a gouge. After that is done drill a hole in the bottom with a 6mm drill bit 20mm deep for the connection to the body. Sand the head to the same grit you used for the body.

The eyes and mouth can be drawn on with a black felt tip pen (photo 29). Simon does his with walnut veneer. The eyes are easy, punching them out with a plug cutter. The mouth is more difficult to do; it can be cut by hand with a Stanley knife. It is important to sand the edges. Carefully glue the veneer eyes and mouth on with PVA, using clear sticky tape to hold them in place. The clear tape allows you to position the pieces precisely.

Once the head is completed, the build is complete (photo 30). Finish and gluing in the dowels is the last step. Apply your choice of finish on the parts, paying special attention to keeping the finish away from the dowel mortises. You can do this by placing a sacrificial dowel in place during the finish process and disposing of the dowel once completed. After the finish is applied and dried, glue fresh dowels into the neck, shoulders, wrist and crotch joint. Assemble to complete your finished Lego person.

David Lim is a designer maker whose work can be found for sale in galleries around Australia and East Asia. See Instagram @turnandplane Learn more about Simon Beggs at Instagram @simonbeggswoodturning