Making a Laminated Hanging Rail

Words: Keith Briggs
Photos: Greg Morrison
The concept of a curved towel rail is not new, however I find this design very satisfying to make as it has evolved to suit my manufacturing strengths and utilises timber which is readily available. You can, however, easily modify both the contruction techniques and dimensions to suit your own requirements.
When selecting timber, I look for a single skip dressed board 250 x 50 x 1600mm long. Even though 1.5m is a standard size, many of the boards are cut 1.6m long. Finding a board that is flat sawn is also important, because when it is re-sawn you end up with mostly quarter sawn pieces. A flat sawn board should be easy to find, as most timber seems to be cut this way, with little regard for the furniture maker who usually seeks timber cut closer to the ‘quarter’ for stability reasons.
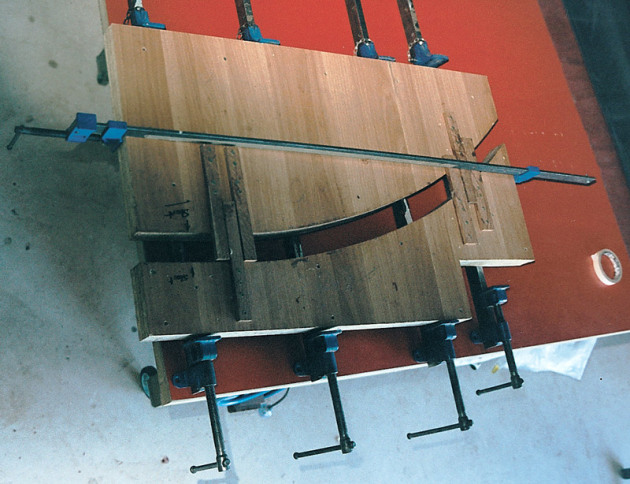
The next step is to make the mould to glue the curved uprights. This can be made from laminated chipboard or MDF to a thickness greater than 50mm. Draw the curve full size—the rear curve is just an extension of the front. The curve can be shaped as you wish, however I simply trace a flexed one metre steel rule. Cut the curve on the bandsaw then screw on the locating guides (see photo opposite above).
In my opinion, a bandsaw is the best way of re-sawing the wood, however a tablesaw will also do the job. The main advantage of using a bandsaw is the size of the kerf, which considerably reduces the amount of sawdust produced. After cutting the piece in half, cut all the horizontal rails and the two uprights from one half, surfacing the edge on the planer between each piece.

The two feet are cut from the other half. Twenty-four strips are then cut from the remaining material, again surfacing the edge on the planer between each piece. They can be cut to around 4mm thick, and then thicknessed to 3mm. Keep the order in which they were cut by marking a triangle on the side of your timber. This way, when the timber is reglued, the grain continues as if it were cut from solid stock. When gluing, it is advisable to use a glue with little or no creep. Urea formaldehyde is a good choice, but PVA isn’t.
Machine all parts to final size and cut to length—don’t forget to allow for tenons. All the tenons can now be cut using either your handsaw or bandsaw. The mortises can be cut on a mortising machine, routered or drilled, and then chiselled by hand. Keeping them upright, glue the three together, making sure you have both a left and right hand side.

The mortise in the centre rail should face inward. Mark out the foot and cut the housing joint 10mm deep, then bandsaw the foot to shape. Finish with a linishing machine or spokeshave and plane. Again, ensure you have both a right and left side, making sure the housing joint is on the inside. Glue the bottom of the uprights into the foot, and hold with two G-clamps. Cut a curve on the underside of all the horizontal rails, and round the top side with a 6mm roundover bit with the router. Glue the bottom centre rail first, clamping with a sash clamp, and then glue the top rails, clamping lightly against the centre rail, one at a time.
Finishing: I usually handplane then sand the components to 240 grit before final assembly. This means that all that is required before applying your favourite finish is a little fine-tuning and the removal of any glue.
Reprinted from Australian Wood Review magazine, issue 30. Keith Briggs makes furniture in West Australia.