Making a Burl Lidded Box

Words and photos: Andrew Potocnik
Some time ago a ceramicist friend was showing me her work in an exhibition catalogue, but flicking through the pages several forms jumped out as having potential for woodturning. I photocopied the images and put them aside, and every time I caught a glimpse they sparked my imagination and I scribbled down an idea for one of my own pieces. Time passed and the drawings and notes built up until I found time to tackle one.
The ceramic piece had a black hemispherical base with a flat-topped collar equal to about one third of the overall form. The collar was crackled white and had a small drop-in lid held in place with a horizontal rectangular black handle with ends cut down at about 10°.
Eventually thoughts led to using a burl for the collar but flipping it upside down so the natural edge points down to the body of the box. The body of the box changed from hemispherical to barrel-shaped with the belly of the curve quite high on the form. Quite a departure, but it was time to begin searching through my endless stash for suitable materials of appropriate size, texture and colour...
I settled on coolabah burl for the collar and jarrah for the body based on material I had in stock. The problem in coming up with new ideas is that appropriate material needs to be found, which can again alter the design, but once that matter was resolved it was time to get the project going.
1. A block of jarrah of about 70 x 70 x 120mm was mounted between centres, trimmed down to a cylinder approaching final size with a bit to spare and a tenon turned at one end so it could be reversed and gripped in a scroll chuck.
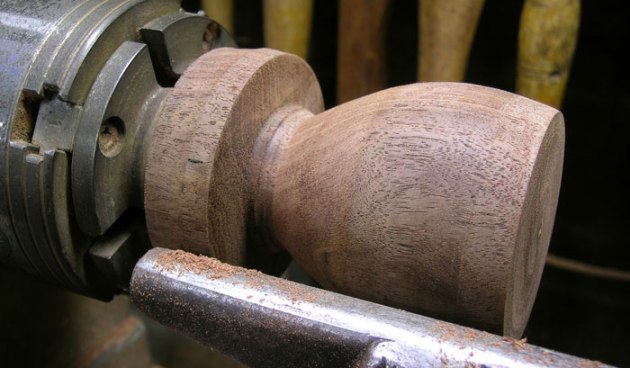
2. Fitted to a scroll chuck the tailstock could be removed, the main form of the vessel refined to a near classical Grecian urn form with its belly roughly a third of the way up the piece, tapering down to its base, but not trimmed right down as strength is needed to prevent chatter as the interior is hollowed.
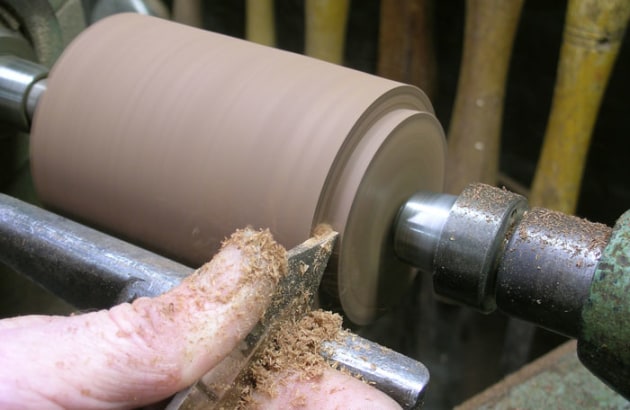
3. A tenon was turned to later accept the collar before the interior was hollowed. There are now so many tools on the market claiming to make turning faster, easier...
4. I opted to use a ring-like tool that removes material very quickly before moving on to a shear scraping tool which enabled me to ‘clean up’ the interior.
With shaping completed and sanded to 320 grit I applied a polyurethane finish to surfaces that would overlap, reducing a messy clean up later in the ‘finishing’ process when components are glued together. To create the wavy-edged top I cut a section of burl as close to parallel to the natural edged surface.

5. This would become the underside of the collar and was mounted between centres. Waste material could now be trimmed away and a tenon cut so the wood could be be reversed and gripped in a scroll chuck.
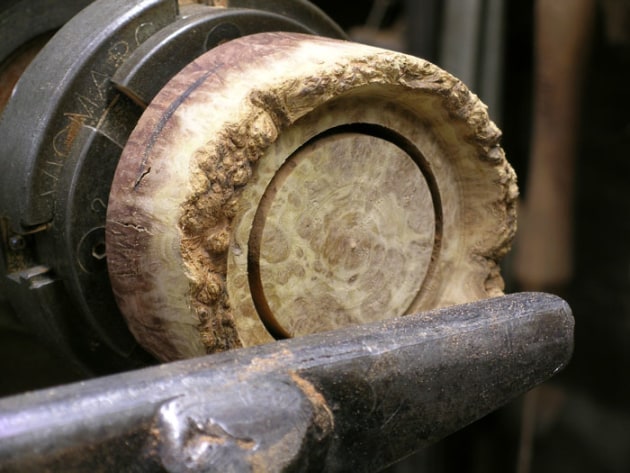
6. Now I could trim the interior of the rough burl surface and cut a recess that matched the rim of the jarrah form)...

7. ...so I could join both components together with epoxy glue, using the tailstock as a clamp).

8. Once both components had bonded overnight the centre or ‘waste’ material was cut out with a parting tool. It would be easy enough to convert this wood to shavings but I prefer to save wonderfully figured wood for another day. Maybe this frugality is part of my post WWII parental upbringing.

9. I find that once there is a transfer of forms between chucks and mounting methods items don’t always run perfectly truly, which is a key in woodturning. To overcome this I turned an insert which held the collared form in place, via my tailstock, and allowed me to trim it down to a final shape.

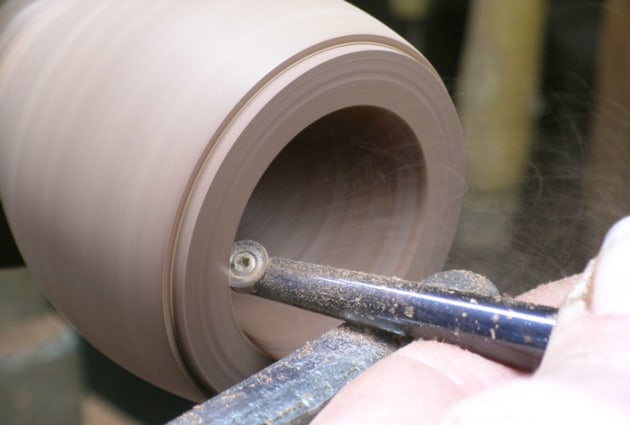
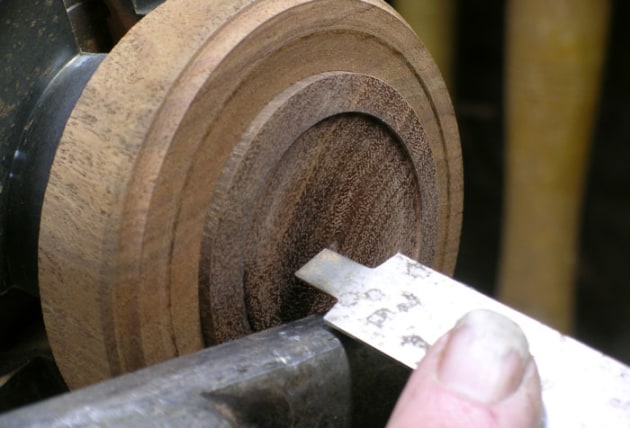
10. The inner surface of the collar was trimmed with a finger-shaped scraper and sanded through to 320 grit...

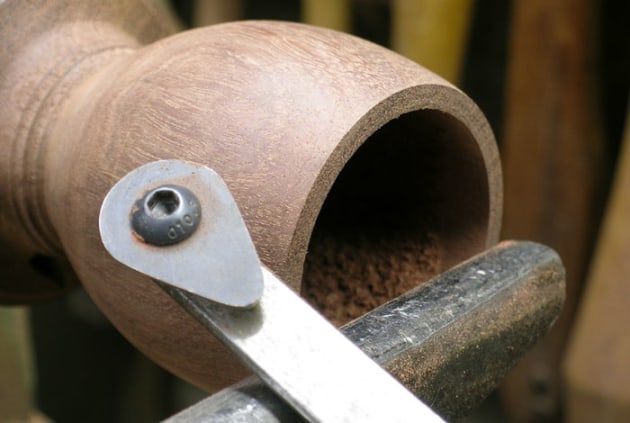
11. ...before a small step or recess was cut with a ‘granny tooth’ scraper.

12. This step is where the lid rests...

13. ...and also serves as a flat surface for aligning the container on a jam fit carrier used to complete the base. The tailstock was kept in position for as long as possible to add support to the form and reduce risk of the form working itself free of the carrier. Hot melt glue can be used to add strength to the temporary carrier.

14. For the lid an endgrain piece of jarrah was glued to a carrier and trimmed to size with a concave underside. This was then cut free and reversed into another jam fit chuck so a recess could be cut to accept a burl insert.
15. The same ‘granny tooth’ tool was used to ensure a neatly cut edge to the recess.
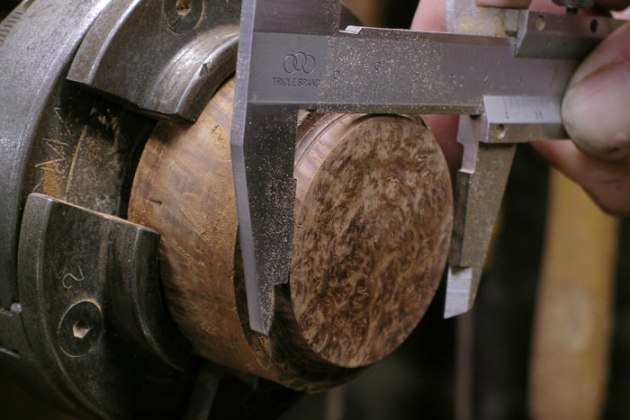
16. A piece of burl, mounted in a scroll chuck was turned to match the recess opening, checked frequently with vernier calipers, and then glued into the lid before shaping and sanding.

17. A V-pointed scraper was used to cut a groove where the two pieces met to create a shadow line between each component.

18. To top the container I planned to carve an organic twig-like form emerging from a narrow turned base, but then thought the turned trumpet shape with a burl edged upper shown might work well.
The ceramic form that inspired this piece is quite different and I still plan on going back to something closer to the design that caught my attention all that time ago.
Andrew Potocnik is a regular contributor to Australian Wood Review magazine. Learn more about him at www.andrewpotocnik.com