Laser cut marquetry: a low cost and compact solution
Words and photos: David Lim
Marquetry is the art of creating intricate designs by cutting and fitting pieces of wood or other materials together. It’s a technique
that has been used for centuries to create decorative and functional objects such as furniture, boxes, and musical instruments. While traditionally done by hand, modern technology has made marquetry easier to accomplish than ever before, thanks in part to the use of CNC laser cutters.
A CNC (Computer Numerical Control) laser cutter is a machine that uses a laser to cut and engrave materials with precision and speed. These machines can be used to create a wide range of designs, including intricate marquetry patterns.
My first machine
In 2015, I started using an 80 watt CO2 laser cutter. It was a versatile machine with a cutting bed of 900 x 600mm which I used to create intricate designs and some production pieces. This machine allowed me to vastly extend the range of artefacts that I could produce. It also allowed me to make small scale production items that I sold on the internet.
At that stage I was in commercial premises with plenty of space but in a domestic situation the negatives of this type of machine were that: 1. It takes up a lot of space (about 4m2); 2. It needs to be water cooled; 3. The fumes need to be expelled outside the workshop; 4. Most importantly, the laser tube is fragile and has an expiry date. CO2 laser tubes degrade over time whether in use or not. The glass laser tube holds a vacuum and is water cooled to preventing it from overheating. The vacuum within the laser tube is slowly lost, which reduces the effectiveness of the laser.
Lighter and cheaper

In 2022 my laser tube failed and I needed to replace it. After some research, I found a new commercially viable option – a diode laser. It needs less space and costs significantly less than a CO2 laser. Examples of diode lasers that are popular for marquetry are the Sculpfun S9 and S10, and currently for around $400 the S9 is highly affordable. It has a laser diode that outputs 5.5 watts of optical power, while the S10 outputs 10 watts, making it twice as powerful.
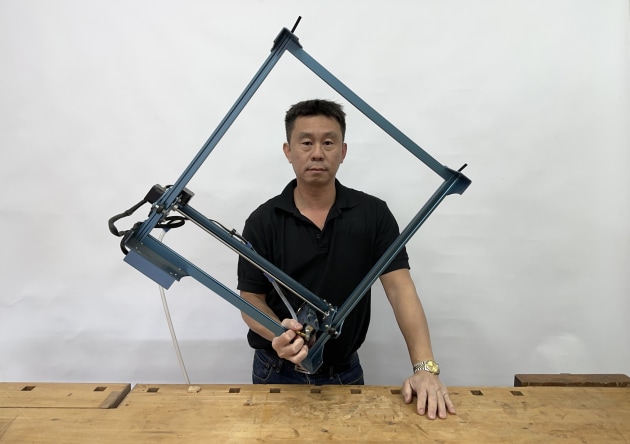
One advantage of the Sculpfun S9 and S10 (shown below) is that they can be upgraded to a larger bed of 935 x 905mm. This is a cost-effective solution for those who want to expand their capabilities without having to purchase a new CNC laser cutter. (I should also note that I don’t have any commercial connection with the manufacturers or distributors.)

I started experimenting with the Sculpfun S9 and quickly upgraded to the S10. With the S10, I can cut through 12mm ply and MDF, which the S9 couldn’t do. Both machines have an ultra-thin laser beam which is only 0.08mm when focused.
The laser cutter is light and hangs on the wall when not in use. It can be set up in a carport or balcony, avoiding the need for an exhaust fan. Used inside a room or garage however, it is advisable to have an exhaust fan.
Both are available online and prices and delivery times vary. It took me approximately half an hour to set up the machine when it came in the mail. And within 45 minutes I was doing my first cuts with the machine.
Software
The software that I used to control the CNC was Lightburn. This is a feature- rich software that offers a range of
tools for both beginners and advanced users. It cost me US$91 to purchase the licence, but it has a free 30-day trial, allowing users to test the software before making a commitment.
Above: Cut multiples of the same piece as spares in case of breakage.
You can draw your own designs on the computer using your preferred choice of CAD software, such as AutoCAD or Sketchup (any 2D CAD software will suffice). Once you have drawn up what you want to cut, you can import the vector file into Lightburn to output the design.
If you’re not well versed in drawing with CAD, you can download vector files from the internet. There are many websites which have free vector drawings to download. Or for a small fee you can get someone to convert your image to a vector file. You can find this service on websites such as fiverr.com or upwork.com.
Using the laser cutter
Cutting veneer marquetry pieces is quick and straightforward. You will need to experiment with the settings on your machine to work out the cut rates and the length of focus of your laser. There are numerous videos on YouTube which will walk you through all the different settings on your laser.

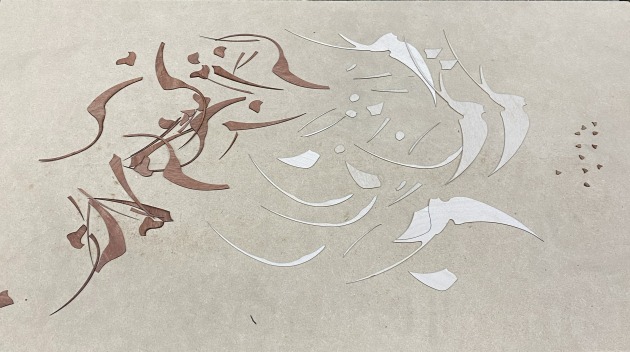
Above: Cut two sets of marquetry pieces from light and dark toned veneer to create a mirrored positive and negative effect.
When you first start it is advisable to cut multiples of the same part – especially if they are very small and intricate. This is because they have a habit of snapping into pieces during the lay-up, or breaking up if there are faults in the veneer.
Cutting multiples of the same part is very quick and easy to do. For an intricate part, I will cut often six to eight spares because I know I will destroy some during the lay-up process, and it is easier to do them all at the same time rather than going back to the laser cutter to recut pieces.

For production items that have only two tones, I cut two sets from both light and dark coloured veneers. Swap the pieces and you then end up with two sets of marquetry! This method has been used for hundreds of years (by hand), and you can still see cabinets that are identical to each other, except for the mirrored positive and negative effects.

Another advantage of using a laser cutter is that once you have the drawing done, you can use the same drawing to make many different items or change the scale of the drawings. For example, I used larger versions of the same swallow drawing on a tray and on a knife block.

I lay out the pieces as in traditional marquetry, using either veneer tape or blue painters tape. Once the pieces are glued together I normally press my designs onto either MDF or ply using my antique book press (if the board fits into it), or in a vacuum press if it does not. Once pressed, I give it a light sand and apply the marquetry to the piece I am making.

You can also use the laser to cut out the voids for the inlay, and of course you can cut and inlay other materials such as mother of pearl shown in the piece above. Because of the cost and the ease of use of this machine, I believe this piece of equipment has the potential to become an essential for every wood workshop.
Architecturally trained and a builder by trade, David Lim @turnandplane is a designer maker and teacher of woodworking. Since 2000, David has made more than 26,000 pens and over a thousand boxes from Australian timbers, predominantly sourced directly from Tasmania. His work is influenced by his Oriental heritage and includes small cabinets, boxes and turned pieces. David’s work can be found for sale in galleries around Australia and East Asia.