Joinery with handplanes
Words and photos: Troy McDonald
We've look at moulding planes and the creative opportunities they present to both the traditional and modern woodworker. In this article we’ll introduce a number of the more specialised joinery planes available to assist with the fitting of joints.
Just like their moulding plane cousins, these joinery planes should not be seen as the bastion of traditional woodworkers. They will be found to have application when used for the final fitting of machine cut joints or alternatively for the cutting of one-off joints where machine set-up time might exceed the time taken to cut the joint by hand.
The planes discussed here include the shoulder plane, skew rebate plane, router plane, side rebate plane, plough plane and the dado plane. I have listed the planes in what I believe represents the relative value of each plane to the modern woodworker.
By modern woodworker I mean someone looking to use traditional tools in a hybrid fashion alongside a basic array of electric hand tools and machinery. Of course, were you to restrict your woodworking to the use of traditional methods only, then the relative value of these planes would be very different to the order presented here.
As noted with moulding planes, the majority of these joinery planes are available as both original vintage planes and also as modern interpretations of classic tools. In many cases the modern versions of these planes now outperform their ancestors due to developments in design, manufacturing methods and materials technology.
Shoulder planes
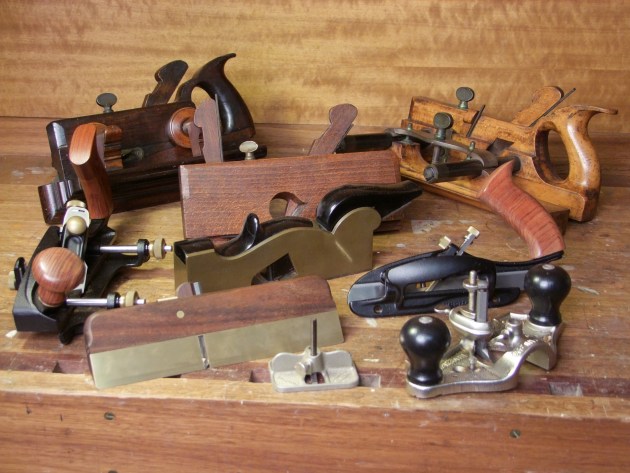
1. A mix of vintage and modern shoulder planes.
Like one or two standard bench planes, it would be hard to imagine the toolkit of even the most ardent machine woodworker not including the shoulder plane. This is a plane of some finesse, being designed for light cuts and exacting use. In their vintage form, shoulder planes were occasionally made of exotic materials such as gunmetal, ebony and rosewood (photo 1).
Shoulder planes are unique in that their sides are manufactured to be perfectly square to the sole. Made of either metal or wood, they were available with either straight or skewed blades with the skewed version being preferred for applications across the grain.
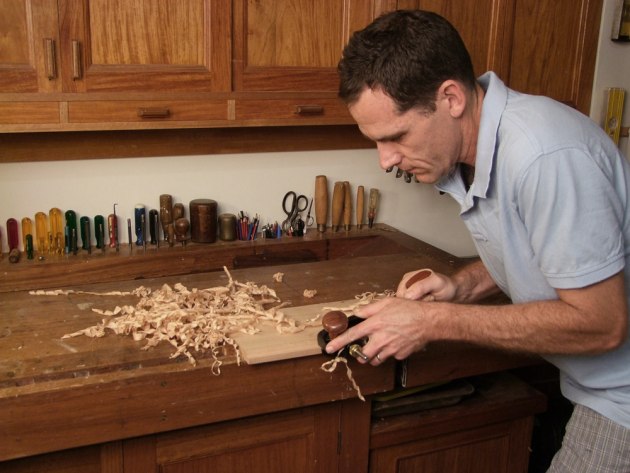
2. Shoulder plane in use trimming the shoulder of a tenon.
The shoulder plane has the blade set at a low angle, typically 15°, with the bevel facing up. The squareness of the stock allows the plane to be used accurately on their side for trimming the shoulder of a tenon as shown in photo 2, or alternatively, with the sole horizontal to trim a rebate or tenon face.
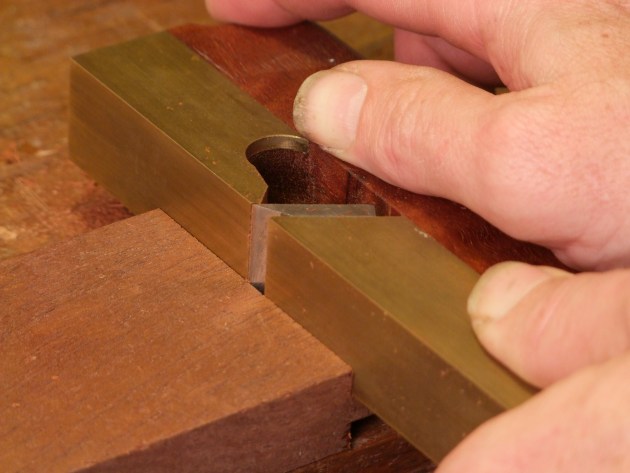
3. Shoulder plane set for a fine cut with the blade just proud of both sides of the plane.
In use, the shoulder plane will not work effectively unless the blade is set just proud of each side of the plane (photo 3). Set for a light cut, this plane is a delight to use either with or across the grain and will be found to be indispensible for the final sizing of tenons and the trimming of rebates.

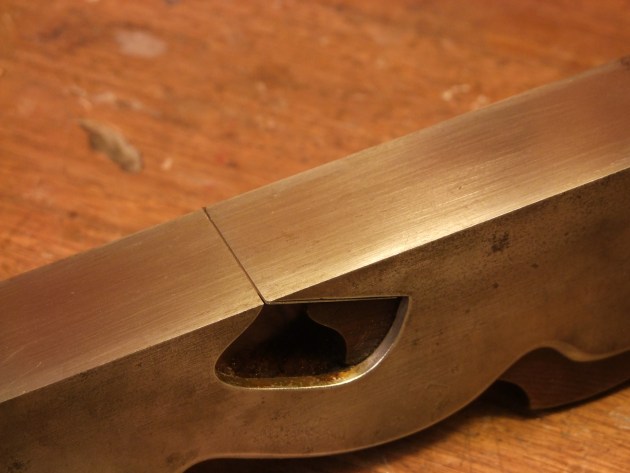
4. Shoulder planes are indispensable for smoothing fillets in moulded profiles.
It is also an essential companion plane to go with your moulding planes to sharpen up fillets within moulded profiles (photo 4).
Skew rebate planes

5. Skew rebate planes, vintage and modern.
The skewed blade of the skew rebate plane or fillister plane ensures it is just as effective at cutting rebates both with and across the grain. Whilst the plane may not have the refinement of the shoulder plane it is designed for heavier work and includes additional hardware including a fence, depth stop and cutting knives or knickers located ahead of the main blade (photos 5, 6).

6. The business end of a skew rebate. Note the depth stop, fence and skewed blade and knicker.
The knickers are crucial to successful cross grain work as they allow the grain to be severed ahead of the blade, thus avoiding torn grain along the edge of the rebate. Like the shoulder plane, the skew rebate should be tuned carefully to ensure the blade sits slightly proud of the square side of the plane. Some modern versions of this plane include adjustable stops that allow the blade to be removed and reinstated in perfect alignment.
The plane is cleverly designed such that the skewed blade and mouth combine to ensure shavings are thrown to the left of the cutter to keep them clear of the rebate being worked. The skew blade is also helpful in ensuring the blade is drawn in to the edge of the rebate being cut reducing the likelihood of the tool drifting offline.

7. Cutting a rebate with the skew rebate plane (left hand removed for clarity).
Whilst the skewed blade is one of the secret ingredients to the success of this plane it can make blade sharpening more difficult when compared with straight bladed planes. When sharpening or honing, the use of a guide to preserve the accuracy of the angle of skew is highly recommended. With fence and depth stop set, the skew rebate plane is very efficient at cutting rebates or raised panels and a multitude of other tasks as shown in photo 7.
Router planes
For many years the router plane was destined for extinction following the invention of its electric namesake. In recent years however, it has made something of a comeback as woodworkers rediscover the usefulness and versatility of this tool. It is perhaps unique amongst handplanes in that the blade can be set to cut at a level which is referenced off the sole of the plane. In this way, the tool can plane a surface parallel to the one on which the sole of the plane rides.

8. Deepening a housing with a router plane.
This is not a tool for the preliminary or initial cutting of joints, use the electric version for that. Where this plane shines is in the final fitting of a joint just like the shoulder plane noted earlier. The plane is highly efficient at tweaking the depth of a housing, or accurately cutting a hinge mortise to a predetermined depth (photo 8).

9. Router planes are available in a range of sizes and with multiple cutters.
The base of the router is designed to span the trench or housing being cut providing a level surface from which to reference. The tool is made in a number of sizes as shown in photo 9. Early router planes made of wood were often user made and very simple in construction. Later cast versions typically included vertical blade adjustment mechanisms to improve their ease of use. I stick to the standard blade, however various shaped cutters are available, making it possible to rout depressions of differing shape.
Perhaps the one additional advantage the router plane has over its electric descendent is the fact that it can be used to rout a trench or housing into a blind corner or tight space not possible to reach with the large base of an electric router.

10. Honing the router plane blade on the edge of your stone gives clearance for the cutter stem.
Sharpening the blade of a router plane can be a little challenging given the vertical stem attached to the blade. Try grinding the blade freehand on the curved end of your linisher or belt sander, both of which provide free space for the stem to extend into. Finally, hone the blade on your preferred stone. Turning the stone on its edge is a simple way to give yourself the additional height required to ensure the stem doesn’t interrupt honing (photo 10).
Side rebate planes
Quite specialised in application, the side rebate plane is designed to cut the side of a housing or ploughed groove to increase its width. To perform this task, these planes are designed with their blade in the vertical plane, that is, the sole of the plane is actually on the side as opposed to the bottom of the plane.

11. Vintage left and right hand side rebate planes and modern version.
A number of examples of side rebate planes are shown in photo 11, including a vintage pair with their equivalent modern plane. Small cast steel side rebate planes are also available, however the additional length of the wooden side rebate provides a significant advantage in use. The wooden version also typically has a wider iron affording it the ability to trim a groove of greater depth.

12. Side rebate plane in use.
They are made in left and right hand versions to allow them to be worked with the grain at all times. Vintage planes
can be notoriously difficult to tune but once set for a fine cut they excel at the specialised task they are designed to perform (photo 12).
This is not a tool you will reach for often, however, the widening of a groove or housing is such a difficult task to perform accurately with hand tools that the side rebate plane can be a source of great relief when the need arises. Paring chisel aside, there is no other hand tool that can be used with any accuracy to perform this operation.
Plough planes
I have chosen the original English spelling within this article, however, in most circles today the English terminology has given way to the American plow in response to the dominance of the American market.
Deemed ‘the prince of planes’, the plough plane was more often than any other tool the one to be chosen for embellishment with rare and expensive materials. The plough plane was an indication of the material wealth or status of its owner with ebony, boxwood, rosewood and ivory amongst a long list of precious materials occasionally used in its construction.
In simple terms the plough plane is used to cut a groove along the grain either within the edge or face of the
work. Plough panes typically include a selection of interchangeable blades to control the width of the groove to be cut, a depth stop to control the depth of the groove and an adjustable fence to accurately position the groove upon the work. On vintage planes, the mechanisms employed for positioning the fence and the design of the handle are perhaps the most notable indication of quality, aside from the materials of construction.

13. Quality plough plane in solid rosewood and its modern equivalent.
The most basic ploughs were devoid of handles and incorporated sliding arms positioned by simple wooden wedges whilst the more expensive planes incorporated fully shaped, closed handles and elaborate threaded arms with wooden nuts (photo 13, left). Modern metal plough planes have additional features such as adjustments for advancing the cutting blade (photo 13, right).
In a true illustration of effective design, the mouth of the plough plane is shaped to throw shavings off to the right, so keeping them clear of both the ploughed groove and its positioning fence on the left of the plane. There is much that could be written about the wonderful design principles of the plough plane, such as the ornate moulding on the fence to reduce its bulk and mass, but more importantly let’s simply say the tool is a joy to use and something every woodworker with an appreciation of hand tools should experience.
In use, like the moulding plane, the plough is best started at the far end of the work. This allows the cutter to be guided by the groove cut during the previous pass. Keep the fence pressed tightly into the work and ensure the body is kept upright, with each stroke moving further back until a shallow groove has been cut along the intended length.

14. Plough plane in use cutting the groove to take a panel.
With this shallow groove achieved, full passes can be taken in the more traditional way, with the cut beginning at the near end of the board. Photo 14 shows the plough in use cutting a groove in the edge of a frame to accept a panel. Learning to use this tool is to experience one of the simple pleasures of working wood.
Dado planes
To the untrained eye, a vintage dado plane bears a striking resemblance to the much more common moulding plane. The term dado, simply refers to a groove cut across the grain within a panel or gable. Perhaps the most obvious application being for housings cut across the solid timber gables of a bookcase to accept the shelves.
As discussed previously, cross grain cutting is invariably improved with a skewed blade and this is a notable design feature of the dado plane. The second requirement to successful cross grain cutting is to ensure the wood fibres are scored or cut ahead of the blade.

15. Dado plane in use cutting a cross grain housing.
A look at photo 15 shows the additional vertical wedge at the front of the plane and it is this wedge that holds in place the knicker iron that performs this important task. In tuning this plane it is crucial that the knicker and blade are matched in width. To retain this match, it is very important to only ever sharpen the inside edges of the knicker iron leaving the outside width preserved. Like the skew rebate plane, the iron of the dado plane needs to be sharpened at a set angle which is important to preserve for the life of the plane.
A dado plane has no fence to guide its cut, hence a simple guide is typically clamped or nailed to the workpiece adjacent to the desired location of the dado. The depth stop on the plane is set for the desired dado depth and with both knicker and blade set for an appropriate depth of cut, the plane is run along the edge of the batten.

16. Knicker of the dado plane and the resulting scoring cut it produces.
To ensure the knicker effectively cuts the cross grain fibres it is sometimes good practice to pull the plane backwards before the first planing pass to provide assurance the wood fibres on each side of the dado have been severed (photo 16). As is the case for all the planes discussed here, the dado plane is a beautiful plane to use in performing the specific task for which it has been designed.
The joinery not the destination
I should again reiterate that it is not my intention here to suggest that any of these planes can sensibly be considered for production work. In my workshop, that is the domain of modern machines. In woodworking however, as much pleasure should be derived from the journey taken to complete a project as the project itself and hence the opportunity that exists in further developing your hand tool skills. Not surprisingly, all of these tools offer a closeness to working with the material at hand and a degree of pleasure in their use that no machine can ever match. What may surprise you though is just how efficient these tools are in completing the tasks for which they have been designed. With one or two of these planes in your kit, properly tuned and ready for use, you will find their ability to fine tune joints or cut one off rebates and dados to be both efficient and pleasurable.
Troy McDonald is an engineer and woodworker based in Brisbane.