Invisible repairs: how to fix defects and voids in wood
Words and photos: Neil Erasmus
Does this sound familiar? You’ve just drilled a large hole in the wrong place and it will be impossible to replace the section without making an entirely new piece of furniture. After some colourful language, you calm down enough to decide that a repair won’t compromise the integrity of the piece. You just need to make sure it is an invisible repair…
But just how do you do this? In furniture making it is the polisher who is the master of disguise, and it is to his or her techniques and tools of trade that we turn to at these times. However with some woodworking skills and practice, we can restore harmony to both the piece of furniture and to ourselves. These techniques should not be seen as a substitute for good workmanship or materials, but they are invaluable when we are reminded by our mistakes that we are human. Of course work that has been compromised structurally will require another approach altogether, perhaps even a ‘start all over again’ one.

West Australian French polisher Mark Masser
Sometimes too we are dissatisfied with nature’s preference for the imperfect in the form of knots, cracks and gum veins, and we want to disguise these features. To achieve a flawless finish we can again combine the woodworker’s and the polisher’s skills, the latter being provided for this article by West Australian French polisher Mark Masser.
Unwanted holes
Repair work of this nature has to be carried out very methodically and can’t be rushed. The first stage is to fill the hole, but that does not mean slapping in a spatula full of car body filler. While this product has some uses in woodwork, it is not always suitable as it doesn’t expand and contract with the surrounding wood when humidity changes. It also has no grain, making it a dead give-away in reflected light. There are a few effective ways to fill unwanted holess.
Wooden plugs
Holes that occupy a fairly large area and are fairly deep are best filled with tight fitting wooden plugs. These may be round or specially shaped to fit an irregular hole. To make one, find a matching piece of wood, preferably from an off-cut, and shape a snug fitting plug making sure to match the grain direction. Don’t make a plug from endgrain to fill a hole on the long grain face of a piece of wood.
Glue the plug in place with a structural glue such as epoxy or urea formaldehyde. Don’t use PVA glue as it may creep, revealing the edges around the plug. Sand the plug flush to the surface of the timber. If any pre-finishing treatment is desired, such as bleaching, staining, fuming, liming or even texturing, do it at this stage.
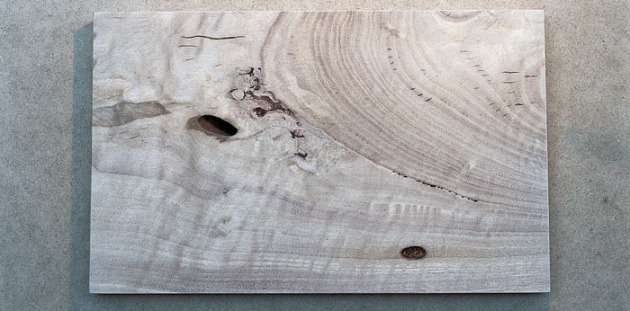
Larger defects may need to be cleaned up first.
Sometimes larger defects, such as those shown in the above, have to be cleaned up with a router and a matching plug made. To do this, fit a small, manageable router with a small diameter straight cutter (about 3mm diameter) and carefully remove the waste in the affected area to the desired depth, operating the machine to and fro by hand and eye.
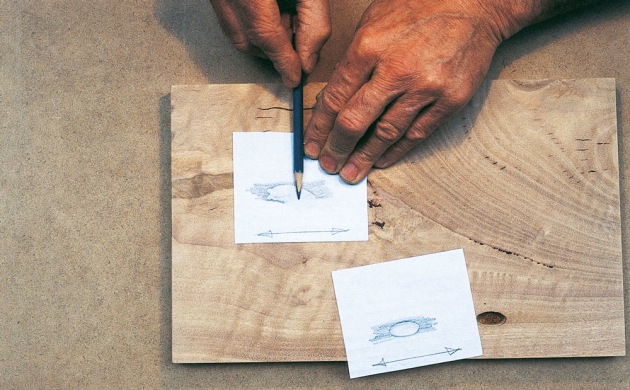
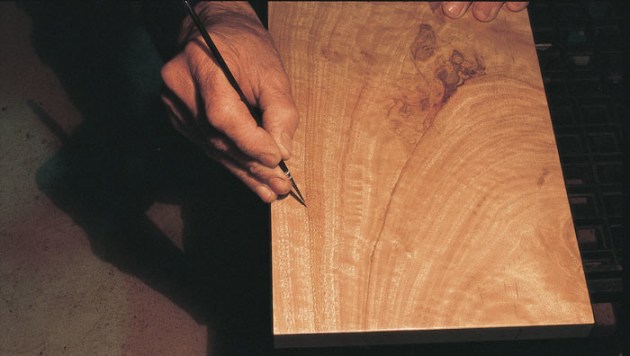
Shade the edges of the void to trace the shape.
Now, stretch a piece of thin paper (0.05mm) over the area and shade it with a sharp 4B pencil. This should highlight the edges of the hole. Prepare a piece of suitable wood to fill the hole, glue the tracing on its surface with paper glue, then cut out the insert carefully on a scroll saw or by hand using a coping saw. Glue this in the hole and fill any gaps with wood dust filler before sanding flush.

Match the grain and colour of the plug as closely as possible.
It is important to match the grain, texture and colour of the applied plug or piece as closely as possible (photo 3).The less touching up required at the finishing stage the more natural the repair will appear over time, as all woods change colour with exposure to natural light – some turn darker while others lighten.

Cutting a plug on the scroll saw.
Car body filler
This needs to be used with a healthy amount of discretion, and has to be carefully doctored to camouflage itself and the damage or defect below its surface. So when is it appropriate to use it? Some natural defects such as surface gum vein or borer holes would benefit from this method, as long as the area to be filled is not too deep.
All loose matter needs to be scratched out before filling and any smooth surface has to be roughened to assist adhesion. Once the filled surface has been sanded down to the desired finish, Mark Masser scratches ‘grain’ on it to blend with the texture of the surrounding wood, using either a razor blade or a scalpel. Before adding hardener to the filler it should be coloured sparingly with a natural ochre powder.
Sawdust filler
Very small borer holes can be filled with fine sanding dust from the surrounding wood thickened with nitro-cellulose lacquer. The colours should blend perfectly, so any further disguising work is not needed.
Superglue
Minor, non-structural cracks and surface flaws can be repaired with superglue. Drip the superglue into the cracks ensuring it chases entirely through, adding more if necessary. This process may require several applications until the crack is filled completely. As this method also bonds the walls of the crack together it makes a very sound repair to fine cracks. Larger, non-structurally flawed ones need to be filled differently. I deal with these by bandsawing several thin slivers of matching material, sharpening one edge and tapping these in place with a little glue. Don’t tap them in end first unless you are filling endgrain.
Colouring
I chose a particularly bad piece of WA blackbutt from my firewood heap to demonstrate the techniques shown here, and all credits go to Mark Masser for wielding his magic with his pencil-brush and colours.
The chosen offcut contained part of a forking branch, fine cracks, a large crack, two large borer holes, gum vein and some burl figure interspersed with pockets of bark. The soft, pithy bark and loose gum vein was picked out and the underlying wood roughened, then filled with coloured body filler, again carefully masking up all the surrounding wood.

The matching inserts have been glued in and sanded flush.
The two borer holes were routed out by hand and plugged with matching inserts which were sanded back flush, while the large crack was fitted with thin veneers placed on edge. Several fine cracks were filled with a sawdust and lacquer mixture and, when everything had cured, the entire piece was sanded back to 240 and a coat of single pack lacquer applied.

Fine cracks were filled with a sawdust and lacquer mixture.
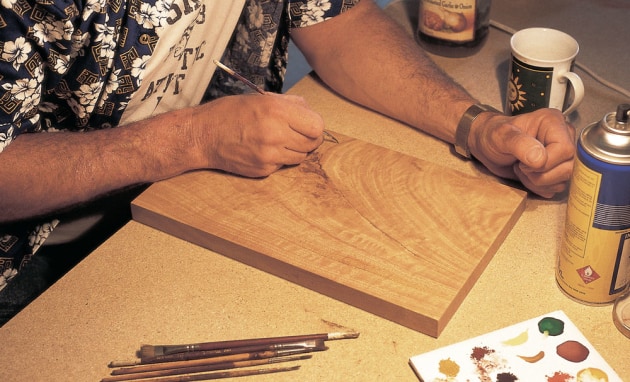
The areas that require attention are doctored by brushing on several layers of ultra thin stain or pigment, each fixed in place with a fine coat of sprayed finish. Single pack, nitrocellulose lacquer is suitable under an oil finish, while shellac must be sprayed on under a rubbed French polished finish. A split second burst of spray is all that is needed to fix the pigment to the surface, as too much build up will draw attention to the area.
Materials
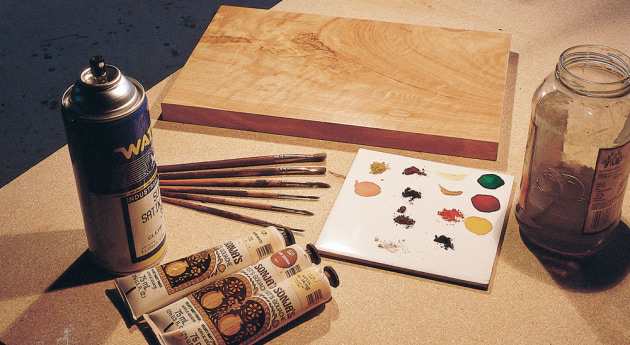
Mark Masser’s tools shown above are a palette of colours on a white tile, an assortment of brushes, methylated spirits or thinners and a spray fixative. He always colours by natural light rather than artificial light. Mark suggests that those who are keen to try out these techniques should first practise on scrap wood.
A basic understanding of colours is required: black and orange are opposites, as are red and green. So use orange to lessen the effect of a dark area, and green to take the edge off an area that appears too red. The latter is a practice often used on timbers with a red hue, the green helping to blend several planks together such as on a table top. Conversely, when a dull, brown finish needs a little lift to blend it with more lively material, wipe on a heavily diluted mix of red. These wipe on applications are done with primary colour spirit stains diluted with metho or thinners.

Prominent grain lines are extended through and well beyond the defect area and may be highlighted to help the eye move away from the area under repair.
Lighter woods are generally more difficult to treat as they absorb and reflect more light, much of it from just below the surface. This three dimensional effect is hard for the polisher to match with his brushes which is why careful wood selection is important at the repair stage. If you ever have to work with light coloured highly figured fiddleback timbers, Mark suggests filling the defects with perfectly matching pieces of wood, and trying to ‘lose’ only the edges through very fine applications of colour, leaving mostly wood visible.
Mark emphasises that stains, pigments and fixative must always be used sparingly, as the multiple applications that are sometimes needed can cause excessive build. To this end, he uses the ‘wash’ from the pigment or stain mixtures, applying them by brush in barely distinguishable strokes He then moves around the area, checking the effect from different angles, and lightly spraying fixative once he’s satisfied. He’ll repeat this process several times, adjusting the colour as he goes until he’s happy with the result.
Too much pigment will not allow light to penetrate, leaving the repair looking two-dimensional and flat while the surrounding material glows from inside. You must resist the temptation to apply colour too thickly. It is a very fine line between too little and too much and only practice makes perfect.
Burl figure is often the easiest of all to fill and disguise, as its wild, random grain allows a less disciplined approach. The polisher achieves a result mainly through dabs and swirls with the brush, using a greater range of colours.
Fine brushes, pigments and aerosol fixatives are available through art suppliers or from specialist shops. We have hardly scratched the surface of the techniques – experimentation and practise will build your skills.
First published in Australian Wood Review, issue 41.
Neil Erasmus is a furniture designer/maker in Perth, WA and also teaches woodwork. See www.erasmusdesigns.com