Hand working edges

Words and photos: Charles Mak
Sharp and crisp edges definitely have their place in furniture pieces, such as on the rails and stiles of doors. However in most projects, I relieve their edges for functional purposes – to remove their sharpness, to give some edge protection and to avoid finish from pulling away from the edges.
Breaking an edge can also add detail to your work or create a visual effect. As a new flat, narrow edge is added, the adjacent surfaces will look subtly different, sometimes altering the look or feel of the piece, such as making a leg appear more slender or a piece lighter.
You can ease an edge with a simple relief, a chamfer, or a round-over. Let me show you how I do that by hand, without making test cuts or worrying about the chatter and noise that a router may produce.
Simple relief
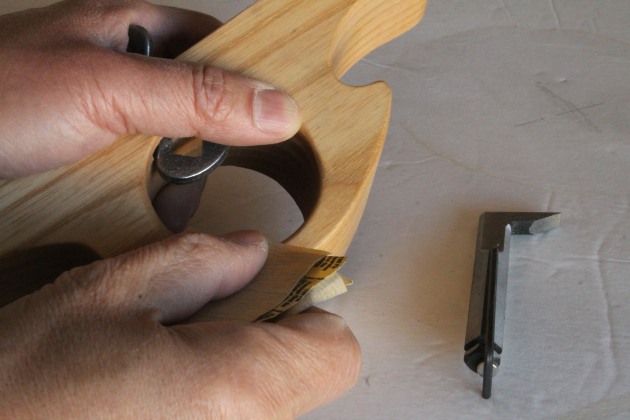
1. For relieving edges in tight corners, a sharp knife or sandpaper is the tool of choice.
Quite often, a fresh edge is too sharp to the touch. The quickest way to take an edge off is with a sandpaper, especially when the edge is less visible or precision is not important, like on the inside edges of table aprons or the bottom edges of drawers. Simply fold a sandpaper or use a sanding block and make the same number of passes with even pressure on each edge. In tight spaces, sanding is a foolproof way of easing an edge (photo 1).
Through chamfers
Chamfers are the most common form of edge breaking. Violinmakers usually chamfer their edges skilfully with a sharp knife, while bespoke Arts and Crafts furniture makers cut bold chamfers using chamfer planes or spokeshaves.
I recently made a bench sweeper for clearing debris from the bench top. It is an unplugged version of a blow gun that Chris Wong, my friend and a fellow woodworker from British Columbia, calls a ‘br’all’. I relieved the straight edges before cutting out the board to shape and then chamfered the curves with a spokeshave.
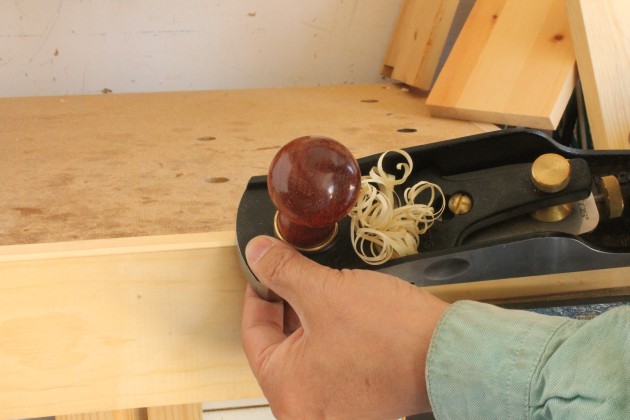
2. Ride a knuckle or a finger under the plane to keep the cutting at a consistent angle.
To chamfer freehand, first layout or scribe two lines on the adjacent faces to define the desired chamfer. Hold a handplane with one hand and use the other hand to keep the plane at a consistent angle to the stock (photo 2). Check the progress against the pencil lines and adjust the tilt of the plane where needed to cut evenly between the lines. As the chamfer nears its final width, make finer and finer shavings until the pencil lines disappear.
3. To avoid endgrain break-out, plane or chisel from the exit end, or put a small chamfer on the exit side/trailing edge first.
When chamfering a board on four edges, cut the chamfers on the endgrain edges first and then plane the long grain edges. To avoid break- outs on the corners, place a backer board on the trailing end or chamfer from the exit end towards the middle (photo 3).
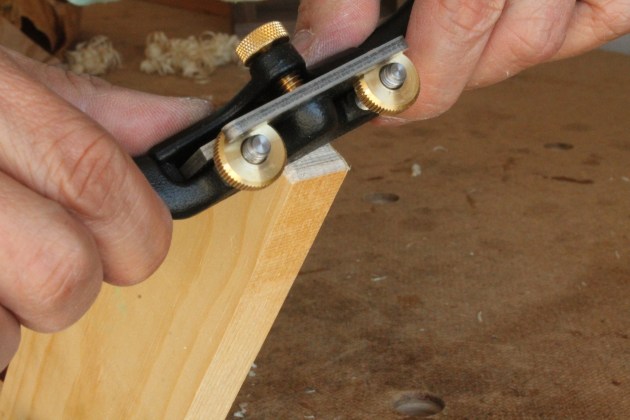
4. I set the guide to the desired chamfer size and adjusted the depth of cut for a medium to fine shaving.
If you plan to chamfer a lot by hand, invest in a chamfer plane, giving you both precision and speed. In my case, I can convert my block plane into a chamfer plane by installing a factory-made chamfer guide. After setting the chamfer width, I keep running the guide on the arris till the plane stops shaving (photo 4). Also handy is the chamfering tool shown in photo 5.
5. A cornering tool can cut a fixed-radius curve on an edge with a pull or push stroke.
Stopped chamfers

6. Make a template for the tongue and mark out the profile on the adjacent faces.
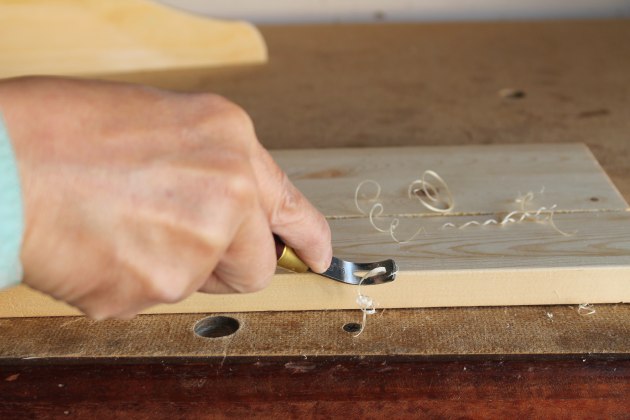
As a variation, a stopped chamfer, such as a curved chamfer, adds another element of visual interest to an edge. A lamb’s tongue is a more elaborate stopped chamfer, like an ovolo and fillet working alternately along an edge. Here, I'll put a lamb’s tongue on my shop-made Moxon vice to illustrate the chamfering technique. Start with a template for the ogee curve and trace the profile onto the adjacent faces of the arris (photo 6).

7. Then mark out the chamfer and saw a stop cut where the chamfers end (photo 7).

8. Remove the bulk of the waste with a saw or a chopping chisel.

9. I pulled or pushed a spokeshave with the grain to chamfer the arris.
The ogee curve is more delicate and prone to damage, so form the chamfer first. After removing the bulk of the waste with a coping saw (photo 8), I cut the chamfer with a spokeshave (photo 9) and finished it with a chisel (photo 10).

10. Clean up the last section of the chamfer that the spokeshave cannot reach with a chisel.

11. Work on the concave curve halfway from both sides to prevent splitting.
For the curve section, saw out the waste close to the lines and then use a chisel (or knife) to carve out the ogee shape. With the chisel bevel facing down, I chiselled out the concave part of the curve, working with the grain from both ends to avoid splitting the wood (photo 11).

12. Use cross-cut strokes with the chisel’s bevel facing up to refine the tight curves.
I then turned the chisel over with its bevel up to work on the hump – the convex part – paying attention to the grain direction. Finally, adapting the cross-cut technique musical instrument makers use, I fine-tuned the hump with crosscut strokes of the chisel and finished it with some light hand sanding for an even and smooth look (photo 12).
Rounded edges

13. Remove the waste between the lines, using strokes from the ends towards the middle.
Rounding an edge without a round spokeshave is not that complicated, because minor imperfection is seldom noticeable to the eye. First, lay out the round profile on both ends and draw two straight lines on the adjacent sides to define the round-over. As in chamfering, steady the handplane with two hands and remove the waste from both sides with straight strokes (photo 13).

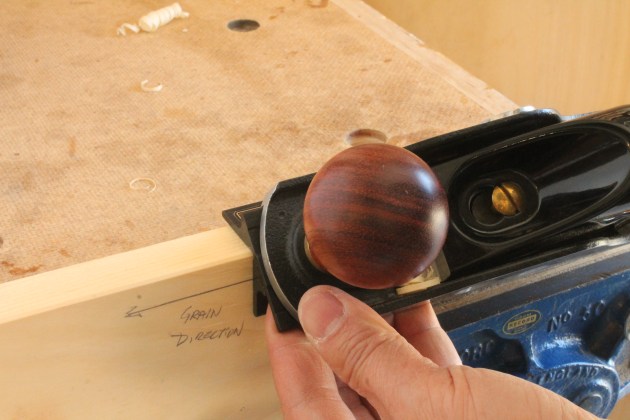
14. To plane the round-over profile, I used straight and overlapping strokes, again working from both ends.
As you get close to a rounded edge, tune the plane for very fine cuts and roll the plane sideways as you make the final series of overlapping strokes (photo 14). Finally, use a curved scraper or sandpaper to smooth out any rough spots or ridges.
Fitting and assembly

15. Chamfer the lower three quarters of each tail’s edge on the inside face to ease the fitting.
Easing edges has another use for joinery work. In a through dovetail, I cut narrow chamfers on the inside 13 arrises of the tail board to ease the assembly and to prevent crushing during a tight fitting (photo 15).
Similarly in a mortise and tenon joint, you can put a slight reverse chamfer on the lip of the mortise and a chamfer on the end of the tenon to make the fitting easier and to create wells for excess glue.
Bruises or bumps may well be welcome signs of character on a vintage piece, but chipped-away edges are something I try to avoid in a new build. These few edging techniques will go a long way to accomplishing that – and more.
Charles Mak lives in Alberta, Canada enjoys writing articles and authoring tricks of the trade.