For Future Reference

Words: Damion Fauser
Photos: Donovan Knowles
Using a reference marking system in your woodworking is as essential as knowing how to sharpen. It will increase your accuracy, greatly reduce your risk of making layout and cut errors, and simplify your work. Many marking systems exist, but they all have the same purpose.
What is a reference system?
Many professions and trades utilise reference systems. Cartographers and surveyors use datum points, such as the top of a distinct topographic feature. Stonemasons set and use a cornerstone. A reference system gives you a way of determining something tangible in your work that is both known and not subject to change.
With the systems I use, I can pick up any component and quickly identify what it is and how it’s oriented in space (up, down, left etc) and in relation to other components. I will know from which face or edge to accurately and consistently register layout tools and which surfaces to register against fences and jigs for cutting joinery and shaping. Just a few quick pencil strokes will save time and avoid having graffiti-like markings and descriptions all over your components.
Face and edge markings
Lets keep it simple to start with. When you dress your stock, you start by flattening a face side and then a face edge. When these are dressed correctly, you should mark them as reference surfaces.
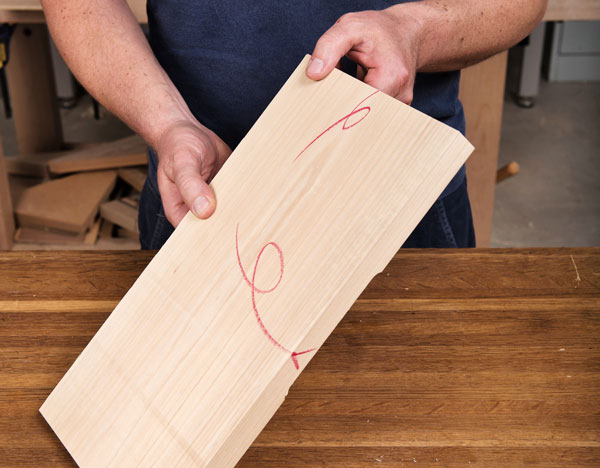
The traditional way of doing this is shown in photo 1. You’ll notice I’ve also clearly marked my reference end. You can use different markings, as long as they are easy to recognise and consistent throughout your work.
These will now be the two clearly identifiable surfaces from which you will reference all of your layout, both measurements and when registering your layout tools such as squares and gauges. It will also be quick and easy to identify surfaces that need to be registered against machine fences and jigs and so on.
When laying out
Sometimes you need to be very conscious of referencing layouts on multiple pieces in a consistent fashion. Markings for cutting biscuit or domino slots should be done from the same reference surface on each component (for example the back edge of a case piece or the top of a leg).
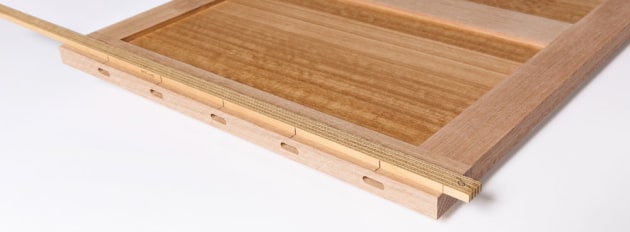
Any deviation in your layout will be doubled when the two pieces are mated back together (photo 2).
Another example of this is when marking out mortise and tenon joinery. Care should be taken when gauging the walls of the mortise and the cheeks of the tenon. If you inadvertently flip one of the two components around, you will again double the error.
Similarly, when laying out dados for shelves in a case piece, if you don’t register from a consistent reference edge the shelves will be uneven.
The cabinetmakers triangle
It never ceases to amaze me how powerful three pencil strokes can be. This marking system has been around for centuries and I use it in many aspects of my work.
Panels
When laying out boards for a tabletop, I always arrange them carefully to take advantage of grain aesthetics and direction, and also to conceal minor defects. On larger panels with many boards, the mathematical possibilities in terms of arranging your boards are daunting.
One board can be arranged in four possible ways. Add a second board, which can also be arranged four ways and you have a total of 16 possible combinations. Every time you add a board to the panel, you multiply the possibilities by four. So, when you’ve taken the time and effort to arrange a panel, you don’t want to lose track of it once you start setting up for gluing.
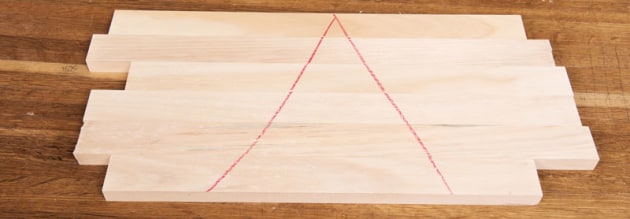
The simplest way to avoid this risk is to draw a bold triangle across the panel (photo 3). There is now only one possible way this panel can be reassembled.
Legs
Legs must also be carefully selected and oriented, and once so, it can be easy to mistakenly mark out mortises etc on the incorrect surfaces.
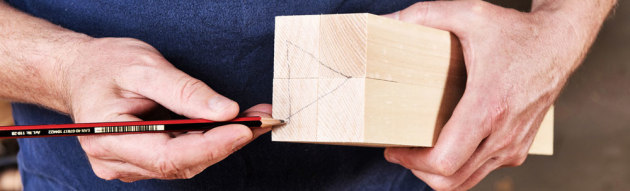
Once I’ve selected and arranged my legs in space and in relation to each other, I gang them together and mark a triangle across the top, as in photo 4. Now each leg is quickly and easily identifiable, as are the inside edges from which I reference my joinery layout.
Frame and panels
I’ve seen frame and panel components that are so covered in markings they look like they’ve been graffitied.
In photo 5, I’ve used three separate but simple triangles for a frame and panel assembly. Placing the two stiles together forms the first, placing the two rails together forms the second, and the third orients the panel to the frame.
Boxes and drawers
Box and drawer components are simple in principle but if you make the mistake of orienting one the wrong way when laying out dovetails, or when cutting a groove to accept the base, you can’t simply swap the piece around, or you merely chase your mistake around to each corner of the box.

You can see in photo 6 that I’ve carried over the theme from the frame and panel to form triangles by placing two opposite components together. I also do this on the back edges of case piece components, including their shelves and partitions.
Laminations and veneers
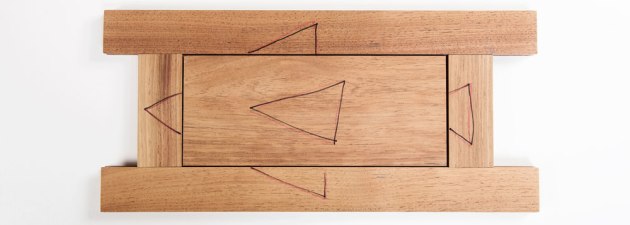
Woodworkers will often resaw their own veneers and laminations from a board to subsequently form decorative arrangements such as slip, book, quarter and radial matches. When discovering the possibilities, it is important to be able to re-orient the veneers back into their original position to maintain the optimal grain match.

A simple triangle across the edge prior to resawing the veneers will allow you to place them back together with ease (photo 7).
Other marking systems
Many other marking systems exist for the same purpose.

Some woodworkers use coloured dots (photo 8) or stickers while others use an alpha-numeric marking system (AA, BB or A1, B1 etc) which can be achieved either with a pencil or a set of steel punches. In the end it doesn’t matter what system you use in your own workshop, as long as it is consistent and you can easily identify it.
My advice is to keep it simple – pick a method and stick to it until it becomes so inherent in your woodworking that you have the use of reference in your mind with every single process undertaken in your workshop. The epiphany for many comes post- error – I’m hoping that this article will assist many of you in not making that error to start with!
Damion Fauser is a furniture designer/maker who lives in Brisbane. He teaches woodwork from his Darra workshop.