
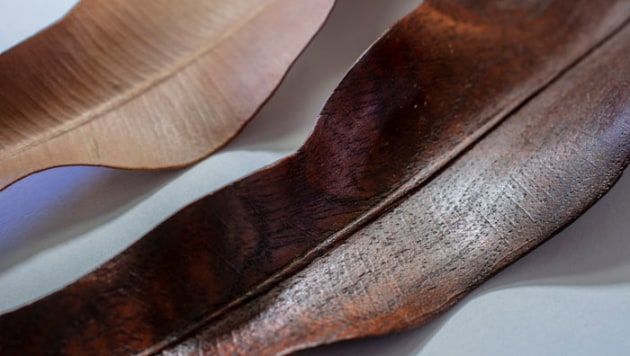
Carving a Eucalyptus Leaf
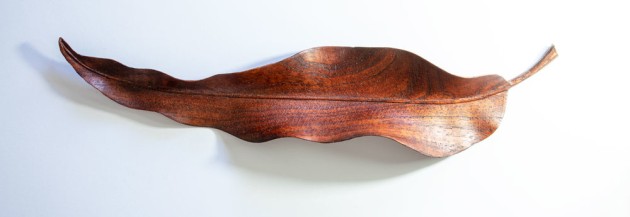
Eucalyptus leaf, 240 x 70 x 2mm thick carved by Robert Howard from red cedar and shown with the model. Photo: Rebecca Nathan
Words and process photos: Robert Howard
This particular eucalyptus leaf is larger than those native to this area. It has a dried out form that creates a lot of movement in its edges, and an interesting play of shadows down its length. I have chosen to carve it exactly as I found it, but some exaggeration could make it even more interesting.
I carved it from my favourite native wood, Australian cedar (Toona ciliata). It is not the best wood for the job as the figure can clash with the carved form, but I have it, and I like it.
Drawing 3D forms
Design drawings, using the standard plan view along with side and end elevations are straightforward for the regular rectilinear forms found in most furniture. Compound curved forms are much more difficult. Luckily, there is a substitute for them that is very simple.
First, I chose the view of the leaf that is the simplest to accurately draw. In this case it was the plan, or overhead view.
Practically, this means projecting the edge shape of the leaf vertically downwards onto the plane of a sheet of paper, or a thin sheet of wood.

1. To do this accurately, I made a simple jig. Firstly I taped the ends of the leaf to a sheet of thin plywood so it would not move if I gave it a nudge with the jig.

2. A simple jig held a pencil vertically below the edge of the leaf so its profile could be drawn for the plan view.

3. The plan view plywood template of the leaf was cut out on the scroll saw.

4. Next, I needed to find a way to get my side and end elevations. I also knew I was going to need a jig to hold the leaf while I carved it. Serendipitously, there was an extremely simple way to do all this. On a piece of scrap cedar, I traced the outline of the leaf, using my template, and bandsawed out the resulting shape in two halves.
5. Then, in turn, I placed the leaf next to each half, in the position it had been in to make the original template, and traced the line of the edge onto the vertical wall made by the bandsaw cut.
6. Then I turned each half on its back and bandsawed out these two new shapes. This simple procedure gave me all the views I needed, in combined form, in the wood of my jig. Each point on the lines of intersection of these two cuts combined the plan, side elevation and end elevation of the leaf at that point.
My jig was now in four parts: a right-hand side cut in two, and a left-hand side cut in two. I selected the bottom right- and left-hand parts, and screwed them down around a leaf outline drawn onto a base board of plywood or MDF. I set the top pair aside for the moment, to use later in a similar way, but with an important difference that I will explain.
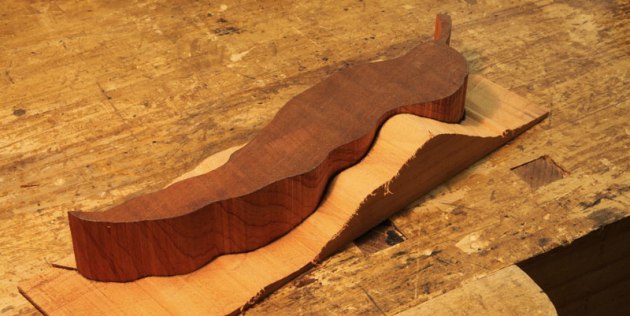
For the carving, I marked out another leaf, using my template, from a piece of quality cedar of higher density and better colour.
Carving the top surface
The two long sides of my leaf are completely different compound shapes, joined together by the centre vein. Close inspection of the actual leaf shows the vein roughly in the centre of the leaf down its length, and crucially, at no point is the vein higher than either edge adjacent to it at that point.
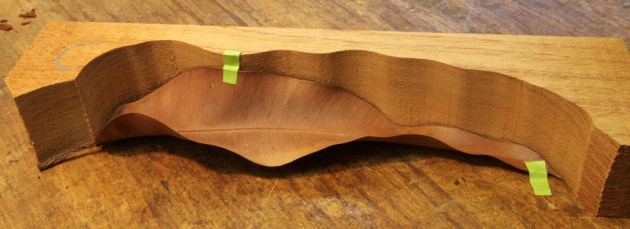
7. This meant that I could safely carve wood away horizontally inwards from each edge of my jig, towards the centre vein. At this stage, I was just roughing out the basic form.
In order to more precisely carve the surface, I needed the centre vein. As eucalyptus leaves dry, this centre vein tends to hold its original form, with only gradual curves side to side and up and down.

8. Its top-down plan shape was easy to draw from the actual leaf. To add to that its side elevation shape, I carved along the drawn line, copying the gentle up and down undulations of the actual leaf.
I then carved inwards from the edge of the leaf to the vein, from each point around the leaf, paying particular attention to the way the actual leaf curved along the way. All this carving was quite safe, as the leaf was fully supported underneath at all points by the uncarved wood on the bottom.

9. I used a V-tool to outline the centre vein and then bring in the sides and work the leaf surface to match.I took care to gradually refine the width and height of the centre vein now, as it would be much more difficult to do at a later stage.
Replicating the veins
Finally, I wanted to see if I could replicate something I have long admired in the gum leaf carvings of John Kendrick Blogg (1851–1936). Somehow he was able to carve very realistic venation in his leaves.
The carving was so subtle I still wonder how he did it. Did he use scrapers? Or did he use the old carver’s trick of scoring the lines into the wood with a smooth, blunt instrument, sanding the evidence away, and finally wetting the wood so the compressed, scored lines swelled to raise them above the surrounding wood surface?

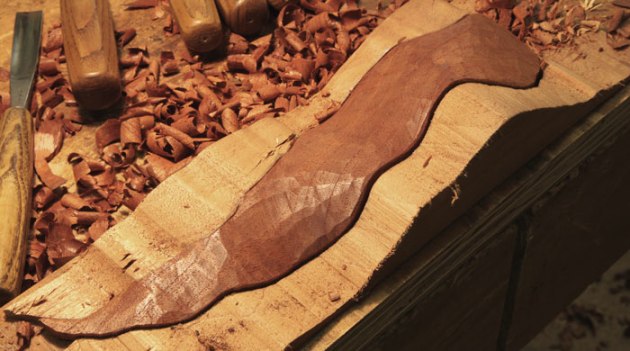
10. I decided to try the latter method (photo 10), but I made one mistake. I should have done it before I carved the bottom surface. This would have allowed me to put some decent pressure on the scoring tool, which would have resulted in a more prominent raised line after wetting. The lines to imitate the veins were scored with what turned out to be the perfect tool – half of a pair of spatula shaped tweezers.
11. Because I waited until the end, I only had partial success, but it was enough to encourage me to try again on another carving sometime in the future.
Carving the underside
With the excess wood on the top surface carved away, I could not simply turn the carving over, and use a jig made with the other pair of pieces I set aside when I made the first jig. Most of the wood would have been unsupported, so that would not have worked.
For the top half, the jig enclosed the leaf carving, but for the bottom, I decided to move the two parts closer together, so the wood I was about to carve was held, not inside the jig as before, but instead, on top of it. In theory, the shapes should have been a perfect match. They weren’t, of course, but they were close.

12. The bottom two halves of the jig were screwed to the base board a tad closer so the inverted leaf carving could be supported on top. With the carving upside down on top of this new jig, the leaf outline was marked and a shallow rebate around 3mm deep carved in to the line marking out the shape of the leaf.
Done accurately, this rebate stopped the wood from moving as I carved it. It also allowed me to compensate for discrepancies in the form, and so ensure that the leaf was supported at all points on its edge.

13. With regular reference to my leaf model, I now carved off the major part of the excess wood on this bottom side of the leaf. This was the more difficult half to carve. Here, the leaf surface was above the edge at every point, so I needed to constantly refer to the actual leaf surface as I carved, as well as frequently check the thickness of my carving.
As with the top half, I soon marked in the vein on this underside. I took great care to match it as closely as possible, as I carved it, with the shape carved on the upper side, both in its plan shape (as seen from above), and in its elevation (as seen from the side). Any error here could easily lead to carving a hole in the wood. Getting it right, however, was crucial to success with the carving.
Finally, I worked over and over the surfaces, slowly and carefully taking off tiny shavings, while all the time checking and rechecking the thickness. I was able to work both surfaces at this stage, because I had not yet sanded and scored the upper surface. Mistakes can have advantages.

14. The underside of the leaf has the tool marks on the surface, as I prefer this effect to a sanded finish. The finished thickness is between 1mm and 3mm, with most of it between 1mm and 2mm. A couple of coats of shellac, followed by some wax, and it was finished.
Robert Howard is a woodworker and sculptor who lives in Brisbane. He teaches regular woodwork classes from his studio.