Piece by Piece

Michael Retter is a highly acclaimed Canberra wood artist whose work appears in numerous public and private collections, notably Australia's Parliament House. His work was featured in issue 70, Australian Wood Review. Below are some insights into his marquetry process. Read the profile of Michael that appeared in the magazine here.
Design is the first stage of any marquetry project, and it’s the all-important one, says Michael Retter.

The drawing is first done on tracing paper [A]. This is then transferred onto a piece (or joined pieces) of veneer that becomes background from which windows for other pieces are cut. Favourite background species are neutral coloured Queensland maple, or candlenut ash that has been ‘greyed’ by the ebonising process described.
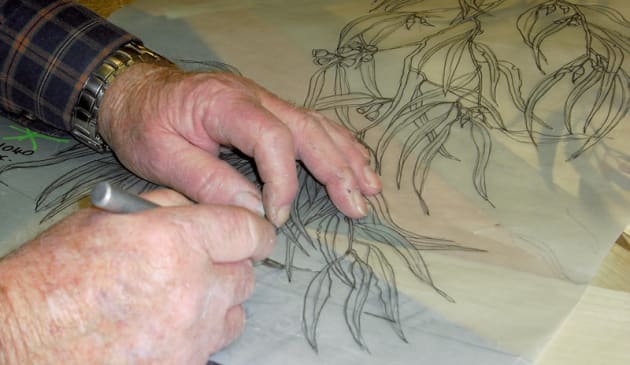
The drawing is transferred by pencilling over the tracing that has carbon paper placed underneath it [B].

Unlike the ‘packet’ method (described in AWR#68) each piece of the pattern is individually cut out with one of the No.11 surgical scalpel blades that Michael buys by the 100 boxful. Once a window has been cut out from the background this becomes in effect a template or a stencil [C].
This template is held over other pieces of veneer and positioned for best effect. The windows in the background were cut out with vertical sides, square to the surface they were cut on. The piece that is cut to fill the window is however cut on angle with tapered edges so it can ‘dovetail’ in to create a finer line.

Each piece is fitted and tweaked for best results [D]. With all the windows filled the taped up background now contains the completed marquetry design.
The borders that Michael likes to frame his ‘paintings’ with are next applied. These may be mitred or ‘butt joined’ as a way of ‘dodging the mitre’. The borders are cut on a hand-operated guillotine [see main photo top] and trimmed to size with one of a set of metal zinc plate templates Michael had made up.

The entire piece is next glued to an MDF backing under pressure. Smaller pieces are pressed in a secondhand door press bought many years ago [E]. Larger pieces are sent to a commercial presser.
Sanding is undertaken with care on a stroke sander (120 grit), then a series of orbital sanders using grits from 150, 220, 320, 400 to 500. Finishing is the final, time-consuming process. Four to five coats of two-pack polyurethane are applied with a roller (less mess). Michael cuts back hard between each coat to contain thin layers whose purpose is to fill grain and the fine detail lines. Grain filling is essential with marquetry to protect it so dirt can’t penetrate in the coming years. The final coats of lacquer are sprayed outside the shed, preferably in the evening on a calm day.