Making a Noguchi inspired low table

Words and photos: Raf Nathan
Isamu Noguchi (1904–1988) is an important name in the world of art and design. He was one of the 20th century’s most important and critically acclaimed sculptors. Working in various mediums he created sculptures, gardens, furniture, lighting, ceramics, architecture, and even set designs. I had the good fortune to stumble upon an exhibition of Noguchi’s work in Japan many years ago. Brilliant. There is a Noguchi Museum in Long Island New York, USA.
In 1944 he created his famous glass-topped table. Since then it has always been produced by Herman Miller. This piece has gained iconic status. Three pieces form the low table: two identical sections of wood and a glass top. It is so popular that there are now countless expensive and cheap versions available. The cheaper tables are called ‘replicas’.

Kit replica of Noguchi’s iconic low table.
Our brief was to make a table fully inspired by Noguchi. At first glance the construction is ‘simple’, but the more we studied it, the more our appreciation of its clever design grew. The two base pieces are identical and are simply reversed to complete the table understructure. There is a large span for the glass to breach so thick 19mm material is used. Joining the two base pieces in the corner creates a stable and as evidenced, timeless form.
After obtaining what proved to be very high quotes for a glass table top we decided to simply buy a replica and use the glass supplied with it. One price for custom cut glass only 8mm thick was $400. A complete replica cost much less, and had 19mm thick tempered glass. As a supposed furniture designer/maker I had a bit of a crisis over doing this. Support the 'knock-off' furniture industry, never. The commission for building the re-styled table came from my younger daughter however. Wanting to support her new interest in woodwork I went along with it. Anyway, we bought a replica for $220 and the build quality turned out to be excellent.

As the piece uses only two wood forms we decided to use wood with high visual impact. Blackheart sassafras is a scarce wood that obtains its distinctive dark heartwood colour from the presence of a fungus. Given enough time the fungus can weaken the wood and eventually eat it away. However in its early stage it creates a darker and sometimes beautiful pattern, contrasting with the lighter surrounding wood.
We figured that 2 x 1 metre lengths of wood 180 wide x 42mm thick were all that was needed. This made the overall height lower than an original but was a good compromise between the desired height and keeping the width stable enough to avoid any cupping.
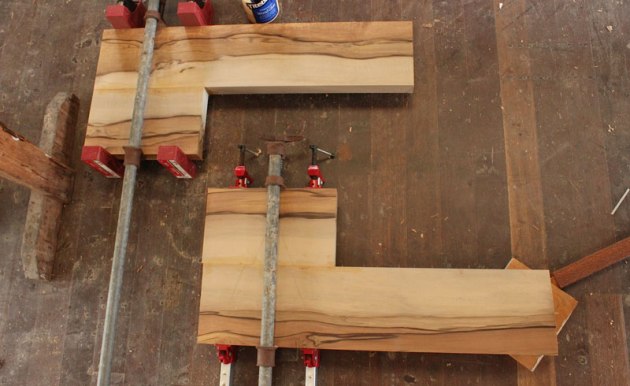
1. After machining the wood, the first step is to glue each section up. Three clamps were used on each to spread the force evenly.
Each piece of wood was square dressed and then sawn in two. The best grain arrangement was chosen, and after jointing the edges the two pieces for each base section were glued together (photo 1).
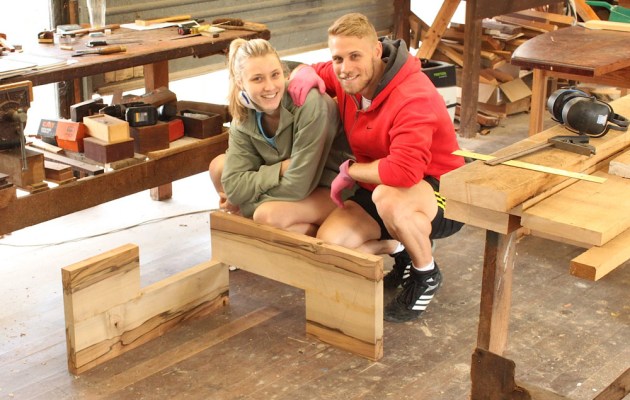
2. With the clamps off the shapes can be defined. These new woodworkers are already feeling pretty proud.
Take care to keep the boards flat and parallel when gluing up and then leave everything to dry overnight. After removing from the clamps the final form can be developed (photo 2).
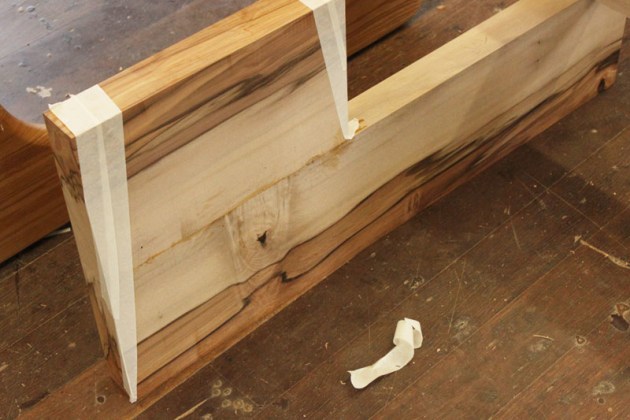
3. Masking tape was used to help visualise the best angles to cut.
We used masking tape to test various angles and shapes (photo 3). Time was spent getting the slope or angle ‘correct’ as we can take wood off easily but can’t put it back. A slope of 8.5° was settled on and this was sawn onto the outside edge only.
The angle was sawn on a bandsaw and the edge was then planed straight.

4. Sand with the grain and take the time to get an even result.
Sanding commenced and various grits were worked through until initially stopping at 150 grit (photo 4). A bevel was applied to all edges. The bevel gives a small extra detail on an otherwise bland shape and softened all the edges. The bevel needs to be as perfect as possible and was run using a laminate trimmer. I love trimmers. They are quick to use and are stress-free to operate as opposed to a large router.

5. 19mm dowel is glued into one corner. The other has a mating hole drilled.
The two pieces of the table meet at one corner. We opted to have the pieces pivot on a dowel. The dowel is 19mm diameter and was easy to fit. The dowel centre was marked and the holes drilled on a drill press. The dowel was glued into one piece of wood only (photo 5).

6. Three plastic bumpers support the glass top.
Three small plastic bumpers were used to hold the glass up from the wood and apply some friction to keep the glass steady. These fit into 6mm holes (photo 6).

7. Three coats of satin polyurethane were applied.
The wood was now sanded again; this time up to 240 grit on all faces and edges. Power and hand sanding with a block achieved this. Polishing was straightforward. A water-based satin polyurethane was used (photo 7). Three coats were applied, leaving time for each to dry well in-between them. A hand rubbed wax completed the polishing (photo 8).

8. Shaped, bevelled, dowel glued in, dowel pivot and bumper holes drilled and finish applied. Assembly is all that remains.
The only task remaining was to repurpose the base sections supplied with the kit purchased for its glass top. Positioned vertically these now are destined to become a wall shelving unit.
For more information about Isamu Noguchi see www.noguchi.org
Raf Nathan is a tool and furniture designer maker who lives near Brisbane.