Jude's Coffin
Story and photos by Stephen Oram
Reprinted from Australian Wood Review, issue 56, September 2007
When one is commissioned to make a piece there is usually an arbitrary deadline set as part of the deal—Christmas, birthdays, business premises opening... But recently I came close to a true deadline when I was asked to make a coffin for a friend who was in the latter stages of dying.
Jude was a particularly vivacious and gregarious person with wide-ranging interests and a lively involvement in the local community. When she went to hospital for the last time, an informal ‘Committee of Carers’ was formed to roster visitors and attend to Jude’s out-of-hospital needs (looking after her house and animals and so on). It was this group that asked me to consider making her coffin. This was a request that caused me to feel both honoured and humbled, and a bit trepidatious.
I informed the ‘Committee of Carers’ that I would undertake the task, and began the designing process. Jude died three days later on a Sunday night. The funeral was set for the following Friday, giving me four days to make the coffin. My recollections of those four days are as follows.
MONDAY
I collect from local millers Cate and Vern the sequoia that they had agreed to donate for the coffin. Sequoia was chosen for its high strength but lightweight qualities. It’s grown not far from here, in the Otways, and milled locally near Daylesford.
Back to the workshop and the drawing board to work on the plan. Contemplate the task ahead and try to get some order happening. Talk about dimensions with Adrian, who’s already made two coffins (for himself and Marilyn, out of old glass pallets) which currently serve as under-bed storage units! Ring Jack, the funeral director, to discuss legal requirements, processes,
and timelines—coffin to be delivered on Thursday night.
Think some more about design possibilities, panic, start chalking out first cuts. Interrupted by Deano who’s come to offer his assistance. Offer him a cup of tea, reject his offer (being a one-man-band and still without a fully formulated plan). Panic.
Reconsider Deano’s timely and generous offer (the cuppa was taking effect). After all, he’s made his own acoustic guitar (which works and sounds well) and he knows his way around a workshop. Okay, refine plan together and work out a division of labour. Two heads are better than one, and a task shared is…and so on.
Apart from aesthetic considerations our main concern was to make a box that would keep itself together. We especially didn’t want the bottom to fall out! At the funeral there was to be a public viewing of the body, after which the lid was to be screwed in place and the coffin decorated by those present who wished to participate. So a finish was not required.
Working with the KISS principle (Keep It Simple Stupid) in mind we rejected the traditional coffin shape, with all of its compound angles (given the potential for compound errors in the rushed circumstances) and opted for a slightly-less-than-simple bow sided box that was suggestive of a boat. For the occupant’s journey.

The ends were to be through tenoned and wedged into sloping mortises in the sides. We let the base into grooves in the sides and ends, and the lid was accommodated by a rebate and fitted with trims to cover any gaps. The base was reinforced on the underside by ribs which were let into shallow mortises
in the sides.
So, to work. First thing was to convert slabs to boards, using the bandsaw, buzzer and thicknesser. No edge-jointing was required, as the boards were wide enough for all components, including the base and lid at 500mm. Fortunately my thicknesser has a capacity of 510mm.
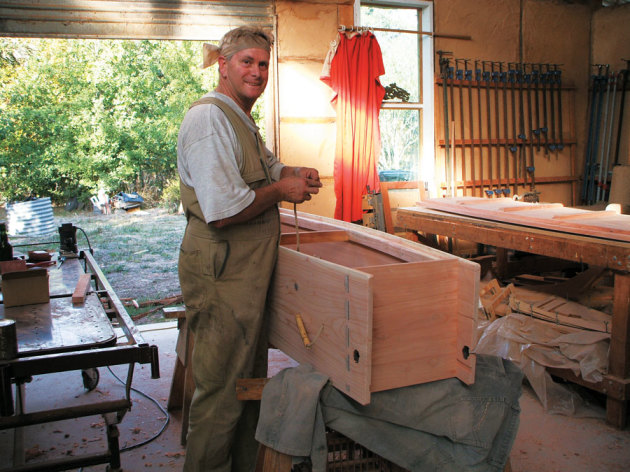
Next we shaped the base which was then used as a template for the lid. This gave us two components for Deano to get onto sanding, while I laid out and cut grooves (photo 1) and mortises.

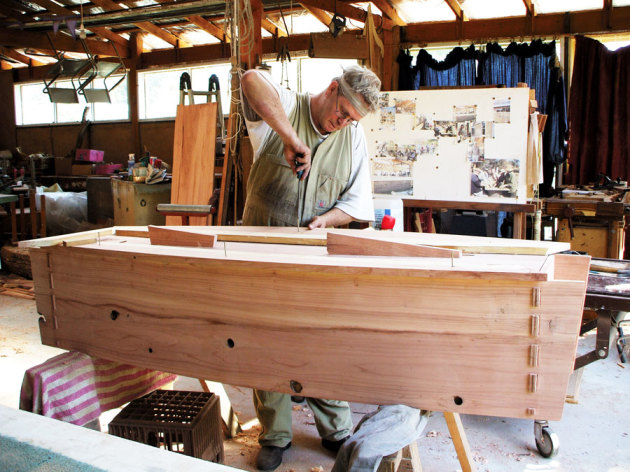
The sides were then sanded and clamped to a bench with a spacer underneath, just to get them used to the idea of bending (photo 2).
That was Monday.
TUESDAY
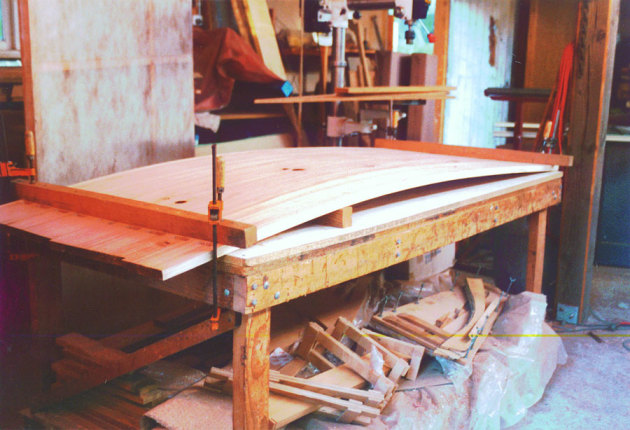
Deano was off doing rent-paying work, while I cut and fitted the tenons (photo 3)...

...and made the wedges that would open the tenon cheeks into the slope-sided mortises (photo 4).

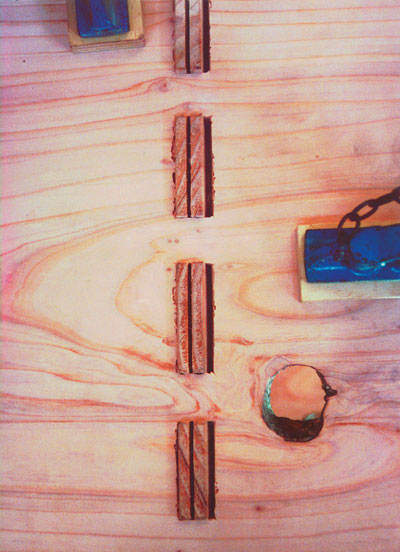
Normally when splitting tenons with wedges you would drill a stop hole for the kerf cut (into which the wedge is forced) to control the split. The diagram left shows this. As I didn’t have a long enough drill bit I decided to risk omitting the stop hole on this particular project—with a job staying above ground I would be less adventurous.
Note the crumbly edges of the mortises in photo 4. They were nice and crisp, but a post-mortising decision to enhance the bendability of the sides by reducing the thickness soon fixed that.
WEDNESDAY
Deano’s back just in time to help with the glue-up. This was achieved without too much fuss, primarily because of the use of cauls (photo 5).

A caul is a clamping batten with a convex edge, which enables even pressure distribution over a wide distance; especially useful when you can’t get clamps into the middle section of the work. Prior to Deano’s return I had prepared the base-support ribs, and along with the base itself, these were fitted as part of the glue-up process, thereby locking them into the structure.
A consequence of curving the sides by making them conform to the shape of the base was that without the lid in place the sides tended to lean in towards the top. This could have been a problem at the public viewing stage of the funeral. The solution was a spreader (removable to enable placement of the liner and the body). To stop the spreader from damaging the sides, battens were attached. These had the added benefit of providing something substantial for the lid screws to hold onto. Whew!
After lunch Deano nicked off while I worked on this solution and a few other details, such as a template for the gravediggers (precise work, apparently) and trimming and fitting the lid. One of the advantages of wedging tenons is that you can release the clamps, if necessary, soon after the glue-up is complete. Performing the above tasks was made a lot easier by doing this. At the end of the day though, the clamps and cauls were re-installed, to be sure, to be sure.
THURSDAY
With a deadline of six o’clock fast approaching it was just a matter of final sanding and general cleaning up. Nearly forgot the handles! No need for a quick dash to the hardware store (shut by then, anyway) we have the materials to hand—sash cord and bamboo.
After attending to that last-minute detail we’re ready for delivery (photo 6), much to Jack’s relief, I’m sure. The next day the funeral went as planned.


REFLECTIONS
Throughout the coffinmaking process Jude was in the back of my mind, and I’m sure that had an influence on the overall look and feel of the coffin. Working with Deano on the project was an invaluable experience—we not only shared the work, we also reminisced and cracked lots of silly jokes and puns, knowing full well that Jude herself would have joined in if she were there physically, as well as in spirit.
About a month later there was an exhibition of local artists’ work, Cocoon, at which I set up a photographic display of the making process and the funeral. A number of people thanked me for doing so, as they’d been unable to attend the funeral, and seeing the photos gave them a sense of connection with the farewell process. And I’m quite sure that the exhibitionist-belly-dancing Jude would have loved being the centre of attention at such an event!
So all things considered, and despite the inevitable sadness associated with the process, I would have to say it was a positive experience, though not one that I would wish to turn into a business, thank you.
Stephen Oram makes celtic lap-harps and furniture at Hepburn Springs, Victoria. Phone: 03 5348 2181 or 03 5348 2592